Kitchen Remodel: Avoid Big Bills and Stress in 2026
Kitchen renovation costs are the total investment in design, materials, fabrication, permits, and installation to upgrade a kitchen. From our showroom and factory at 11 Edvac Dr Units 13–19, Brampton, Altima Kitchens and Closets helps GTA homeowners plan kitchen renovation costs with factory-direct cabinetry, in-house installers, and 2D/3D design.
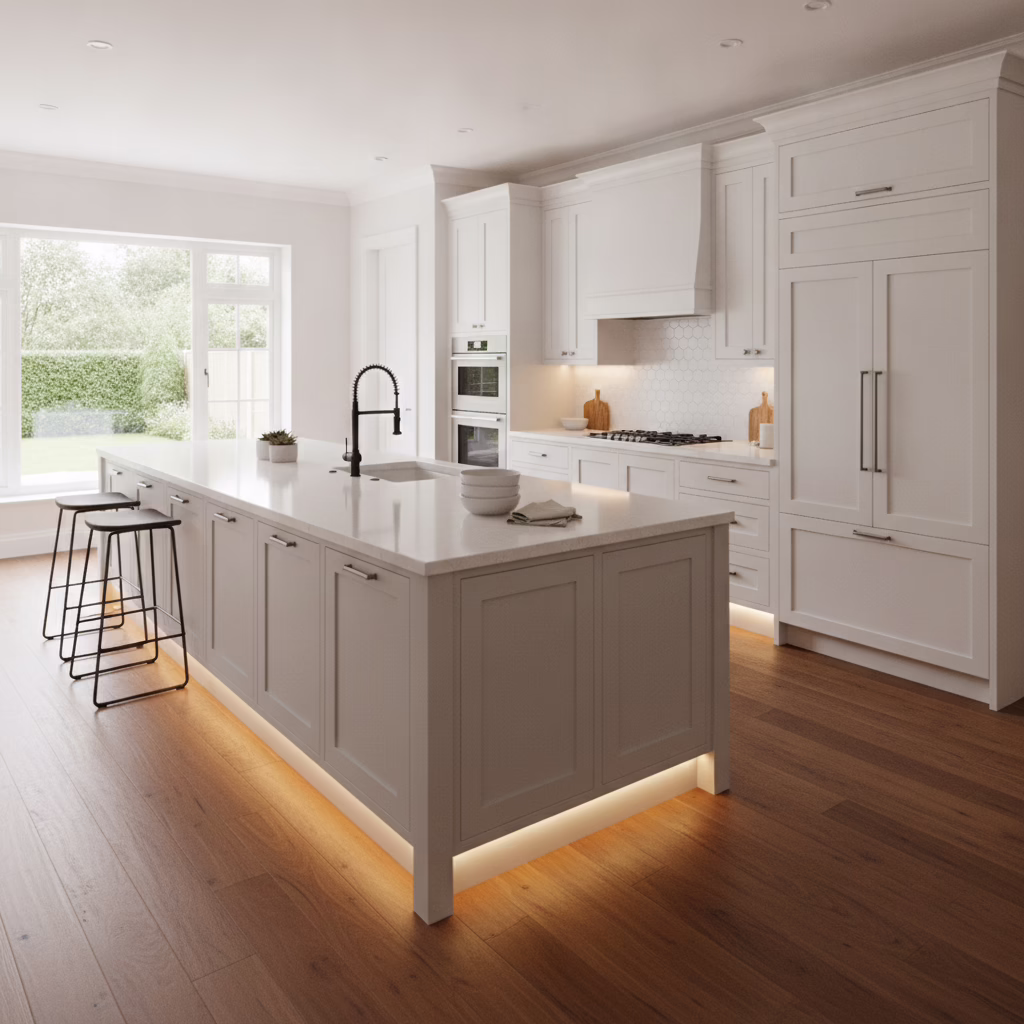
By Ashok, Altima Kitchens and Closets • Last updated: 2026-06-18
Above-Fold Section: Your 3‑Minute Plan
Get control of kitchen renovation costs by fixing scope first, locking full material selections second, and scheduling manufacturing and trades third. One accountable, design-build team reduces handoffs, keeps timelines predictable, and prevents mid‑project changes that add stress.
Here’s what you’ll learn and use right away:
- What “kitchen renovation costs” actually include beyond finishes
- Which early decisions move budgets and timelines the most
- How 2D/3D design de‑risks choices before anything is built
- Why factory‑direct cabinetry and in‑house installation cut surprises
- Local GTA factors from our 11 Edvac Drive, Brampton base
Summary
Kitchen budgets stay on track when scope, selections, and sequencing are aligned. Define layout changes, choose materials to match goals, lock delivery timelines, and document everything. A design‑build team with factory‑direct cabinetry and in‑house install removes handoffs and reduces surprises.
This complete guide delivers the practical playbook for a low‑stress remodel. We explain what costs include, where they come from, and how to minimize risk through scope clarity, visual approvals, and disciplined scheduling. We also share GTA‑specific insights drawn from projects delivered through our Brampton showroom and manufacturing facility.
For a deeper dive into scope decisions, see our plan a kitchen renovation guide, which expands the step‑by‑step approach we outline here and shows how to align design intent with trade sequencing.
What are kitchen renovation costs?
Kitchen renovation costs are the sum of planning, permits, materials, fabrication, labor, logistics, and aftercare required to transform a kitchen. Budgets shift with scope (layout vs. cosmetic), selections (cabinet construction, doors, counters), and logistics (lead times, condo access). Clear, written specs keep spending focused.
At Altima, the “cost” umbrella covers discovery, site measures, 2D working drawings, 3D renders, cabinetry manufacturing, countertop templating and fabrication, site protection, installation, finishing, and warranty. When layout or utilities change, permitting and inspections enter the plan. Each decision impacts the sequence that keeps trades productive.
To orient your thinking, review our concise breakdown in the kitchen renovation cost guide. It complements this article by mapping each decision to its downstream effect on schedule and complexity—without talking about dollar figures.
Why understanding costs matters
Knowing the drivers behind kitchen budgets lets you prioritize function over fads, avoid rework, and keep timelines real. Clarity enables smart trade‑offs—like enhancing storage inside the current footprint—to stretch impact without stretching schedules.
Here’s the thing: one “small” change can cascade. Moving a sink can trigger plumbing, countertop, and inspection implications. Re‑centering a range may require dedicated electrical and new ventilation. In condos, every utility move requires coordination with building rules and booked elevator time.
- Function > fashion: Storage accessories often deliver daily wins with little disruption.
- Visual approvals: 2D/3D design reduces indecision that stalls trades.
- One team: Design + factory + install keeps accountability clear.
If you’re mapping priorities, our GTA kitchen design ideas article shows how layouts, lighting, and accessory choices combine to improve flow and usability.
How kitchen budgeting really works
Budgets align when you fix scope first, make selections to match that scope, and then schedule lead times around manufacturing and trades. Document every component—boxes, doors, hardware, counters, lighting, and finishes—to prevent hidden add‑ons and keep the project on rails.
Scope → Selections → Sequencing
- Scope: Keep the existing footprint, or rework layout with structural, plumbing, or electrical changes. Scope dictates coordination requirements and lead times.
- Selections: Choose cabinet box construction, door style, finish, hardware, countertops, backsplash, lighting, sink/faucet, and storage accessories. Each choice affects manufacturing and installation windows.
- Sequencing: Lock manufacturing slots, coordinate countertop templating after cabinet set, then schedule backsplash and lighting. Appliances should be on site or confirmed with final specs before fabrication.
Process table
| Decision area | Main impact | Typical risks if unclear |
|---|---|---|
| Layout changes | Permits, trades, timeline | Permit delays, rework |
| Cabinet spec | Durability, finish quality | Warp, paint chipping |
| Countertops | Fabrication timeline | Template or fit issues |
| Backsplash + lighting | Final polish, function | Tile waste, dark spots |
| Appliances | Cutout sizes, power | Return fees, rewiring |
In our experience across GTA projects, most kitchens pass through three measurable checkpoints: design sign‑off, cabinet installation, and countertop set. Treat these as your anchors. Everything else—tile, lighting, hardware—flows smoothly once these anchors are locked.
For a practical walk‑through of upgrades by stage, scan our before‑and‑after kitchen upgrades resource. It illustrates how staged decisions add up to a cohesive finish.
Types and methods: refresh, refacing, full redesign
There are three reliable paths: a surface refresh (paint, hardware, backsplash), cabinet refacing with new doors and veneered boxes, or a full redesign with new cabinetry, counters, and layout updates. The right path depends on cabinet condition, storage needs, and timeline.
Surface refresh
A refresh keeps the footprint while dialing up visible elements. It’s ideal when boxes are sound and you want momentum without major coordination.
- New backsplash, hardware, and lighting deliver strong visual lift.
- Inside the boxes, add a pull‑out pantry, lazy susan, or spice pull‑outs.
- Pair with a targeted cabinet upgrade if a few boxes need replacement.
Cabinet refacing
Refacing replaces doors and drawer fronts while keeping sound cabinet boxes. It’s a powerful style reset with less site disruption.
- Choose MDF painted or prelaminated doors for a durable, clean look.
- Swap hardware and add soft‑close hinges for a modern feel.
- For a third‑party overview of refacing approaches, see this cabinet refacing guide.
Full redesign
Full redesign means new custom cabinetry, counters, backsplash, lighting, and often a layout update. It’s the path when you want to solve flow, storage limits, or aging materials for the long term.
- Approve 2D and 3D designs before we manufacture—visual clarity avoids rework.
- Coordinate utilities and inspection windows early for smooth sequencing.
- Explore factory‑direct options in our average reno guide for a structured overview of decisions.
Best practices to avoid big bills and stress
Set a decisive scope, finalize a complete spec, and lock a realistic schedule with one accountable team. Factory‑direct cabinetry, itemized quotes, and 3D visualizations close gaps between plan and build, keeping changes—and stress—low.
In our experience, three moves consistently protect your renovation: document everything, validate visually, and consolidate accountability. That triad trims indecision and compresses the time between milestones.
- One team, one plan: In‑house design and installation reduce handoffs.
- Itemized scope: List every cabinet, accessory, finish, and trade. Detail prevents assumptions.
- 3D before build: Approve layouts and finishes visually first; aim for 2–3 review rounds.
- Quality manufacturing: CNC precision and pro spray finishing improve fit and longevity.
- Jobsite readiness: Confirm measures, delivery access, and protection plans before day one.
For additional third‑party perspective on planning discipline, you can skim this concise kitchen and bath planning overview. Use it to cross‑check your selections and milestones against our process.
Want fewer unknowns? Book a showroom consult to review cabinet construction, door finishes, and storage accessories side by side. We’ll build your 3D model and map milestones—before anything is ordered.

Tools and resources for smart planning
Use 2D/3D design to confirm clearances, a selections matrix to track finishes, and a milestone schedule to prevent overlaps. A pre‑construction checklist—permits, measurements, and appliance specs—keeps installation smooth and predictable.
Design validation
- 2D plans specify exact cabinet sizes, appliance cutouts, and clearances.
- 3D renders confirm sightlines, color balance, and lighting coverage.
- Most clients complete design in 2–4 iterations; set a review cap to stay decisive.
Selections matrix
- Document doors, finish, hardware, countertops, backsplash, lighting, sink/faucet.
- Add storage accessories (pull‑out pantry, spice pull‑outs, corner solutions).
- Track lead times beside each item to coordinate deliveries.
Milestone schedule
- Cabinet install → countertop template → countertop set → backsplash → lighting.
- Require appliance specs before we fabricate to avoid on‑site modifications.
- Pad 1–2 buffer days between major trades for inspections and curing.
If you’re considering refacing as a strategic middle path, this neutral refacing explainer outlines typical steps. Pair it with our full home renovation guide to see how kitchen decisions fit into broader upgrades.

GTA and local factors from 11 Edvac Drive
At our 11 Edvac Drive showroom in the Regional Municipality of Peel, condo rules, permit reviews, and delivery logistics influence timelines. Booking elevators, coordinating inspections, and staging materials in our Brampton factory keep GTA projects predictable.
Local considerations for 11 Edvac Drive
- Plan deliveries around peak traffic near Williams Pkwy at 2500 Williams Pkwy to maintain crew productivity.
- Cold‑weather installs need heated, dry staging to protect finishes—our spray‑booth protocols support quality year‑round.
- Condo work requires building coordination and elevator bookings—confirm rules early to avoid rescheduling.
Need a quick visual of upgrade options that suit GTA homes? Browse our custom cabinet ideas for material and accessory combinations that balance performance with maintenance.
Mini case studies: how scope choices shape outcomes
Small shifts in scope can transform results. Keeping a footprint and upgrading storage accelerates delivery, while full custom cabinetry with layout updates unlocks flow and function. GTA examples below show how decisions affect schedule and complexity—without guessing.
Brampton detached — storage‑first upgrade
- Kept footprint; added pull‑out pantry, lazy susan, and valance lighting.
- Factory‑direct cabinetry matched existing dimensions for faster fit.
- Outcome: More storage and light with minimal disruption.
Toronto condo — refacing for a modern look
- Sound cabinet boxes; new MDF painted shaker doors and hardware.
- Coordinated elevator bookings and quiet‑hour windows with building management.
- Outcome: Contemporary style without changing utilities or footprint.
Mississauga family home — full redesign
- New L‑shaped layout with island, quartz counters, backsplash, and lighting.
- 2D/3D design approved before manufacturing; precise site measures guided install.
- Outcome: Better flow, seating, and durable finishes.
Curious how these choices translate into day‑to‑day life? Our home renovation guide connects kitchen planning with adjacent spaces so your upgrades support the way you actually live.
Frequently Asked Questions
Most homeowners ask how to plan a realistic budget, what drives spend, how long it takes, and how to reduce risk. These quick answers focus on scope control, design clarity, permitting, and scheduling—without discussing specific dollar amounts.
What drives kitchen renovation budgets the most?
Layout changes, cabinet specification, countertops, and appliance choices move budgets the most. Keeping the footprint, approving a complete spec before ordering, and validating appliance cutouts reduce rework and timeline risk.
How do I plan a budget without overspending?
Lock scope first, then select finishes that support it. Use 2D/3D designs to test layouts before build, track every item in a selections matrix, and align delivery windows with trades. One accountable design‑build team helps prevent change orders.
Do I need permits for a kitchen remodel?
Permits are typically required for structural, plumbing, or electrical changes. Cosmetic updates like painting and hardware swaps usually don’t. Always confirm with your municipality and condo board before work begins.
How long does a kitchen renovation take?
Timelines depend on scope and selections. Refacing is faster; full redesigns take longer due to manufacturing, templating, inspections, and finishing. Approving designs early and coordinating trades keeps schedules predictable.
Can financing help manage the project?
Yes. Flexible financing with 0% down and fast approvals can spread payments. This helps you secure quality materials and workmanship without delaying the project. Ask about approval timelines and terms.
Key takeaways
Control kitchen renovation costs by fixing scope, finalizing a complete spec, and sequencing trades around manufacturing. Visual approvals and one accountable team prevent rework and keep stress low.
- Scope → selections → sequencing is the order that protects timelines.
- 2D/3D design de‑risks choices before you buy a single material.
- Factory‑direct cabinetry aligns quality, lead times, and fit.
- Itemized scopes reduce assumptions and mid‑project changes.
- Local condo rules and logistics shape schedules—plan for them.
Conclusion and next steps
A stress‑free kitchen remodel comes down to scope clarity, complete selections, and one accountable team. When design, manufacturing, and installation live under one roof, you protect your schedule and your investment—without guessing.
- Next step: Visit our Brampton showroom to compare materials and see your space in 3D.
- Where: 11 Edvac Dr Units 13–19, Brampton (Regional Municipality of Peel).
- Also read: Our average reno guide for a quick decision checklist.
Plan with certainty. Schedule a design consultation to see your kitchen in 3D, compare cabinet options, and map an installation timeline—start to finish—with one accountable team.
Related Posts

Why Choose Kitchen Renovation Company
Nowadays, Kitchen spaces are not only a place for cooking and serving food, but these areas act as a statement, as they speak a lot about a family, the philosophy and personality of individuals, and spaces. If you admire aesthetics and adorn the beauty of your home, you must pay attention to the interior design […]
How a Kitchen Renovation Contractor is Changing the Game
Lifestyle is all about bringing something coherent to the overall experience of living. The kitchen and closets stand as two of the most influential spaces in a home that add to the overall experience of living. A Kitchen Renovation Contractor in Whitby by the name of Altima Kitchen and Closets Inc. is changing the overall […]
How Media unit contractor in Whitby is Changing the Game
Lifestyle is all about bringing something coherent to the overall experience of living. The kitchen and closets stand as two of the most influential spaces in a home that add to the overall experience of living. A Media Unit Company in Whitby by the name of Altima Kitchen and Closets Inc. is changing the overall […]