Basement Laundry Room: Best Layout Ideas for 2026 Today
A basement laundry room remodel is the full redesign and build of a lower-level wash-and-care space to improve workflow, safety, moisture control, and storage. From our Brampton facility at 11 Edvac Drive, Altima designs, manufactures, and installs custom cabinetry and finishes that streamline washing, drying, folding, and organization across GTA homes.
By Ashok • Altima Kitchens And Closets
Last updated: 2026-06-16
Overview: Your Basement Laundry Room Remodel, At a Glance
A successful basement laundry remodel prioritizes moisture management, safe utilities, and an efficient wash–dry–fold–store flow. Pair code-compliant plumbing/electrical with durable finishes, good ventilation, and custom storage. The result: faster chores, fewer messes, and a brighter, quieter space you’ll actually enjoy using.
Here’s what you’ll get from this expert guide, tailored to Greater Toronto Area homeowners who want factory-direct cabinetry and an end-to-end, one-team experience.
- Clear definitions and planning fundamentals for a basement laundry room remodel
- Actionable steps: assessment, design, rough-ins, installation, and punch list
- Layout patterns that save steps and tame clutter
- Moisture, ventilation, soundproofing, and lighting best practices
- Cabinetry, countertops, flooring, and finish selections that last
- Local context for Brampton and the Regional Municipality of Peel
- Mini case studies from recent GTA remodels and a quick FAQ
- Plan smarter with internal resources on basement finishing and space gains from our team, including guidance in our basement transformation tips and space-maximizing ideas.
What Is a Basement Laundry Room Remodel?
A basement laundry room remodel is the coordinated redesign and construction of a lower-level laundry area—upgrading plumbing, electricity, ventilation, and storage to improve safety and workflow. It blends space planning with durable finishes and custom cabinetry, creating a dry, bright, code-conscious room that speeds up weekly laundry routines.
In our experience, most laundry zones grow organically—appliances get parked near a drain, a shelf appears, cords multiply. A remodel resets everything. We re-plan the flow, correct utilities, and build cabinetry that turns chaos into a calm, well-lit workspace.
- Scope typically includes: layout design, washer/dryer placement, water supply/Drain-Waste-Vent checks, venting to exterior, GFCI/AFCI-protected circuits, task/ambient lighting, storage systems, counters, and resilient flooring.
- Why it matters: poorly ventilated, damp basements cause mold risk, appliance wear, and odors. A remodel cuts humidity, contains mess, and protects structure.
- What Altima brings: in-house 2D/3D design, factory-direct cabinetry, professional installation, and a single accountable team from 11 Edvac Drive in Brampton.
When you can see your space in 3D before construction, decisions get easier. Clients tell us previewing door styles, colors, and clearances reduces second-guessing and speeds approvals.
Why a Remodel Matters
Remodeling your basement laundry boosts safety, reduces moisture and noise, and shortens chores. With proper ventilation, GFCI-protected outlets, and durable finishes, appliances last longer and the home stays healthier. Add custom storage and bright lighting to prevent clutter and make every load easier.
A laundry room does heavy lifting for decades. Small oversights—like missing shutoffs, poor vent routing, or no backsplash—turn into leaks, lint dust, and wall damage.
- Health: consistent humidity control reduces musty odors and mildew. A dehumidifier plus exterior-vented dryer keeps relative humidity stable.
- Safety: GFCI/AFCI protection, metal dryer ducting, shutoff valves, and a floor drain lower risk. Good layout also keeps paths clear.
- Longevity: balanced loads and level machines vibrate less, extending appliance life. Sturdy counters prevent sagging and chips.
- Everyday speed: a straight-line wash–dry–fold–store path can trim minutes off each load. Over a year, the time savings add up.
Here’s the thing—the quiet upgrades pay back daily: soft-close hampers, pull-out shelves, and LED task lighting mean fewer trips upstairs and fewer lost socks.
How a Basement Laundry Remodel Works
A proven workflow is assess → design → rough-in → close-in → fit-out → test. We verify moisture and utilities, model the room in 2D/3D, rough-in plumbing/electrical/venting, close the walls with insulation and drywall, install cabinetry and finishes, then test and hand over with a punch list.
Our structured process keeps your project on time while you see progress in clear stages.
- Assess: check slab for moisture, map existing drains/vents, confirm electrical capacity. Note ceiling height for stacked units.
- Design: produce 2D plans and 3D renders with appliance specs, clearances, and storage counts. Approve door profiles and finishes.
- Rough-in: set supply lines with shutoffs, trap and standpipe sizing, slope and vent routes, dedicated 120V/240V circuits, and a rigid metal dryer duct to exterior.
- Close-in: insulate rim joists, add a continuous vapor barrier where appropriate, and hang moisture-resistant drywall.
- Fit-out: install cabinets, quartz counters, backsplash, lights, LVP or tile flooring, and accessories like hanging rods and fold-out ironing stations.
- Test + handover: run appliances, check drains/vents, set dehumidifier, review care instructions, and complete a final punch list.
Want a deeper dive on sequencing? Our basement finishing breakdown explains how early planning removes mid-project surprises and helps protect your schedule.

Planning, Permits, and Local Factors in Brampton (Peel)
Remodels in Brampton and the Regional Municipality of Peel benefit from basement-savvy planning at our 11 Edvac Drive hub: route dryer vents to exterior, manage humidity seasonally, and align rough-ins with local permitting workflows. Thoughtful prep prevents delays and keeps inspections smooth.
Basements interact with climate and codes. Proper vent terminations, shutoff access, and safe circuits are universal best practices, while local permitting sets documentation and inspection checkpoints.
- Venting: run a short, smooth, rigid metal duct to exterior with a backdraft damper; keep elbows minimal for efficient airflow.
- Moisture: combine a dehumidifier with continuous exhaust or timed ventilation. Seal rim joists and select water-tolerant finishes.
- Permitting: laundry remodels that alter plumbing/electrical or create new partitions usually need permits and inspections. See practical context on permit steps in Brampton and framing touchpoints via this framing codes overview.
Local considerations for 11 Edvac Drive
- Traffic and access: scheduling deliveries near Williams Pkwy at 2500 Williams Pkwy helps us stage materials efficiently for fast installs.
- Seasonality: winter humidity drops can crack caulk; we set dehumidifier/humidifier targets and specify sealants that flex through freeze–thaw.
- Neighborhood nuance: proximity to Bottomwood Park means some homes sit over wetter soil—vapor barriers and floor leveling compounds become especially important.
Need a big-picture plan first? Start with our GTA-focused basement renovation guide for sequencing and scope clarity tailored to multi-space projects.
Layouts and Workflows That Actually Work
Design the room around the laundry loop: sort → wash → dry → fold → store. Keep steps minimal by placing appliances, counter space, and storage in sequence. Galley, L-shape, or U-shape layouts each solve different room sizes; stacked units open floor area for folding and tall storage.
We start with traffic and tasks. Your hands should move front-to-front, not back-and-forth across the room.
- Straight-line (galley): washer → dryer → counter → tall cabinet; great for narrow rooms.
- L-shape: short run for appliances, long run for folding and sink.
- U-shape: maximum counter and cabinet capacity for busy households.
- Stacked: reclaim 3–4 linear feet for a deeper counter or a utility sink.
| Layout | Best For | Typical Space | Pros | Watch-outs |
|---|---|---|---|---|
| Galley | Narrow rooms | 5–7 ft width | Simple flow, budget-friendly framing | Shallow storage; manage door swings |
| L-shape | Small–medium rooms | 7–10 ft width | Good counter run; easy sink placement | Corner access; plan lazy-susan style storage |
| U-shape | Large rooms, families | 10+ ft width | Max storage; separate zones | Longer runs; more cabinetry |
| Stacked | Ceiling height 84–96 in | Any width | Saves floor space; easy vent routing | Vibration control and leveling matter more |
Think of the counter as your productivity engine. A 24–30 inch-deep, 36 inch-high surface with a lip keeps piles tidy and saves your back.
Moisture, Ventilation, and Noise Control
Keep basements dry and quiet with three moves: dehumidify, ventilate the dryer to exterior with rigid duct, and isolate vibration. Seal rim joists, use moisture-tolerant finishes, and consider sound-rated drywall or ceiling treatments to stop noise migration to main floors.
Moisture rides in on clothes and air. We specify a dehumidifier and an exhaust strategy that stabilizes relative humidity during heavy laundry days.
- Dehumidification: set targets between 40–55% RH to discourage mildew.
- Dryer venting: rigid metal duct, minimal elbows, smooth interior, exterior cap with damper.
- Noise control: anti-vibration pads, solid subfloor, insulated joist bays, and door sweeps can trim perceived noise by noticeable levels.
- Water defense: floor drain where feasible, high-side baseboards, backsplash behind sink, and leak alarms near shutoffs.
We’ve found that a short, straight vent run and well-tuned dehumidifier make laundry days feel less sticky and keep walls spotless. It’s simple physics: less moisture in, more exhausted out.
Electrical and Plumbing Essentials
Laundry zones need dedicated, protected power and accessible shutoffs. Plan a 120V circuit for the washer, a 240V circuit for most electric dryers (or gas provisions), GFCI/AFCI protection, a properly sized standpipe and trap, and labeled hot/cold valves within easy reach.
Utility clarity now prevents emergencies later.
- Electrical: dedicated circuits, GFCI/AFCI where required, and clear labeling. Keep receptacles accessible above finished surfaces.
- Plumbing: rigid supply lines with quarter-turn valves, appropriately trapped and vented standpipe, and a cleanout you can reach without moving appliances.
- Gas dryer (if applicable): approved flex connector, shutoff valve within 6 ft, and combustion air path per manufacturer guidance.
- Disaster planning: leak detectors at valves and a pan beneath the washer when layout allows.
Our installers pressure-test supply lines, confirm drain performance with full-flow tests, and verify venting before walls close. That’s how we avoid callbacks and keep laundry rooms worry-free.
Storage, Cabinetry, and Surfaces
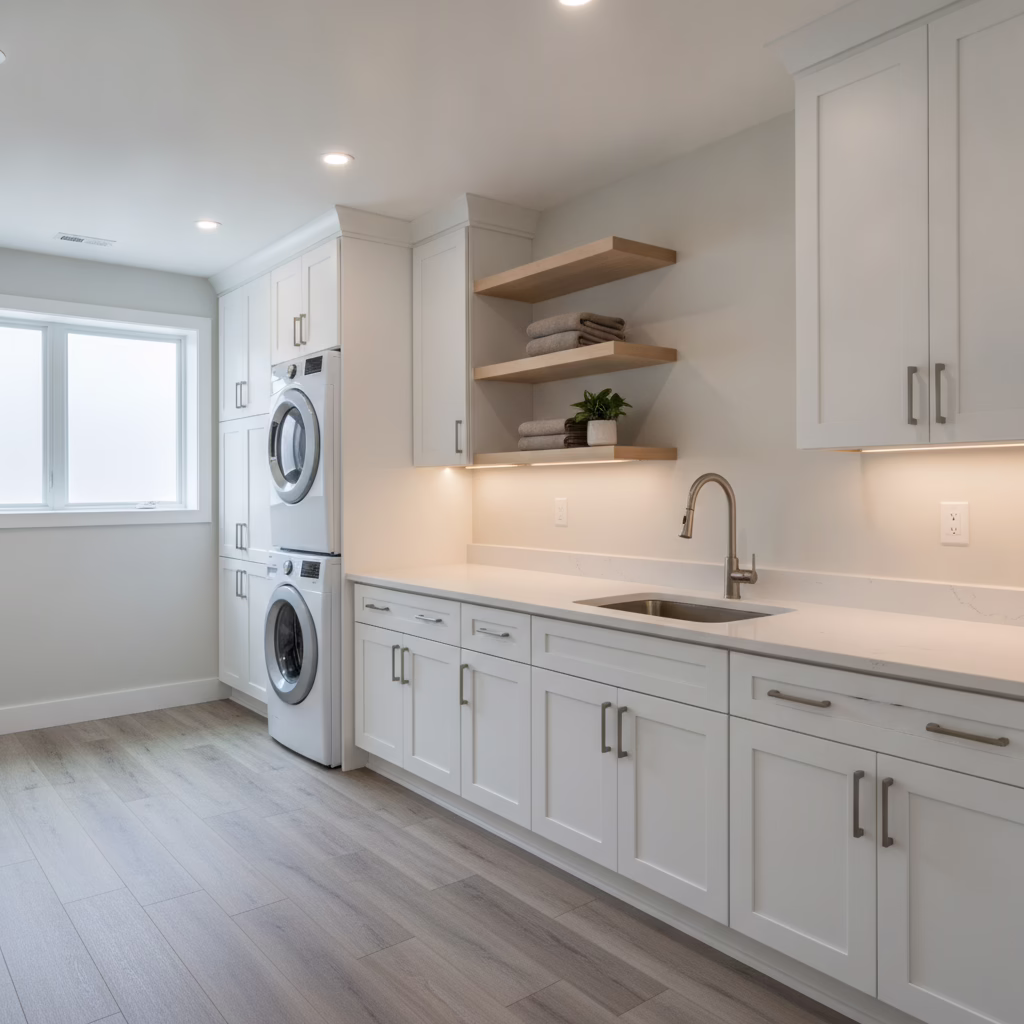
Built-in storage turns a utility corner into a clean, durable workspace. Combine tall cabinets, pull-out hampers, wall shelves, and a quartz folding counter over side-by-side or stacked units. Moisture-resistant finishes and soft-close hardware stand up to daily loads.
Cabinetry is where Altima’s factory-direct advantage shines. We manufacture in Brampton with Italian CNC machinery and finish in our spray booth for consistent color and quality.
- Essentials: tall broom closet, adjustable shelves, pull-out hampers, and a rod for hang-dry items.
- Worktop: quartz counters resist staining and provide a smooth fold surface; 24–30 inch depth feels luxurious.
- Backsplash: subway or large-format tile shields walls behind sink and folding zones.
- Lighting: LED valance strips under uppers remove shadows on the counter.
We include soft-close hinges and full-extension slides so even deep cabinets stay practical. It’s these tactile details—doors that align, drawers that glide—that make daily chores a touch easier.

Lighting and Smart Upgrades
Pair bright general lighting with shadow-free task beams over counters and at the sink. Add smart switches, leak sensors, and appliance monitors to automate checks. Focused light plus small automations makes the room safer, faster, and easier to use every day.
Great lighting stops eye strain and spots stains before they set.
- Ambient: low-glare LEDs in the ceiling provide even coverage wall-to-wall.
- Task: under-cabinet strips illuminate the entire fold zone—no shadows from your body.
- Smart: water-leak sensors near shutoffs and a smart dehumidifier help maintain a steady, dry environment.
Clients also love motion sensors for quick entries with full hands. The lights greet you; you focus on the task.
Flooring and Finishes for Basements
Choose water-tolerant materials: luxury vinyl plank (LVP), porcelain tile, or epoxy systems. Elevate appliances on leveling pads, seal transitions, and use high-side baseboards. These finishes resist splash, contain drips, and clean fast while looking sharp for years.
Basement floors see splashes, carts, and heavy appliances. We recommend:
- LVP: warm underfoot, fast to install, and forgiving to minor slab variations.
- Porcelain tile: rock-solid, easy to sanitize; ideal near utility sinks.
- Epoxy: seamless and durable in utility-first rooms.
- Transitions: metal edge profiles protect high-wear thresholds.
If your slab isn’t perfectly level, self-leveling compound and an isolation underlayment make a huge difference in appliance stability and noise.
Tools and Resources
Start with a measured plan and an appliance spec sheet folder. Add a moisture meter, dehumidifier, and vent brush kit. Use 2D/3D design previews to validate clearances, then finalize a cabinet schedule and finish list. Organized inputs make smoother permits and faster installs.
We supply dimensional drawings and material boards during design so choices are visual and confident.
- Planning tools: tape, laser measure, and a paper or digital grid to test layouts.
- Moisture tools: basic pin meter and hygrometer for RH tracking.
- Design assets: appliance spec sheets, cabinet schedule, and finish samples.
For whole-home coordination, see our whole-home renovation guide and how a basement kitchenette complements laundry in our basement kitchen insights.
Case Studies and Examples from GTA Homes
Three GTA remodels show common wins: stacked units reclaim counter depth, rigid ducting and dehumidifiers stabilize humidity, and factory-built cabinets maximize storage. Each project started with 2D/3D design, then moved through our in-house manufacturing and installation for a crisp, on-time finish.
Brampton—Narrow room, big storage: A 6 ft-wide room felt unusable. We stacked appliances, ran a 26 inch quartz counter, and added a tall cabinet with three pull-out hampers. A short, straight vent and leak alarms finished the package.
Mississauga—Noise control above a nursery: Insulated joist bays, anti-vibration pads, and a solid-core door cut perceived noise significantly. Parents reported fewer sleep disruptions and an easier bedtime routine.
Toronto—Moisture-prone foundation wall: We sealed rim joists, installed a continuous backsplash, and specified porcelain tile near the sink. A dehumidifier tied to a drain kept RH consistent through summer laundry peaks.
All three homes used Altima’s in-house 2D/3D design and factory-direct cabinetry. Clients appreciated seeing exactly how doors, drawers, and shelves would clear before we cut a single panel.
Thinking about your own laundry upgrade? Book a showroom consult at 11 Edvac Drive and preview door styles, finishes, and storage options. Our team designs, builds, and installs—one accountable partner, start to finish. Schedule your visit.
Deeper Planning: Framing, Clearances, and Inspections
Frame for finishes you’ll actually use: plan stud spacing, backing for cabinets and rods, and door swings that clear hampers. Keep dryer duct runs short and accessible, and document changes for smooth inspections. Smart framing speeds installation and avoids rework.
As projects expand, solid framing and documentation make everything else easy.
- Framing basics: straight walls yield perfect cabinet fits; add blocking where shelves, rods, or uppers will land.
- Access: design removable panels or access doors near shutoffs and cleanouts.
- Reference: This practical basement framing guide offers context on typical sequencing and checks.
We pre-plan access panels in 3D so utilities stay serviceable. It’s a small step that prevents cutting finished drywall later.
Basement Laundry Remodel FAQ
Homeowners ask about floor drains, stacked units, vents, and clearances. Plan shutoffs within reach, vent dryers outside with rigid duct, and keep a generous counter near the dryer. Stacked units save space, but confirm ceiling height and vibration control in early design.
Do I need a floor drain in a basement laundry room?
A floor drain is a smart safeguard where feasible because it directs accidental leaks away from walls and trim. If adding a drain isn’t practical, combine a leak pan under the washer, shutoff valves within reach, and water-leak sensors for early alerts.
Are stacked washer/dryer units a good idea for small basements?
Yes, stacked units open valuable counter and cabinet space. Confirm ceiling height, vent routing, and vibration control. We often reclaim 3–4 linear feet for a deeper quartz counter, a utility sink, or tall storage when we switch from side-by-side to stacked.
Can I put a gas dryer in the basement?
You can, provided you have a proper gas line with a shutoff, correct venting to the exterior, and adequate combustion air per the manufacturer. Place the shutoff within easy reach and plan for annual maintenance checks.
What lighting works best over folding areas?
Use bright, low-glare LEDs with under-cabinet strips for shadow-free coverage. Pair a general ceiling light with focused task lighting above the counter and sink. Motion sensors are helpful when your hands are full.
Key Takeaways
Prioritize moisture control, safe utilities, and an efficient workflow. Use durable finishes, bright task lighting, and custom storage to speed chores and protect your home. Plan access to shutoffs and vent dryers outside. 2D/3D previews remove guesswork and keep projects on time.
- Design for the laundry loop and keep steps minimal.
- Control humidity with dehumidification and exterior venting.
- Dedicate protected electrical circuits and accessible shutoffs.
- Invest in factory-built cabinetry and a continuous folding surface.
- Preview everything in 2D/3D to validate clearances before build.
Conclusion and Next Steps
A well-planned basement laundry room remodel can feel like adding a new utility wing to your home. When design, cabinetry, and installation come from one accountable team, you get a quiet, dry, efficient room that stays organized and looks great.
Ready to see your laundry flow on screen before a single cut? Our Brampton showroom and factory make selections fast and fabrication precise. We handle design, manufacturing, and installation under one roof—plus itemized quotes, lifetime-warranty door options, and flexible financing support.
- Book a design consult at Altima Kitchens And Closets.
- Bring appliance specs and a quick sketch with measurements.
- We’ll model 2D/3D layouts, finalize finishes, and schedule installation.
Want more inspiration? Explore our practical guidance on renovating older wet rooms—many waterproofing and ventilation lessons carry straight into laundry spaces.
Related Posts

Why Choose Kitchen Renovation Company
Nowadays, Kitchen spaces are not only a place for cooking and serving food, but these areas act as a statement, as they speak a lot about a family, the philosophy and personality of individuals, and spaces. If you admire aesthetics and adorn the beauty of your home, you must pay attention to the interior design […]
How a Kitchen Renovation Contractor is Changing the Game
Lifestyle is all about bringing something coherent to the overall experience of living. The kitchen and closets stand as two of the most influential spaces in a home that add to the overall experience of living. A Kitchen Renovation Contractor in Whitby by the name of Altima Kitchen and Closets Inc. is changing the overall […]
How Media unit contractor in Whitby is Changing the Game
Lifestyle is all about bringing something coherent to the overall experience of living. The kitchen and closets stand as two of the most influential spaces in a home that add to the overall experience of living. A Media Unit Company in Whitby by the name of Altima Kitchen and Closets Inc. is changing the overall […]