Kitchen Design Guide: Save Time and Stress in 2026
The kitchen design process is a structured, step-by-step workflow that turns your wishlist into working drawings, factory-built cabinets, and a finished kitchen—on time. For homeowners in 11 Edvac Drive and across the GTA, our in-house 2D/3D design, manufacturing, and installation accelerate decisions, reduce rework, and deliver a kitchen that fits your life.
By Ashok — Altima Kitchens and Closets • Last updated: 2026-05-12

Summary
This complete guide explains the kitchen design process from discovery to final install. You’ll see how 2D/3D drawings, factory-direct cabinetry, and an in-house team shorten timelines, improve quality, and simplify choices. Use the checklists, timelines, and best practices to plan with confidence and avoid common pitfalls.
Here’s what you’ll learn at a glance:
- What the kitchen design process is and how it works end-to-end
- Which measurements, clearances, and codes matter (and why)
- How 2D/3D design reduces risk and change orders
- Step-by-step milestones, approvals, and typical durations
- Best practices for storage, lighting, and appliance planning
- How Altima’s in-house factory and installers streamline delivery
Jump to a section:
- What Is the Kitchen Design Process?
- Why the Process Matters
- How It Works (Step-by-Step)
- Design Types and Approaches
- Best Practices
- Tools and Resources
- Case Studies and Examples
- Local considerations for 11 Edvac Drive
- FAQ
- Conclusion
What Is the Kitchen Design Process?
The kitchen design process is the professional sequence of discovery, measurement, space planning, 2D/3D drawings, material selection, engineering, manufacturing, and installation. Following this order prevents rework, clarifies decisions, and ensures the built kitchen matches the approved design—functionally and aesthetically.
At Altima Kitchens and Closets, this workflow is the backbone of every project. We start with function: zones for prep, cook, clean, and store. We then translate needs into precise layouts, cabinet specs, and finish schedules. The final kitchen is the physical result of documented decisions—not guesswork.
Core elements you can expect
- Discovery and goals: Lifestyle, storage, and appliance needs documented up front.
- Measured drawings: Accurate room dimensions form the baseline model.
- 2D floor plans and elevations: Clear line drawings for layout, sizes, and heights.
- 3D renders: Visual previews to confirm proportion, finish, and lighting.
- Engineered cabinet list: Each box, door style, and accessory specified.
- Factory production: CNC machining and pro spray finishing for consistency.
- Professional installation: Aligned, leveled, and secured to last.
Because decisions are captured in drawings and itemized specifications, you avoid late changes. In our experience, detailed 3D previews reduce post-approval revisions dramatically, and clear schedules keep trades in sync.
Why the Process Matters
A disciplined kitchen design process saves time, reduces errors, and improves everyday function. It aligns budgets and expectations, turns choices into clear drawings, and coordinates trades so installation runs smoothly with fewer surprises and faster completion.
Well-planned kitchens work better daily. Standard counter height is 36 inches; common work aisle targets are 42 to 48 inches for safe, two-way movement. These practical numbers—applied early in planning—improve cooking comfort, access, and safety for the next decade or more.
Benefits you’ll feel right away
- Fewer change orders: 3D visuals catch proportion and finish questions before build.
- Better storage: Pull-out pantries, spice pull-outs, and corner solutions maximize every inch.
- Faster decisions: One showroom for cabinets, counters, backsplashes, and hardware.
- Smoother install: Factory-built boxes arrive square; installers focus on fit, not fixes.
- Higher resale appeal: Clean lines, ergonomic heights, and durable finishes help value.
We also align design choices with best-practice guidance. For example, NKBA planning guidelines recommend 36-inch walkways, 42–48-inch work aisles, and landing spaces near cooking and refrigeration. Early attention to those details keeps daily tasks easy.
How the Kitchen Design Process Works (Step-by-Step)
A successful kitchen follows eight clear steps: discover, measure, plan, visualize, specify, engineer, manufacture, and install. Each step has approvals and deliverables so nothing is missed, everyone stays aligned, and the final kitchen matches your signed drawings and selections.
Below is a typical end-to-end path we run from our Brampton showroom and factory. It scales to full home renovation timelines and integrates with flooring, tile, lighting, and appliance scheduling.
Process table: milestones and deliverables
| Step | What We Do | Your Deliverables | Typical Duration |
|---|---|---|---|
| 1) Discovery | Goals, inspiration, appliance list, and pain points | Needs brief + prioritized wishlist | 1–3 days |
| 2) Measure | Site visit, as-built dimensions, photos | Measured plan with key clearances | 1 day |
| 3) Space plan | 2D layouts, work triangles, aisle widths | Floor plan + elevations | 2–5 days |
| 4) Visualize | 3D renders, finish palettes, lighting concept | Color 3D views + finish board | 2–7 days |
| 5) Specify | Cabinet list, hardware, storage accessories | Itemized selections schedule | 1–3 days |
| 6) Engineer | Shop drawings, cut lists, QA checks | Approval set for signature | 2–4 days |
| 7) Manufacture | CNC machining, assembly, pro spray finishing | Production status updates | 1–3 weeks |
| 8) Install | On-site install, scribe/level, punch list | Walkthrough + care guide | 3–7 days |
Key checkpoints that prevent delays
- Appliance models locked: Sizes drive cabinet and rough-in dimensions.
- Landing zones: 12–15 inches of counter beside ranges and fridges improves safety.
- Electrical plan: GFCI protection and task lighting mapped with outlets and switches.
- Vent path: Hood duct route measured to avoid conflicts with joists or beams.
- Floor transitions: Height differences planned to prevent tripping and door swings.
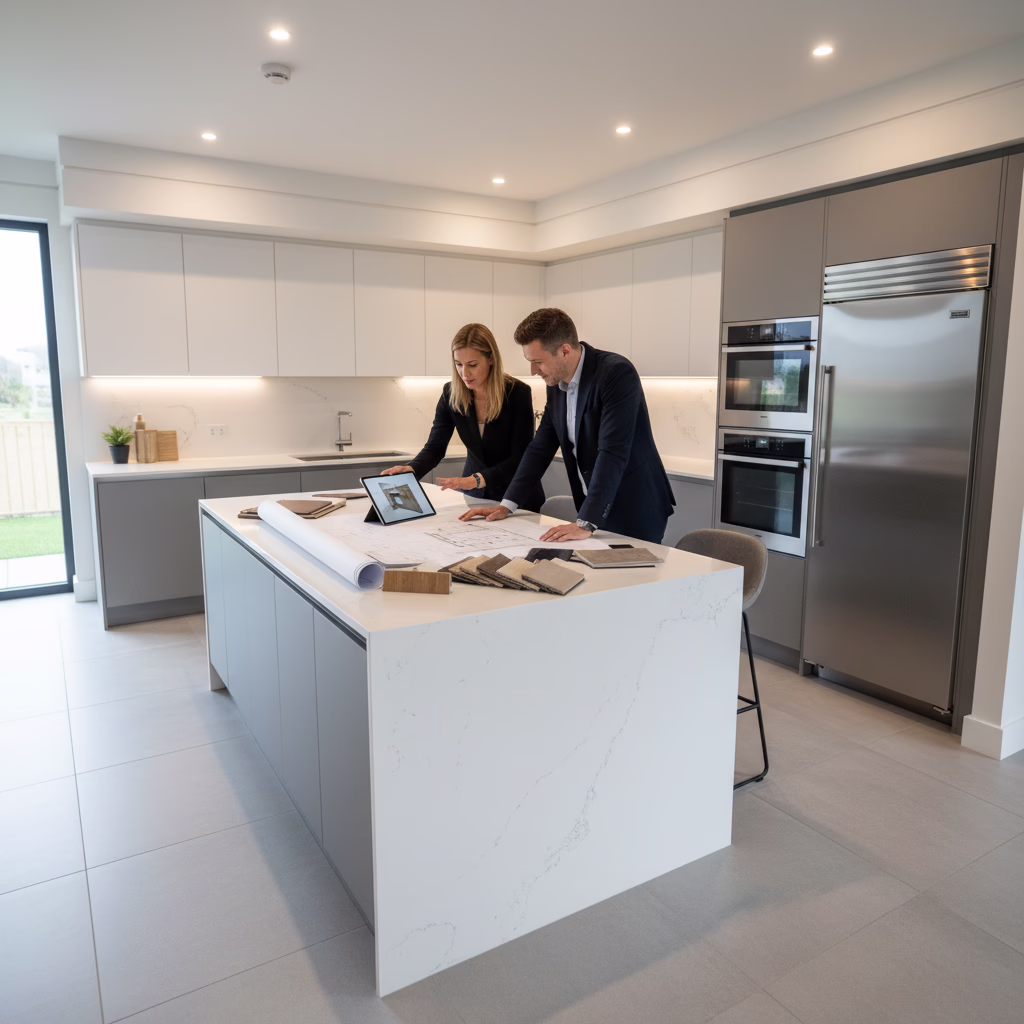
To visualize finishes early, we share 3D renders that match real-world materials from our showroom. Clients tell us these previews make it easy to compare a waterfall quartz island versus a mitered edge, or to see how matte cabinet fronts pair with a textured backsplash.
Design Types and Approaches
Most kitchens fall into a few layout families—galley, L-shape, U-shape, peninsula, or island. The best approach depends on structure, traffic, and appliances. We balance clearances, storage, and sightlines so the final plan fits both your space and your daily routines.
While no two projects are identical, the same design logic applies. Work centers for prep, cook, clean, and store stay within easy reach. Aisle widths and door swings avoid collisions. Lighting is layered: task, ambient, and accent. Storage tools—pull-outs, dividers, corner units—convert dead space into working space.
Common layout options
- Galley: Parallel runs with 36-inch walkway minimum; efficient for small condos.
- L-shape: Open corner with 42-inch work aisle; easy to add an island for seating.
- U-shape: Three-sided workspace; maintain 42–48-inch center aisle for mobility.
- Peninsula: Good when walls can’t move; creates zones without new framing.
- Island: Popular for hosting; target 42 inches of clearance and 24 inches of seating depth.
Style and material approaches
- Modern: Flat-panel fronts, integrated pulls, and subtle veined quartz.
- Transitional: Shaker doors, warm woods, and mixed-metal hardware.
- Classic: Framed details, furniture-style bases, and timeless stone patterns.
Cabinet boxes are typically 24 inches deep (base) and 12 inches (upper). Toe kicks land around 3.5–4 inches high. These dimensions keep ergonomics consistent, support appliance standards, and make accessories like spice pull-outs and lazy Susans perform as expected.
Best Practices That Save Time and Stress
Lock your appliance models early, keep work aisles 42–48 inches, and plan layered lighting. Approve 2D/3D drawings before manufacturing, and use storage accessories to convert every inch. These moves prevent clashes, speed installation, and keep daily tasks simple.
Layout and ergonomics
- Clearances first: 36-inch walkways; 42–48-inch work aisles; 24-inch pantry interiors.
- Landing spaces: 12–15 inches of counter beside ovens, cooktops, and fridges.
- Seating comfort: 24 inches width per stool; 12 inches overhang with knee space.
Lighting and power
- Task lighting: Under-cabinet lights positioned at cabinet fronts reduce shadows.
- Ambient lighting: Even ceiling lighting with dimmers for day-to-night control.
- Code-aware outlets: GFCI where required; map small-appliance circuits in planning.
Storage and organization
- Pull-out pantry: Keeps staples visible; plan for tall units near prep zones.
- Spice and utensil pull-outs: 6–12-inch modules beside ranges improve speed.
- Corner solutions: Blind-corner pull-outs or lazy Susans reclaim tough spaces.
When you approve drawings and a selections schedule before manufacturing, production moves in one pass. That’s why our itemized quoting and 3D visuals go hand in hand—decisions are concrete, so timing is predictable.
Tools and Resources We Use
We combine 2D/3D design software, factory-direct production, and a single-showroom selection experience. You see photoreal visuals, touch real samples, and sign off on a complete spec so cabinets, counters, tile, and lighting arrive in sync and install without drama.
Design clarity and manufacturing control are the difference makers. Our Italian CNC machinery, professional spray booth, and in-house installers create a closed loop: what you approved is what gets built and fitted on site.
- 2D/3D kitchen design: Floor plans, elevations, and realistic renders you can trust.
- Showroom selections: Cabinets, quartz, tile, and hardware under one roof.
- Itemized schedules: Cabinet list, finish schedule, lighting plan, and hardware map.
- Production QA: Shop drawings, cut lists, and spray-finish quality checks.
Explore ideas and standards alongside this guide in our custom kitchen design ideas article and our renovation contractor guide detailing trade sequencing.

Codes, Safety, and Efficiency Essentials
Plan for safe electrical, ventilation, and clearances before drawings are final. Follow recognized guidelines for walkways and landing spaces, include GFCI protection near water, and route hood ducts effectively. Choose efficient appliances to reduce energy and water use over time.
For planning norms, NKBA guidelines are a helpful benchmark for clearances and landing spaces. For energy-smart choices, the U.S. Department of Energy’s Energy Saver has tips on efficient appliances and lighting. For building safety, the International Codes outline critical electrical and ventilation requirements.
- Aisles and landings: Size walkways and landing zones early for safer cooking.
- Electrical safety: Use GFCI where required; coordinate circuits with appliance loads.
- Ventilation: Ducted range hoods exhaust moisture and odors to the exterior.
- Efficiency: Efficient dishwashers and fridges cut water and energy use long term.
Codifying these decisions in your drawings prevents onsite compromises. It also helps inspectors, electricians, and HVAC pros work faster because the intent is documented up front.
Case Studies and Real-World Examples
Small or large, projects succeed when the process is clear. These snapshots show how tight condo galleys and busy family islands both benefit from measured drawings, 3D previews, and factory-built cabinets installed by one accountable team.
Condo galley refresh
A narrow galley needed storage and light. We used 12-inch uppers on one side, added under-cabinet lighting, and set a 36-inch walkway. A 3D render confirmed a lighter matte door with a soft-vein quartz. The result: brighter prep zones, better reach, and no door conflicts.
Family island kitchen
For a hosting-focused home, we planned a 96-inch island with 12-inch seating overhang and 42-inch aisles. Pull-out pantry storage and a spice pull-out flank the range. 3D views helped choose a waterfall edge that matched the backsplash tone for visual continuity.
Integrated full-home update
During a larger home renovation, we synchronized flooring, tile, and cabinet install. Shop drawings were approved before rough-ins, so electricians placed outlets for valance lighting exactly where the plan showed. Installers finished in one pass, with only a short punch list at the end.
For broader planning ideas that span kitchens and beyond, see our full home renovation guide and practical advice in revamp your kitchen.
Plan With Confidence: Free Design Walkthrough
If you’re planning a kitchen in the GTA, a 30-minute walkthrough clarifies layout options, storage upgrades, and material selections. Bring your measurements or book a site visit. We’ll turn your wishlist into 2D/3D drawings you can approve with confidence.
Ready to map your layout and finishes? Explore inspiration in our custom kitchen cabinets resource, then schedule a consultation at our Brampton showroom. We’ll prepare measured drawings, 3D visuals, and an itemized selections schedule—start to finish with one accountable team.
The Best Sequence for Decisions
Decide appliances first, then layout, then storage, then finishes. This order keeps dimensions stable and prevents redraws. Lock drawings and selections before manufacturing so the factory builds exactly what you approved—no surprises on site.
- Appliances: Confirm models and cutouts; venting and electrical follow.
- Layout: Fix work aisles, landing zones, and door swings.
- Storage: Add pull-outs, dividers, and corner solutions where traffic allows.
- Finishes: Coordinate cabinets, counters, backsplash, and hardware in good light.
This sequence is how we avoid “domino” changes. It also keeps trades moving: rough-ins match the cabinet plan, and counters template promptly after base install.
Checklists and Templates You Can Use
Use simple checklists to speed decisions and keep notes in one place. Track appliance models, clearances, storage upgrades, lighting zones, and finish selections. A one-page summary reduces email back-and-forth and helps your designer produce accurate drawings faster.
Pre-design checklist
- List appliances with model numbers and dimensions.
- Measure room length, width, ceiling height, and window/door sizes.
- Note immovable items (columns, stairs, bulkheads).
- Identify must-have storage (pull-out pantry, tray dividers, spice pull-out).
- Collect 5–7 inspiration images that reflect your style.
Selections checklist
- Cabinet door style and finish (e.g., matte white shaker).
- Countertop material and edge (e.g., quartz, 2-inch miter).
- Backsplash tile size and grout color.
- Hardware style and finish (pulls, knobs).
- Lighting: under-cabinet, ceiling, pendants, dimmers.
When all of this sits in one selections schedule, manufacturing stays predictable. That’s the advantage of our one-roof showroom and factory-direct approach.
Local considerations for 11 Edvac Drive
- Plan around seasonal timelines. GTA winters can slow exterior venting work; schedule ducting and deliveries ahead of cold snaps for smoother installs.
- Coordinate condo rules. Book elevators and protect corridors for cabinet deliveries if you’re in a high-rise; our team helps with logistics and timing.
- Match finishes to daily use. Families in busy 11 Edvac Drive households often prefer durable matte fronts and easy-clean quartz to keep maintenance simple.
Frequently Asked Questions
Most homeowners ask about timelines, drawings, and where 3D design fits. Here are concise answers that clarify scope, order, and decision-making so you can move forward with confidence and fewer surprises.
How long does a typical kitchen design process take?
Design through final approvals often spans two to four weeks, depending on how quickly selections are made. Manufacturing generally takes one to three weeks, and installation three to seven days, based on scope and site conditions.
Do I need to choose appliances before designing?
Yes. Appliance sizes drive cabinet dimensions, electrical loads, and venting paths. Locking models early prevents redraws and keeps trades aligned with the approved plan and rough-ins.
What drawings do I approve before cabinets are built?
You’ll approve 2D floor plans, elevations, and 3D renders, plus a cabinet list and selections schedule. Final shop drawings summarize dimensions, accessories, and finishes so the factory builds exactly what you’ve signed off.
How do you prevent installation delays?
Upfront measurements, locked appliances, and documented rough-ins reduce surprises. Factory-built cabinets arrive square, and our installers follow the same drawings you approved, which keeps on-site adjustments minimal.
Can you help with lighting, tile, and countertops too?
Yes. We’re a one-stop team with cabinets, quartz, backsplash tile, hardware, and lighting plans under one roof. Selecting everything in one showroom speeds decisions and keeps your project on schedule.
Conclusion: Bring Your Design to Life
A proven kitchen design process turns inspiration into exact drawings, factory-quality cabinets, and a smooth installation. With in-house design, manufacturing, and installers, you get one accountable team—and a finished space that matches your approved 2D/3D plans.
Key takeaways:
- Decide appliances first, then layout, then storage, then finishes.
- Use 2D/3D drawings and an itemized selections schedule to lock scope.
- Plan clearances: 36-inch walkways, 42–48-inch work aisles, thoughtful landings.
- Document electrical, venting, and lighting early to avoid onsite changes.
- Choose an integrated team so design, factory, and install stay aligned.
Next step: Book a design walkthrough at our GTA showroom and see your kitchen come to life in 3D. We’ll translate your wishlist into drawings you can approve with confidence—then build exactly that. Prefer to prep first? Start with our kitchen planning guide and backsplash tips.
Ready to begin? Schedule a discovery session in 11 Edvac Drive, and let’s map your kitchen—end to end.
Related Posts

Why Choose Kitchen Renovation Company
Nowadays, Kitchen spaces are not only a place for cooking and serving food, but these areas act as a statement, as they speak a lot about a family, the philosophy and personality of individuals, and spaces. If you admire aesthetics and adorn the beauty of your home, you must pay attention to the interior design […]
How a Kitchen Renovation Contractor is Changing the Game
Lifestyle is all about bringing something coherent to the overall experience of living. The kitchen and closets stand as two of the most influential spaces in a home that add to the overall experience of living. A Kitchen Renovation Contractor in Whitby by the name of Altima Kitchen and Closets Inc. is changing the overall […]
How Media unit contractor in Whitby is Changing the Game
Lifestyle is all about bringing something coherent to the overall experience of living. The kitchen and closets stand as two of the most influential spaces in a home that add to the overall experience of living. A Media Unit Company in Whitby by the name of Altima Kitchen and Closets Inc. is changing the overall […]