Full Remodel Guide: Know What Happens and When 2026
Full home renovation timeline planning is the structured sequencing of every task, permit, design decision, and inspection so your remodel runs on time. From our location at 11 Edvac Drive, Altima Kitchens and Closets uses design-build workflows and factory-direct cabinetry to keep schedules predictable while you live through changes or plan a temporary move-out.
By Ashok, Altima Kitchens and Closets • Last updated: 2026-04-27
Above-Fold: Hook, Summary, and Quick TOC
Plan your whole-home remodel by mapping phases, locking decisions early, and sequencing trades around permits and inspections. A reliable timeline groups work into design, approvals, demo, rough-ins, finishes, and handover—each with clear owners, dependencies, and milestones you can track weekly.
Big renovations succeed when the plan is simple to follow. This guide shows you the practical schedule we use across the GTA, with examples for kitchens, bathrooms, basements, and condos.
- What “timeline planning” really covers—and where delays start
- How to phase work so kitchens, baths, and basements don’t collide
- Permits, inspections, and who does what at each step
- Living-in-place vs. temporary move-out strategies
- Weekly tracking, punch lists, and how Altima keeps dates firm
At a Glance
- Design + Decisions: 2–6 weeks (scope, drawings, 3D, selections)
- Permits + HOA/condo approvals: 1–6 weeks (parallel to final design)
- Demo + Structural: 1–3 weeks (site protection, removals, framing)
- MEP rough-ins: 1–2 weeks (mechanical, electrical, plumbing)
- Inspections + Close-in: 3–7 days (pass-fail cycle)
- Cabinetry + Surfaces: 1–3 weeks (factory-direct delivery, install)
- Finishes + Fixtures: 1–2 weeks (tile, paint, lighting, hardware)
- Commissioning + Handover: 2–5 days (testing, training, warranties)
Local considerations for 11 Edvac Drive
- Peak demand around long weekends can book trades two to four weeks out; secure your slot early for summer and late-fall projects.
- Weather swings affect exterior work and material deliveries; plan indoor phases first during winter and reserve exterior items for milder weeks.
- Condo boards often require weekday work windows; coordinate access and elevator bookings in advance to protect your timeline.
What Is Full Home Renovation Timeline Planning?
It’s a phase-based schedule that sequences design, permits, demolition, rough-ins, inspections, finishes, and handover with defined owners and dependencies. The goal is to eliminate idle days, avoid trade conflicts, and keep your home safe and functional throughout the remodel.
When we talk about full home renovation timeline planning, we mean creating a living schedule that guides every decision and contractor on site. It merges your design choices with permitting, manufacturing lead times, inspections, and installation windows.
- Scope-to-Schedule Link: Every new wall, outlet, and cabinet maps to a task and date range.
- Dependencies: Electrical rough-in follows framing; tiling follows waterproofing; countertops follow cabinet set.
- Milestones: Permit issued, rough-in passed, cabinets installed, final inspection, substantial completion.
- Risk Buffers: 5–10% time contingency absorbs inspection re-visits or back-ordered items.
- Weekly Site Rhythm: Daily logs, photo updates, and end-of-week punch downs keep momentum.
At Altima, we integrate 2D/3D drawings and factory-direct production into this plan so cabinetry, vanities, and media units arrive just-in-time instead of piling up and crowding your living areas.
Why Timeline Planning Matters
A solid timeline reduces stress, prevents scope creep, and keeps trades moving without clashes. It also minimizes living disruption, shortens downtime for kitchens and baths, and protects budgets by avoiding rush orders or rework triggered by late decisions.
Renovations fail when decisions lag or trades overlap. A clear plan avoids stacked crews, idle hours, and redo work. It’s not only about speed—it’s about flow.
- Fewer Interruptions: Sequencing means you still have a functioning bathroom or kitchenette during key weeks.
- Permit Certainty: Inspections bunch up; planning prevents last-minute scrambles.
- Quality Control: Timeboxes for waterproofing cure, paint dry, and HVAC balancing prevent callbacks.
- Communication: We share WhatsApp updates and photo logs so you see progress daily.
In our experience across the GTA, homes that start with locked selections and signed-off 3D drawings reach substantial completion weeks sooner than homes where finishes are still open during rough-ins.
How a Full-Home Timeline Works
Break the project into six phases—Design, Approvals, Demolition, Rough-ins, Finishes, and Handover. Sequence tasks inside each phase, assign owners, and use short stand-ups to resolve blockers fast. Track milestones weekly and adjust buffers, not critical dates.
Phase 1: Design and Decisions
- Site measure, discovery, and constraints mapping (1–3 visits)
- 2D layouts and 3D renderings for kitchens, baths, closets, media units
- Material selections under one roof: doors, counters, tile, lighting
- Itemized quote and value-engineer options before sign-off
Example: Choosing a pull-out pantry and spice rack pull-out now sets cabinet widths, which in turn locks appliance specs and electrical rough-ins.
Phase 2: Approvals and Ordering
- Permit drawings (where structural or plumbing/electrical changes occur)
- Condo board submissions and elevator bookings (if applicable)
- Factory-direct cabinetry goes into production; long-lead fixtures ordered
Tip: Run permits in parallel with final design edits. Typical paperwork windows range from one to six weeks, depending on scope and season.
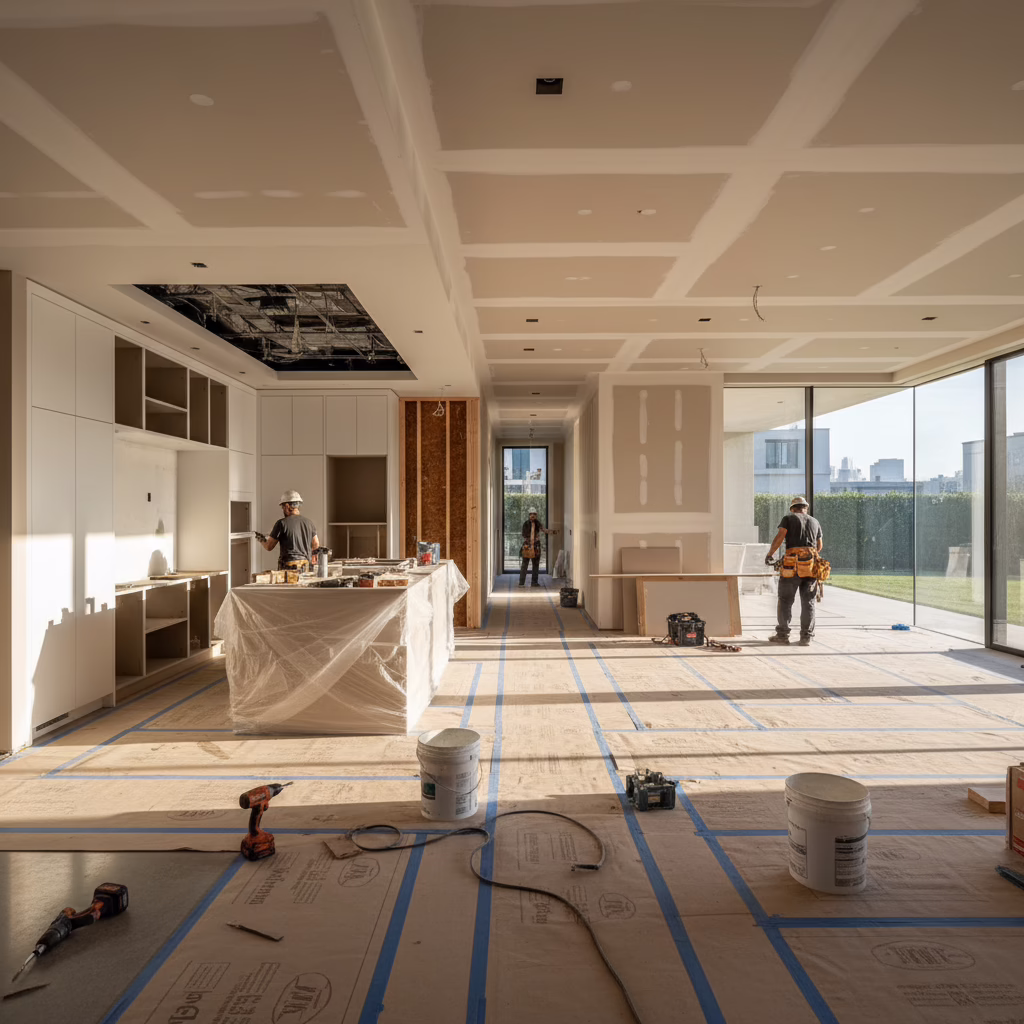
Phase 3: Site Protection, Demo, and Structural
- Floor protection, dust walls, HVAC returns masked for clean air
- Selective demolition; careful salvage of reusable elements
- Framing changes, headers, and layout prep for new cabinetry
We treat protection as a task with start and end dates. Clean sites install faster and pass inspections sooner.
Phase 4: Mechanical, Electrical, and Plumbing (MEP) Rough-ins
- Supply runs and drains in new bath locations; hood venting and make-up air
- Dedicated kitchen circuits; under-cabinet and pantry lighting
- HVAC tweaks for open-concept comfort and code compliance
Inspections often cluster here. Clear as-builts help inspectors and speed passes.
Phase 5: Close-in, Surfaces, and Cabinetry
- Insulation, drywall, and prime; waterproofing for wet zones
- Tile setting, floor leveling, and trim
- Cabinet installation, scribe, and adjust; template and set counters
Factory-direct production lets us align delivery with install crews, which reduces storage clutter and shortens overall duration.
Phase 6: Fixtures, Finish, Commissioning, and Handover
- Plumbing trims, appliance set, lighting aim, smart dimmers
- Paint, caulk, hardware, silicone; final clean
- Walkthrough, punch-list completion, warranties and care guides
We close with a documented handover: serial numbers, finish schedules, and maintenance notes so your new spaces keep looking new.
| Phase | Typical Duration | Main Owner | Key Dependency |
|---|---|---|---|
| Design & Selections | 2–6 weeks | Designer + You | Site measure complete |
| Permits/Approvals | 1–6 weeks | Designer/Engineer | Finalized drawings |
| Demo & Structural | 1–3 weeks | Site Lead | Protection in place |
| MEP Rough-ins | 1–2 weeks | Licensed Trades | Framing complete |
| Surfaces & Cabinetry | 1–3 weeks | Install Crew | Rough inspections passed |
| Finishes & Handover | 1–2 weeks | Project Manager | Countertops set |
Approaches to Sequencing and Scheduling
Use a design-build model for unified ownership, then pick a living plan strategy: room-by-room sequencing for occupied homes or zone stacking for speed. Anchor everything to critical inspections and just-in-time deliveries to minimize idle days.
Design-Build vs. Design-Bid-Build
- Design-Build (Altima’s model): One accountable team manages drawings, factory production, and install—fewer handoffs, tighter dates.
- Design-Bid-Build: Separate designer and contractors; competitive bids but more coordination risk and schedule gaps.
Because we manufacture cabinetry in-house, we compress the design-to-install gap and reduce lead-time uncertainty.
Room-by-Room vs. Zone Stacking
- Room-by-Room: Keep one bath working while another is remodeled; ideal when you’re staying in the home.
- Zone Stacking: Demo and rough-in multiple areas at once; faster overall but requires more space and flexible living plans.
We often start with kitchens (highest daily impact), then sequence primary baths and basements to restore whole-home function quickly.
Occupied Home vs. Temporary Move-Out
- Occupied: Shorter daily work windows, extra protection, and micro-phasing to keep essentials running.
- Move-Out: Long workdays, parallel crews, and faster completion if access and storage allow.
Either way, we plan for water/electric cutovers, appliance swap days, and quiet hours to respect routines.
Best Practices That Keep Dates Firm
Lock decisions before demo, track milestones weekly, and protect the site like a finished space. Timebox messy work, batch inspections, and use factory-direct production to align deliveries with install. Document everything—photos, as-builts, and checklists.
- Front-Load Decisions: Appliances, fixtures, tile, and door styles chosen before ordering reduce change orders.
- Visual Sign-Offs: 3D designs catch conflicts early (e.g., fridge swing vs. peninsula).
- Batch Inspections: Group rough inspections to cut wait cycles.
- Clean-As-You-Go: Daily tidy-ups save hours weekly and protect finishes.
- Checklists: Room-by-room punch items ensure a crisp handover.
For kitchens, details like lazy susan cabinet specs, pull-out pantry widths, and under-cabinet lighting channels are confirmed in drawings so electricians and installers arrive ready.
Tools and Resources (Templates You Can Use)
Use simple tools: a one-page Gantt, a selections register, and a weekly site checklist. Track decisions, deliveries, and inspections in one place. Photos and daily notes provide proof and keep everyone aligned.
Here are lightweight tools we share with timeline-sensitive clients.
- One-Page Timeline: A week-by-week strip with owner initials (PM, Elec, Plumb, You).
- Selections Register: Finish, brand, model, room, order date, ETA, install date, warranty.
- Inspection Tracker: Permit number, stage, booked, passed, re-visit date, notes.
- Photo Log: Daily site photos labeled by room and task for fast approvals.
- Punch List: Pre-close items sorted by trade, due date, and status.
Want a deeper kitchen-specific plan? See our kitchen renovation planning guide and match its task list to your home-wide calendar.

Kitchen, Bath, and Basement: Smart Sequencing
Restore daily function first. Tackle the kitchen early, keep one bathroom operational, and plan basement stages around noise and dust. Overlap only where inspections won’t conflict, and schedule countertops last to protect finishes.
We prioritize rooms by daily impact, then coordinate the rest so families can still live comfortably during work.
- Kitchen First: Early cabinet set allows countertops and backsplash to follow; appliances land near project end.
- Bathrooms Staggered: Remodel one at a time; waterproofing and tile cure times are protected.
- Basement Windows: Noisy framing and drywall during daytime; flooring and paint later to reduce dust cycles.
Planning a media wall? Coordinate TV power and conduit with the electrical rough-in. Explore ideas in our custom kitchen design ideas and align accessories like spice rack pull-outs with cabinet bays.
Permits, Inspections, and Compliance
Book permits early and group inspections by trade stage. Keep stamped drawings on site, photograph rough-ins before close-in, and maintain clear access and lighting for inspectors. Build your schedule around these fixed checkpoints.
- Drawings On-Site: Stamped plans and any revisions available for quick reference.
- Photo Evidence: Framing anchors, waterproofing membranes, and vapor barriers documented.
- Access Ready: Clear rooms, good lighting, and labeled panels speed approvals.
Condo work? Read our condo renovation best practices for managing elevator bookings, quiet hours, and board approvals that can influence start dates.
Risk Management and Buffers
Add 5–10% time buffers to absorb inspection re-visits, late deliveries, or hidden conditions. Lock critical decisions before demo and have alternates ready for at-risk items. Update the plan weekly—never let buffers vanish silently.
- Lead-Time Watchlist: Flag items with long ETAs and set swap candidates.
- Hidden Conditions: Old plumbing or wiring? Reserve time for corrections.
- Seasonal Reality: Weather and holidays change delivery and crew availability.
We carry contingency slots between phases rather than at the end, so small slips don’t snowball into big delays.
Real Examples from GTA Projects
Success comes from decisions made early and tasks sequenced tightly. These GTA scenarios show how kitchens, baths, and basements finish faster when designs are locked, permits run in parallel, and factory production aligns with on-site work.
Family Home: Kitchen + Primary Bath + Basement
- Week 1–2: Finalize 3D designs; order appliances and plumbing trims.
- Week 3–4: Protection, demo kitchen and primary bath; framing changes.
- Week 5–6: MEP rough-ins; batch inspections; close-in and prime.
- Week 7–8: Cabinet install; countertop template; tile bath; paint basement.
- Week 9–10: Countertops set; backsplash; trims; fixture set; final clean.
Outcome: Kitchen function restored sooner, with bath and basement following—minimal household downtime.
Condo Suite: Kitchen Refresh + Vanity + Closet
- Week 1: Condo board submission; elevator slots booked; selections locked.
- Week 2–3: Protection; demo; electrical and plumbing adjustments.
- Week 4–5: Cabinet install; countertop template; closet system fit.
- Week 6: Counters set; backsplash; vanity install; punch and handover.
See our broader full-home renovation guide for scope variations that can compress or extend these windows.

Kitchen Pillar and Related Resources
Kitchen work drives the overall remodel timeline. Align cabinet manufacturing, appliance lead times, and countertop templating to avoid gaps. Use design previews to lock clearances and lighting before ordering—this prevents rework and protects finish dates.
Explore kitchen-specific tactics that feed your master schedule:
- Measure decisions against our renovation blueprint.
- Balance storage and style using our GTA kitchen design ideas.
- Coordinate basement phases with permits from our basement planning guide.
- Refresh baths with insights from bathroom vanity trends.
Free Timeline Review (Soft CTA)
If your dates feel uncertain, we’ll review your plan, flag hidden dependencies, and propose a practical week-by-week sequence. Our goal: a remodel that finishes on time without sacrificing craftsmanship or daily comfort.
Want a second set of eyes on your schedule? Our design-build team can translate your wish list into a clean, conflict-free plan with clear milestones and weekly status check-ins.
Frequently Asked Questions
Homeowners ask how long a full remodel takes, whether to live in during construction, and what to do if inspections slip. These answers outline realistic ranges, decision points, and how to keep momentum when the plan changes.
How long does a full home renovation usually take?
Most whole-home projects run 8–16 weeks from demo to handover once design and permits are complete. Complexity, condo rules, and long-lead items can add time. A clear sequence and weekly tracking keep durations in the realistic range.
Should we stay in the home during renovations?
If you have multiple baths and flexible routines, living-in-place can work with room-by-room sequencing. For faster completion or heavy structural work, a short move-out allows parallel crews and longer workdays, reducing overall duration.
What’s the best way to avoid delays?
Lock selections before demo, order long-lead items early, and batch inspections. Keep stamped drawings on site and maintain daily photo logs. Address punch items weekly instead of saving them all for the end.
When should countertops be scheduled?
Template after base cabinets are leveled and fixed. Expect counters 5–10 business days after templating, then set backsplash and plumbing trims. This sequence protects finishes and prevents rework.
Key Takeaways and Next Steps
Great timelines are simple, visual, and owned by one accountable team. Lock decisions, schedule around inspections, and align deliveries with install crews. Review progress weekly and protect buffers so small slips don’t compound into big delays.
- Decide Early: Selections drive rough-ins and orders.
- Sequence for Living: Keep daily essentials online.
- Batch Inspections: Reduce pass/fail cycles.
- Document: Photos and punch lists create smooth handovers.
- Unify Ownership: Design-build reduces handoffs and date drift.
Next steps:
- List every room and pick your sequencing model (room-by-room or zones).
- Start your selections register and flag long-lead items now.
- Book a timeline review with our team to validate durations and buffers.
Ready to move? Schedule a consultation with Altima Kitchens and Closets—book your discovery session near 11 Edvac Drive and we’ll map a confident week-by-week plan.
Bathroom upgrades can improve daily function and resale appeal; see insights from Everest Plumbing’s bathroom remodeling overview. If you’re timing a sale, a simple home prep checklist like this one from HouseUp helps align reno milestones with listing windows. Outdoor projects? Seasonal design ideas from MWG Landscape can pair with interior timelines.
Related Posts

Why Choose Kitchen Renovation Company
Nowadays, Kitchen spaces are not only a place for cooking and serving food, but these areas act as a statement, as they speak a lot about a family, the philosophy and personality of individuals, and spaces. If you admire aesthetics and adorn the beauty of your home, you must pay attention to the interior design […]
How a Kitchen Renovation Contractor is Changing the Game
Lifestyle is all about bringing something coherent to the overall experience of living. The kitchen and closets stand as two of the most influential spaces in a home that add to the overall experience of living. A Kitchen Renovation Contractor in Whitby by the name of Altima Kitchen and Closets Inc. is changing the overall […]
How Media unit contractor in Whitby is Changing the Game
Lifestyle is all about bringing something coherent to the overall experience of living. The kitchen and closets stand as two of the most influential spaces in a home that add to the overall experience of living. A Media Unit Company in Whitby by the name of Altima Kitchen and Closets Inc. is changing the overall […]