Custom Kitchen Cabinets: Avoid Costly Mistakes in 2026
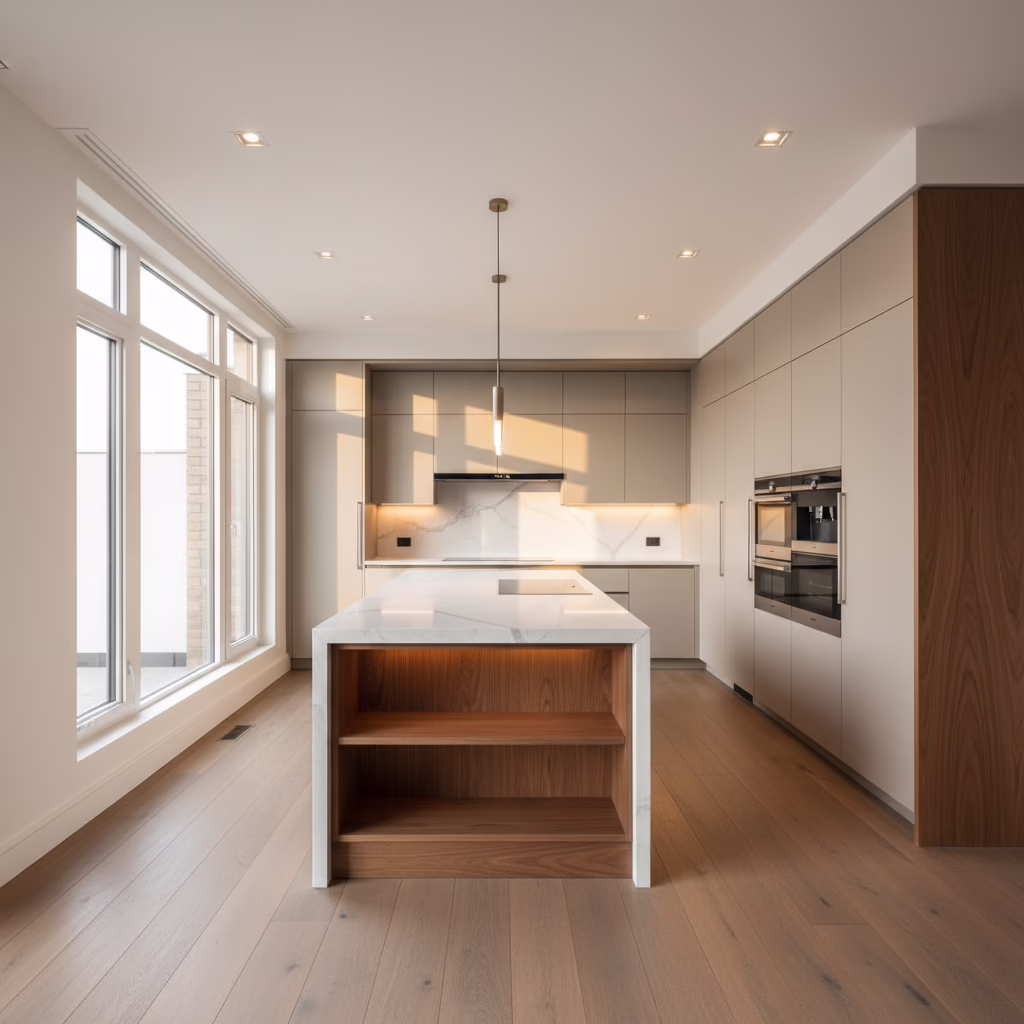
Custom kitchen cabinets in Brampton are made-to-measure storage and millwork built around your layout, appliances, and style. They maximize space, improve workflow, and elevate long-term home value. From our Brampton-area facility at 11 Edvac Drive, Altima Kitchens and Closets designs, manufactures, and installs tailored cabinetry with 2D/3D plans, factory-direct materials, and in-house crews.
By Ashok | Last updated: 2026-04-26
Start Here: Hook, Promise, and Table of Contents
Use this guide to plan custom kitchen cabinets in Brampton with confidence. You’ll see how Altima’s in-house design, factory-direct manufacturing, and professional installation prevent delays, alignment issues, and finish mismatches. Jump to definitions, process steps, materials, best practices, tools, examples, FAQs, and next steps.
Planning your kitchen shouldn’t feel overwhelming. This guide blends practical advice with Altima’s real process so you can make smarter, faster decisions that fit your home and timeline.
- What are custom cabinets?
- Why they matter in Brampton
- Custom Kitchen Cabinets in Brampton: What to Expect
- How the Altima process works
- Types, styles, and materials
- Design Math: Clearances that Work
- Hardware and Lighting Essentials
- Best practices and mistakes to avoid
- Tools and planning resources
- Case studies and GTA examples
- Beyond the kitchen
- Frequently Asked Questions
- Conclusion and next steps
At a Glance: Summary
Custom cabinetry aligns layout, storage, and finish into one cohesive system. In Brampton, Altima’s one-stop, factory-direct model shortens lead times, ensures fit for condos and detached homes, and delivers durable finishes backed by lifetime warranties on select doors.
Here’s what you’ll walk away with:
- A clear checklist for measuring and planning.
- Step-by-step view of design-to-installation.
- Material insights: melamine vs. plywood boxes; MDF painted vs. prelaminated doors.
- Accessory must-haves: pull-out pantry, spice racks, Lazy Susan corners.
- Finishing details: under-cabinet lighting, valance trims, backsplash alignment.
Local considerations for 11 Edvac Drive
- Winters can be dry; specify durable painted or prelaminated doors and keep indoor humidity near 35–45% to reduce seasonal wood movement.
- Spring and summer are popular renovation windows; book design slots early to align with appliance deliveries and building schedules.
- Many GTA condos require drawings and elevator bookings; Altima’s 2D/3D plans and in-house coordination help avoid rescheduling.
What Are Custom Kitchen Cabinets?
Custom kitchen cabinets are built-to-order units sized to your exact walls, appliances, and workflow. Unlike stock sizes, they optimize every inch, integrate accessories, and match finishes precisely. Altima designs in 2D/3D, manufactures with Italian CNC machinery, and installs with a single accountable team.
In practice, “custom” means your cabinet widths, heights, and depths are tailored rather than forced into 3-inch increments. That allows continuous runs, fewer fillers, and cleaner sightlines—a big advantage in tight GTA kitchens.
Useful planning data points include 36 inches typical counter height, 42–48 inches for main aisle clearances, and 18 inches between countertop and uppers. Precision here prevents appliance interference and ensures comfortable cooking.
Because Altima handles design, fabrication, and installation under one roof, you get consistent finishes, coordinated timelines, and a single point of accountability. That reduces change-order risks and punch-list items.
Why Custom Cabinets Matter for Brampton Homes
Brampton homes range from compact condos to large detached houses, so space and storage vary widely. Custom cabinets deliver right-sized solutions, durable finishes for seasonal swings, and smart organization for busy family kitchens—all coordinated by one accountable team.
Here’s why it matters:
- Space efficiency: Corner solutions like a Lazy Susan or blind-corner pull-out can reclaim 25–35% otherwise wasted volume in L-shaped layouts.
- Workflow: A work triangle totaling about 13–26 feet keeps prep, cook, and clean zones efficient, reducing steps and collisions.
- Durability: Factory spray finishes and prelaminated options resist chips and moisture better than most site finishing.
- Condos: Elevator sizes and corridors dictate cabinet module widths; Altima sizes boxes strategically to avoid delivery hassles.
- Accountability: One team manages measurement, fabrication, and install, eliminating handoffs that create delays.
And because the selection experience is centralized, you can decide on door style, hardware, lighting, counters, and backsplash in one showroom visit—reducing decision fatigue and timeline slips.
Custom Kitchen Cabinets in Brampton: What to Expect
Expect a structured workflow: discovery, site measure, 2D/3D design, selections, CNC fabrication, professional spray finishing, scheduling, and installation. For Brampton projects, we also coordinate condo or subdivision requirements and align delivery with appliance timelines.
When people search for “custom kitchen cabinets Brampton,” they’re usually looking for clarity on process and finish quality. Altima’s approach emphasizes proof at every step—from dimensioned drawings to sample doors—so you can approve confidently before production.
Typical measurement references include plumb/level checks, finished-floor heights, and appliance spec tolerances (for example, 24 inches built-in dishwasher opening width). These small details add up to smooth installation day.
How the Altima Process Works (Step-by-Step)
Altima’s process flows from consult to install: goals intake, laser measure, 2D/3D design, selections, sign-off, CNC machining, professional spray finishing, quality check, delivery, and installation. One team owns your result end-to-end.
Here is a practical view of the stages and what you’ll do at each stage.

| Stage | Your Involvement | Key Details Captured |
|---|---|---|
| Discovery & Goals | Share style, storage pain points, and appliance plans. | Target layout, zones, and priority features. |
| Laser Measure | Provide access; we verify walls, floors, and utilities. | Room dimensions, out-of-square angles, floor level variances. |
| 2D/3D Design | Review drawings and 3D renders; request refinements. | Cabinet sizes, clearances (42–48 in aisles), appliance specs. |
| Selections | Choose door style, box material, hardware, lighting. | MDF painted vs. prelaminated; melamine vs. plywood boxes. |
| Sign-Off | Approve final drawings and finishes. | Dimensioned elevations; finish codes; hinge/pull specs. |
| CNC Fabrication | Factory production in Brampton area. | Precision machining; consistent edges; cabinet squareness. |
| Spray Finishing | Color and sheen matched to samples. | Professional spray booth for smooth, durable coatings. |
| Quality Check | Optional showroom review of a sample assembly. | Door reveals, hardware function, finish adhesion. |
| Delivery & Install | Coordinate with your appliance arrival window. | Protection, level/secure boxes, scribe fillers, toe kicks. |
Practical tip: keep major walkways at least 42 inches (48 inches for multiple cooks). This single decision prevents door conflict and improves daily flow.
Free technical walkthrough: Book a showroom or in-home consult to see door samples and 3D views. We align measurements, appliance specs, and delivery windows in one sitting.
Types, Styles, and Materials
Choose door styles (Shaker, flat slab, raised panel), box materials (melamine or plywood), and finishes (MDF painted or prelaminated). Pair with soft-close hardware, pull-outs, and lighting for a balanced system that looks great and works hard for years.
Most GTA kitchens benefit from a clean Shaker or slab profile. For family homes, durable prelaminated doors resist fingerprints and are easy to wipe. For a premium painted look, MDF with professional spray finishing delivers a smooth, uniform surface.
Cabinet boxes typically use 5/8–3/4 inch melamine or 1/2–3/4 inch plywood. Melamine offers a hard, consistent surface and strong screw-holding when engineered correctly; plywood provides layered strength and classic craftsmanship appeal.

Box Materials: Melamine vs. Plywood
Both are proven. The right choice depends on use, aesthetics, and maintenance expectations.
| Aspect | Melamine | Plywood |
|---|---|---|
| Stability | Dimensionally stable; resists minor humidity swings. | Strong across spans; excellent for heavy loads. |
| Surface | Hard, easy-clean interior; consistent color/texture. | Wood grain layers; may require sealing/edgeband care. |
| Look | Modern, uniform interiors; many decor options. | Traditional appeal; natural veneer options. |
| Use Case | Busy family kitchens; rentals; easy maintenance. | Showcase kitchens; long-span shelves; premium builds. |
For deeper insight, explore our take on melamine vs plywood cabinet boxes and how to size shelves to limit deflection.
Doors and Profiles
Door construction and edge profiles shape your kitchen’s style. Crisp Shaker rails, slab minimalism, or applied moldings all telegraph a mood. Consistency across panels, fridge surrounds, and appliance panels is key to a finished look.
See modern options in our CNC cabinet door profiles overview, including rail widths that pair well with tall pantries.
Organization Accessories that Change Daily Life
Small upgrades create big wins in daily use:
- Pull-out pantry: Keeps staples visible; typical 12–18 inch width.
- Spice pull-out: 3–6 inch modules near the cooktop reduce steps.
- Lazy Susan: Corner access improves by roughly 2–2.5x compared with fixed shelves.
- Tray dividers: 3–4 inch partitions for baking sheets and boards.
- Under-cabinet lighting: 2700–3000K warms task areas and reveals stone texture.
Design Math: Clearances that Work
Great kitchens are built on numbers: 42–48 inch aisles, 12 inch island seating overhangs, 24 inch dishwasher openings, and 18 inch counter-to-upper distance. Lock these in on paper before fabrication to avoid field surprises.
Core Distances
- Aisles: 42 inches for one cook; 48 inches if two people cook together.
- Counter to Uppers: 18 inches typical for appliances and backsplash.
- Stove to Hood: Follow manufacturer spec; 24–30 inches above cooktop is common.
- Microwave height: 15–54 inches above floor depending on model and reach.
- Toe kick: 3–4 inches high; 2–3 inches deep for comfortable stance.
Island and Seating
- Overhang: ~12 inches for counter-height seating; plan concealed brackets every 16–24 inches.
- Knee space: 18 inches deep at counter height; 15 inches at bar height.
- Walkways: Maintain at least 36 inches clear behind stools.
Storage Sizing
- Trash pull-out: 15–18 inches wide for two bins.
- Pantry interior: 16–18 inches deep to avoid lost items.
- Drawer slides: 75 lb rating for wide pots-and-pans drawers.
Locking down these numbers during 2D/3D design makes installation faster and reduces on-site adjustments.
Hardware and Lighting Essentials
Specify soft-close hinges, full-extension slides, and layered lighting early. Under-cabinet LEDs at 2700–3000K, interior pantry lights, and dimmers improve usability and safety while showcasing finishes without glare.
Hinges and Slides
- Hinges: Concealed, soft-close designs protect finishes and reduce noise.
- Slides: Full-extension, soft-close slides bring items to you; 75 lb capacity is a reliable baseline.
- Pulls/Knobs: Match finishes across rooms to create continuity.
Lighting Layers
- Under-cabinet: Even task lighting for prep zones; reduces shadows from pendants.
- In-cabinet: Pantry sensors illuminate shelves automatically.
- Ambient: Recessed or track lighting fills the room; dimmers manage mood.
Plan wire paths and switch locations before fabrication to avoid drilling through finished boxes.
Best Practices: 12 Costly Mistakes to Avoid
Avoid measurement shortcuts, undersized clearances, and finish mismatches. Confirm appliance specs early, demand dimensioned drawings, and coordinate lighting, backsplash, and counter overhangs. With one accountable team, these risks drop and installation day runs predictably.
Here are the common pitfalls we correct most often—and how you can sidestep them from day one.
- Skipping a verified measure: Out-of-plumb walls can be 1/2 inch off over 8 feet. Measure, then design.
- Ignoring aisle width: Keep 42–48 inches to prevent door collisions and traffic jams.
- Underestimating corner function: Use a Lazy Susan or blind-corner pull-out; don’t settle for dead zones.
- Delaying appliance selections: Ovens and fridges vary; install tolerances are tight.
- Forgetting trash/recycling: A 15–18 inch pull-out near prep saves steps every meal.
- Mismatching finishes: Sample doors and stones under the same lighting you’ll install.
- Overlooking lighting: Layer under-cab, in-cab, and ceiling; plan wiring before fabrication.
- Not aligning backsplash terminations: End tiles to centers of outlets or cabinet edges for clean sightlines.
- Weak hardware: Specify soft-close hinges and 75 lb glides for wide drawers.
- Shallow pantries: 16–18 inches interior depth keeps goods reachable without step stools.
- Ventilation oversights: Maintain filters and clear duct paths to protect finishes and indoor air.
- Fragmented teams: Split accountability invites gaps; a single design-build partner simplifies change control.
On ventilation care, see a practical local overview of kitchen exhaust filter maintenance practices for smoother airflow.
Tools and Planning Resources
Use 2D/3D design to preview layouts, check clearances, and validate appliance fits. Combine laser measurement, sample doors, lighting demos, and a punch-list template so nothing slips between design and install.
We rely on a consistent toolkit that keeps projects on rails:
- 2D drawings + 3D renders: Approve reveal lines, tall cabinet proportions, and island seating overhangs (typically around 12 inches).
- Measurement template: Record window heights, outlet runs, and HVAC placements before cabinetry sizing.
- Finishes kit: Compare doors, counters, and backsplash samples under 2700–3000K lighting.
- Accessory checklist: Pull-out pantry, spice pull-outs, tray dividers, corner solutions, trash/recycling.
- Hardware spec: Soft-close hinges, full-extension glides, child-safe options if needed.
Curious about refinishing paths? Review our perspective on painting kitchen cabinets and when a full rebuild is the better long-term call.
If a backup plumber is part of your renovation plan, this local note on unclogging a kitchen sink explains basics that can keep schedules intact.
Case Studies and Real-World Examples (GTA)
Every home has unique constraints. These snapshots show how tailored design, factory-direct production, and coordinated installation solve tight corners, condo logistics, and growing-family storage needs across the GTA.
Brampton Detached: Family-Friendly Storage
Challenge: A 1990s L-shape with 30-inch uppers and a dark corner. Solution: Increased upper height to 36 inches, added a Lazy Susan, a 15-inch trash pull-out, and under-cabinet lighting at 2700K. Result: About 20–25% more usable storage and brighter prep zones.
Toronto Condo: Logistics and Lines
Challenge: Elevator width limited tall cabinet modules to 30 inches. Solution: Split pantry into two 24-inch sections, sized island to maintain 42-inch aisles, and aligned backsplash terminations with outlet centers. Result: Clean reveals, no delivery damage, comfortable circulation.
Vaughan Townhome: Island Workflow
Challenge: Competing doors and traffic. Solution: Rotated island seating, set 12-inch overhang with support brackets, and placed a 6-inch spice pull-out next to cooktop. Result: Fewer collisions and faster weeknight cooking.
Looking beyond the interior? Outdoor prep spaces need weather-aware planning. For inspiration, here’s a regional note on planning an outdoor kitchen and the importance of durable finishes.
Beyond the Kitchen: Matching Spaces That Flow
A cohesive home ties the kitchen to nearby spaces. Altima designs matching media walls, mud room cabinets, and vanities so profiles, colors, and hardware relate, creating a whole-home look without guesswork.
When you extend cabinetry beyond the kitchen, your finishes work harder for your lifestyle. Many clients coordinate door style and hardware across storage areas for a polished result.
See how we approach complementary projects:
- Media walls and TV units: insights from our media unit setup overview.
- Bathroom vanities: practical planning in our bathroom renovation guidance.
- Basements and bars: layout tips in our basement renovation perspective.
- Whole-home flow: coordination ideas in our full home renovation overview.
Frequently Asked Questions
These are the most common questions GTA homeowners ask about custom kitchen cabinets. Each answer is concise and practical so you can move forward with confidence.
What measurements do you need before design?
We start with room length/width, ceiling height, window and door locations, and appliance specs. We then laser-measure for accuracy, checking level and plumb. This ensures clearances like 42–48 inch aisles, 18 inches between counters and uppers, and proper appliance tolerances.
Which cabinet box is better: melamine or plywood?
Both are excellent when engineered well. Melamine offers a hard, easy-clean interior with consistent finishes. Plywood provides layered strength and traditional appeal. We recommend based on span, load, and your maintenance preferences, and we review shelf thickness to limit deflection.
How do you prevent installation day surprises?
We confirm dimensions with laser tools, produce 2D/3D drawings for approval, and sequence production with appliance deliveries. Our crews level boxes, scribe fillers, and verify door reveals. One accountable team keeps changes controlled and schedules on track.
Can you match kitchen finishes to other rooms?
Yes. We design coordinated media walls, mud room cabinets, and vanities using the same profiles, colors, and hardware families. This creates a cohesive, whole-home look and simplifies future updates or additions.
Conclusion and Next Steps
Successful kitchens start with precise measurements, clear 2D/3D approvals, and coordinated manufacturing and installation. With Altima’s one-stop model, you avoid common mistakes and get a cohesive space that’s built to last.
Key takeaways:
- Measure, then design—and validate clearances on paper before production.
- Decide accessories early: pull-out pantry, spice pull-out, corner solutions.
- Match finishes under realistic lighting for color accuracy.
- Keep aisles 42–48 inches; plan seating overhangs around 12 inches.
- Work with one accountable team from design to install.
Next steps:
- Book a consultation to review 2D/3D options and door samples.
- Bring appliance specs and room measurements for faster decisions.
- Visit our Brampton-area facility near 11 Edvac Drive to see materials and finishes in person.
Ready to begin? Let’s design custom kitchen cabinets in Brampton that fit your life today and tomorrow.
Related Posts

Why Choose Kitchen Renovation Company
Nowadays, Kitchen spaces are not only a place for cooking and serving food, but these areas act as a statement, as they speak a lot about a family, the philosophy and personality of individuals, and spaces. If you admire aesthetics and adorn the beauty of your home, you must pay attention to the interior design […]
How a Kitchen Renovation Contractor is Changing the Game
Lifestyle is all about bringing something coherent to the overall experience of living. The kitchen and closets stand as two of the most influential spaces in a home that add to the overall experience of living. A Kitchen Renovation Contractor in Whitby by the name of Altima Kitchen and Closets Inc. is changing the overall […]
How Media unit contractor in Whitby is Changing the Game
Lifestyle is all about bringing something coherent to the overall experience of living. The kitchen and closets stand as two of the most influential spaces in a home that add to the overall experience of living. A Media Unit Company in Whitby by the name of Altima Kitchen and Closets Inc. is changing the overall […]