Custom Kitchen Design Ideas for GTA Homes (2026 Guide)
Custom kitchen design ideas in the GTA refer to layout, storage, finishes, and lighting choices tailored to your home’s footprint and lifestyle. The best designs balance function and style, follow proven planning standards, and leverage 2D/3D visualization so you can see the space before build—then deliver with in-house manufacturing and installation for quality control.
By Altima Kitchens and Closets • Last updated: April 9, 2026
Quick Answer
For custom kitchen design ideas in the GTA, start with a layout that follows NKBA work-aisle clearances, add smart storage (pull-out pantries, spice pull-outs, lazy susans), and preview finishes in 3D. At our Brampton showroom and factory (11 Edvac Drive, Units #13–19), we design, manufacture, and install end-to-end for seamless results.
Start Here: Your GTA Custom Kitchen Design Game Plan
Begin by mapping your workflow, measuring clearances, and shortlisting must-haves. Then use 2D/3D design to test layouts, storage, and finishes before committing. A one-stop, factory-direct partner streamlines selections, manufacturing, and installation so your vision stays on track from concept to completion.
- What you’ll learn:
- Practical custom kitchen design ideas GTA homeowners actually use
- How to plan layouts, storage, lighting, and surfaces for daily life
- Ways 2D/3D design de-risks choices before build
- How in-house manufacturing improves quality and timelines
- Why this guide helps:
- Built on GTA project experience across condos, townhomes, and detached homes
- Grounded in NKBA layout guidelines and proven field practices
- Actionable checklists you can take to a showroom consultation
- Who it’s for:
- Homeowners planning kitchen renovation GTA wide (Toronto, Brampton, Mississauga, Oakville, Vaughan)
- Condo owners needing space-savvy, code-aware solutions
- Anyone who wants factory-direct cabinetry with one accountable team
At a Glance
- Primary approach: Function-first layout, storage, and lighting, refined in 3D.
- Core tools: 2D/3D kitchen design, itemized quotes, in-house manufacturing, pro installation.
- Key standards: NKBA recommends 42–48 inch work aisles; triangle legs 4–9 feet each (total 13–26 feet).
- Sustainability: ENERGY STAR appliances and LED lighting reduce energy use significantly (DOE notes LEDs use up to ~75% less energy than incandescents).
Local Tips
- Tip 1: If you’re visiting our Brampton showroom at 11 Edvac Drive (Units #13–19), aim for mid-mornings to explore door profiles, quartz, and accessories without rush-hour traffic on nearby arterial roads.
- Tip 2: Plan deliveries around GTA weather swings. Winter installs benefit from on-site floor protection and door-sealing protocols our installers follow to keep dust and moisture under control.
- Tip 3: Condo projects in Toronto often require elevator bookings and protection. Our project managers coordinate building approvals and timing so installations run smoothly.
IMPORTANT: These tips reflect how our design, factory, and installation teams operate locally to minimize downtime and disruptions.
What Is “Custom Kitchen Design Ideas” in the GTA?
It’s a tailored plan that combines workflow-driven layouts, storage upgrades, durable finishes, code-aware lighting, and appliance choices—refined with 2D/3D visuals and delivered by a single, accountable team. In the GTA, designs must consider condos, narrow lots, and family lifestyles common to the region.
- Definition you can use:
- “Custom” means built to your space and habits—not catalog-only sizes or generic layouts.
- “Design ideas” cover layout, cabinetry, storage accessories, counters, backsplash, lighting, and hardware.
- “GTA context” adds condo bylaws, service elevator windows, and local installation logistics.
- Standards that anchor decisions:
- NKBA work aisles: 42 inches (one cook) to 48 inches (two cooks) for safe movement.
- Work triangle: each leg 4–9 feet; sum 13–26 feet for efficient travel.
- Landing zones: 12–15 inches of counter beside major appliances for safe transfers.
- Why this matters:
- Design standards reduce fatigue and accidents—especially in busy family kitchens.
- 2D/3D modeling eliminates guesswork so you can approve before we build in our factory.
- Factory-direct cabinetry plus pro installation improves quality control and timelines.
Why Custom Kitchen Design Matters for GTA Homes
Custom design turns constraints into advantages: better storage per square foot, safer movement, easier cleanup, and a look that reflects you. For GTA condos and family homes, it’s the most reliable way to maximize space while meeting building requirements and daily-life demands.
- Function first:
- Right-sized aisles reduce traffic jams at the fridge and sink.
- Zones for prep, cook, cleanup, and serving speed up daily routines.
- Pull-outs and dividers keep essentials within a single step reach.
- Safety and ergonomics:
- Clearances and landing zones reduce spill and burn risk.
- Soft-close hardware limits finger-pinches and noise in open plans.
- Under-cabinet lighting brightens tasks without glare.
- Energy and maintenance:
- ENERGY STAR dishwashers and fridges cut energy and water versus standard units.
- LEDs last longer and consume far less energy than halogen/incandescent (DOE).
- Quartz counters resist stains and reduce ongoing upkeep compared to porous stone.
- Real example (Brampton):
- We reworked a busy family kitchen into prep/cook/cleanup zones, added a pull-out pantry, and used 3D to lock finishes. Result: faster mornings and a quieter, safer space.
How a GTA Custom Kitchen Comes Together (Step by Step)
The best process is consultative and visual: discover goals, measure, design in 2D/3D, refine selections, manufacture in-house, and install with one accountable team. This end-to-end method protects quality, schedule, and budget alignment.
- Discovery & needs analysis
- Clarify daily routines, storage pain points, appliance wish list, and style preferences.
- Identify condo or municipal constraints early (deliveries, hours, protection).
- Site measure & planning
- Verify dimensions, utilities, and wall conditions to reduce surprises.
- Discuss clearances per NKBA—target 42–48 inch aisles and proper landings.
- 2D/3D design & iteration
- Test L, U, galley, or island layouts; check triangle distances (4–9 feet per leg).
- Preview cabinetry styles, quartz patterns, backsplash tile, and lighting layers.
- Selections & itemized scope
- Choose door profiles, finishes, storage accessories, and lighting.
- Review a transparent, itemized scope so you know exactly what’s included.
- In-house manufacturing
- Cabinetry produced on Italian CNC with a professional spray booth for finishes.
- Lifestyle-backed durability, plus lifetime warranty on MDF Painted and Prelaminated doors.
- Professional installation
- Factory-matched installers fit doors, panels, scribe moldings, and hardware precisely.
- Clean site protocols, condo coordination, and clear communication throughout.
- Final walkthrough & care
- Quality check, adjustments, and education on care for cabinets, counters, and lighting.
- Post-project support from the same team that built your kitchen.
Layout Types and Approaches That Work in the GTA
Match the layout to your footprint and traffic patterns. Galleys excel in condos; L-shapes with peninsulas fit townhomes; U-shapes and islands shine in detached homes. Prioritize 42–48 inch aisles, safe landings, and clear work zones for any plan.
Galley (Condo-Friendly)
- Why it works: Parallel runs create efficient triangles with minimal steps.
- Key specs: Aim for at least 36 inch walkway each side; keep triangle legs 4–9 feet.
- Good add-ons: Pull-out pantry, tray dividers, under-cab lights.
- Example: Toronto condo galley with full-height pantry, slimline hood, and LED valance lighting.
L-Shape (Flexible for Corners)
- Why it works: Opens sightlines and supports dining nooks or peninsulas.
- Key specs: Corner solutions like a lazy susan cabinet or blind-corner pull-outs.
- Good add-ons: Microwave drawer, spice rack pull-out near the range.
- Example: Mississauga L with peninsula seating and 15 inch landing by the fridge.
U-Shape (Max Storage)
- Why it works: Surrounds the cook with storage and counter space.
- Key specs: Maintain 42–48 inch interior aisles to avoid bottlenecks.
- Good add-ons: Double trash pull-out, baking center with vertical dividers.
- Example: Oakville U-shape with task/ambient/accents layered lighting.
Island (Social Hub)
- Why it works: Adds prep space, storage, and seating; defines open plans.
- Key specs: Keep 42 inches around; include outlets per code.
- Good add-ons: Waterfall quartz, beverage fridge, charging drawer.
- Example: Brampton family island with 24 inch seating overhang and pendant trio.
Storage Ideas That Actually Save Time
Prioritize pull-outs and purposeful dividers. A well-placed pull-out pantry, spice rack, tray dividers, and a double waste center near the sink reduce steps and clutter. Store tools where they’re used—prep, cook, or cleanup—to speed daily routines.
- Top performers:
- Pull-out pantry installation near the fridge for cereals, snacks, and cans.
- Spice rack pull-out beside the range for fast seasoning access.
- Lazy susan cabinet in corners to keep pots and small appliances reachable.
- Tray/divider pull-outs for sheet pans and cutting boards.
- Utensil and knife drawer organizers near the prep zone.
- Placement rules of thumb:
- Waste and recycling: under-sink or a double pull-out to the right of sink.
- Everyday dishes: nearest to dishwasher for quick unloads.
- Seasonal ware: upper cabinets above secondary zones to free prime real estate.
- Lighting that helps:
- Pantry lighting installation with door-triggered LEDs for full visibility.
- Valance lights under uppers to eliminate shadows on counters.
 1")
Finishes, Surfaces, and Color Palettes
Blend durable surfaces with timeless palettes. Quartz counters, quality cabinet finishes, and a balanced backsplash elevate daily use. Use 60-30-10 color planning, vary sheen levels, and add texture for depth. Aim for durable, non-porous surfaces in busy GTA family kitchens.
- Counters:
- Quartz countertops for stain resistance and easy care.
- Waterfall ends on islands for a modern focal point.
- Cabinet finishes:
- MDF Painted doors (lifetime warranty on MDF Painted and Prelaminated doors).
- Matte or low-sheen finishes to minimize fingerprints in busy homes.
- Backsplash:
- Elongated subway, stacked stone-look porcelain, or herringbone for movement.
- Coordinate grout to the countertop for continuity; use stain-resistant grout.
- Palettes:
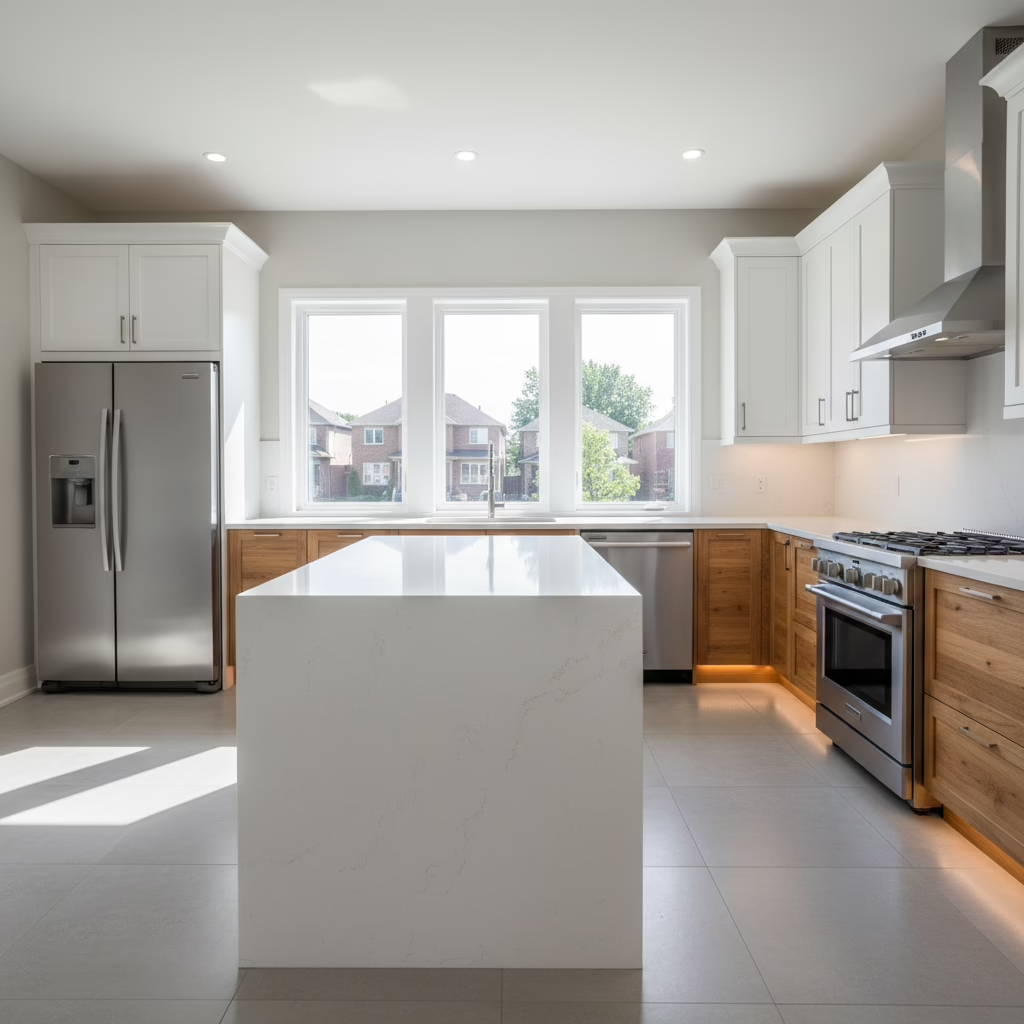
- Warm wood bases + white uppers = light, grounded look.
- Two-tone cabinets with a darker island for visual balance.
- 60-30-10 rule for main/secondary/accent colors.
Lighting Layers That Make a Difference
Layer task, ambient, and accent lighting. Under-cabinet LEDs for prep, dimmable recessed for ambient, and pendants for focus points. LED solutions use far less energy and run cooler, improving comfort during long cooking sessions.
- Task:
- Under-cabinet LED strips or pucks (3000–3500K) for clear, warm-neutral light.
- Toe-kick night lights for safe nighttime movement.
- Ambient:
- Dimmable recessed cans spaced to avoid shadows.
- Ceiling fixtures or slimline tracks in condos with concrete ceilings.
- Accent:
- Pendants over islands (mount the lowest pendant ~30–36 inches above the counter).
- Inside-glass uppers with LED strips for display.
Appliances and Ventilation (Performance First)
Choose right-sized, energy-smart appliances and match ventilation to your cooking style. Induction tops curb heat and improve efficiency; properly ducted hoods clear smoke and moisture. Always coordinate specs with cabinet design to protect clearances and improve longevity.
- Cooktops & ranges:
- Induction offers fast response and high efficiency versus resistance electric; it also reduces ambient heat.
- Gas requires strong ventilation and clearance to combustibles—plan cabinet heights accordingly.
- Dishwashers & refrigeration:
- ENERGY STAR models save water and electricity versus standard units.
- Panel-ready options create a seamless, built-in appearance.
- Ventilation:
- Exterior venting preferred; verify condo rules for ducting and make-up air.
- Capture area of the hood should cover the cooking surface; mount per manufacturer guidelines.
Backsplash and Countertop Pairings
Pair a durable quartz with a complementary backsplash in scale and sheen. Keep busy veining with quieter tiles, or vice versa. Use full-height splashes behind ranges for easier cleanup and visual drama.
- Winning combos:
- Fine-vein quartz + elongated subway in satin finish.
- Concrete-look quartz + geometric porcelain mosaic for texture.
- Calacatta-look quartz + slab backsplash for a continuous look.
- Installation best practices:
- Dry-fit tile layouts to align with outlets and range width.
- Seal grout where recommended by the manufacturer for longevity.
Materials and Construction: What’s Inside Your Cabinets
Cabinet box material, hardware, and finish quality determine durability. Melamine and plywood each have merits; quality hinges and slides matter more than most realize. Factory-direct production with CNC precision improves fit, finish, and consistency.
| Component | Option | Strengths | Considerations |
|---|---|---|---|
| Cabinet box | Melamine | Stable, cleanable interiors; consistent finish | Edge protection and sealing at sinks are important |
| Cabinet box | Plywood | Strong screw-holding; moisture resistance by grade | Specify quality veneer and properly sealed edges |
| Hardware | Soft-close hinges/slides | Quieter use; protects doors and drawers | Verify load ratings for deep drawers and pull-outs |
| Doors | MDF Painted; Prelaminated | Precision profiles; consistent paint/laminate; lifetime warranty on these doors | Confirm care instructions for longevity |
- Why factory-direct matters:
- CNC machining yields precise joinery and repeatable accuracy across units.
- In-house spray booth controls finish quality versus outsourced painting.
- One accountable team reduces gaps between design intent and final fit.
Pricing Factors to Plan (No Dollar Amounts)
Plan for scope, materials, accessories, and installation complexity. Transparent, itemized scopes help you prioritize must-haves and phase nice-to-haves. Flexible financing with 0% down can align investment with milestones—without compromising design intent.
- Scope drivers:
- Layout changes (plumbing, electrical, walls) add coordination.
- Cabinetry linear feet and interior accessories influence complexity.
- Material selections:
- Door styles and finishes (painted, prelaminated, specialty textures).
- Quartz counter thickness, edge profiles, and slab selection.
- Installation logistics:
- Condo elevator bookings, protection, and scheduling windows.
- Site conditions (leveling, wall straightness, access).
- How we help:
- Itemized quotes with upgrade pricing to match priorities.
- 0% down financing, fast approvals, and low monthly payment options.
- Project management that keeps selections, timelines, and teams aligned.
Best Practices Our Designers Rely On
Use standards for safety and flow, then tailor to habits. Keep dish storage by the dishwasher, knives and boards near prep, and pans by the range. Minimize corner friction with smart accessories, and light every work surface.
- Placement rules:
- Dishware and glasses within a single pivot of the dishwasher.
- Cooking oils/spices in a pull-out next to the range (not above heat).
- Trash/recycling near prep to reduce steps and spills.
- Lighting rules:
- Task lighting at all counters; switch separately from ambient lights.
- Use 3000–3500K LEDs for warm, color-accurate food prep.
- Safety rules:
- Leave clear landings beside ovens and fridges to set down hot or heavy items.
- Mind GFCI outlets near sinks; follow installer and manufacturer specs.
Tools and Resources You Can Use
Combine professional 2D/3D design with an itemized scope, showroom sampling, and in-house manufacturing. This toolset reduces risk and compresses timelines, giving you confidence before a single cabinet is built.
- 2D/3D design previews: Iterate layouts and finishes visually before build.
- Showroom selections: See door profiles, quartz, backsplash, and hardware in one place.
- Itemized scope: Transparent inclusions and upgrade options, line by line.
- Factory-direct cabinetry: Quality control from CNC cut to sprayed finish.
- Financing assistance: 0% down options with fast approvals.
For deeper planning pointers on scope and phasing, see our guide to a stunning renovation. If you’re exploring a city-specific approach, our Toronto kitchen renovation insights offer practical context.
 2")
Case Studies: Real GTA Scenarios
Three rapid examples show how layout, storage, and finishes come together: a Toronto condo galley, a Brampton family island kitchen, and a Mississauga L-shape with a peninsula. Each used 3D previews, factory-direct cabinetry, and pro installation to deliver on time.
- Toronto condo galley:
- Challenge: Narrow space and strict delivery windows.
- Solution: Galley with pull-out pantry and LED valance; condo coordination for elevator bookings.
- Outcome: Efficient workflow and brighter prep zones.
- Brampton island kitchen:
- Challenge: Busy family, limited storage, and dark finishes.
- Solution: Two-tone cabinets, waterfall quartz island, spice pull-outs, and double waste center.
- Outcome: Faster mornings and a lighter, modern look.
- Mississauga L with peninsula:
- Challenge: Traffic bottleneck near the fridge.
- Solution: 42 inch aisle targets, 15 inch landing at fridge, and tray dividers.
- Outcome: Clear flow and easier meal prep for two cooks.
For more cabinetry specifics, explore how we transform kitchens with custom cabinets. Regional considerations also appear in our Etobicoke renovation overview.
Free Planning Checklist (Mini)
- Target aisle widths: 42–48 inches based on cooks
- Landing zones: 12–15 inches by fridge/oven
- Triangle legs: each 4–9 feet; total 13–26
- Storage: pull-out pantry, spice pull-outs, tray dividers
- Lighting: task + ambient + accent (3000–3500K LEDs)
- Ventilation: exterior ducting where allowed
Thinking About Your Own Project?
Book a showroom consultation at our Brampton factory location (11 Edvac Drive, Units #13–19). We’ll build your space virtually in 3D, finalize selections in one visit, and manage the project end-to-end.
FAQ: Custom Kitchen Design Ideas GTA
These quick answers cover layout, storage, materials, condo logistics, and timelines—so you can move from inspiration to action confidently with one accountable design-build partner in the GTA.
- How do I choose the right layout for my space?
- Match the layout to your footprint and traffic. Galleys excel in narrow condos; L-shapes fit corners; U-shapes and islands suit larger rooms. Aim for 42–48 inch work aisles and proper landing zones. Use 3D design to compare options before you commit.
- Which storage upgrades make the biggest difference?
- Pull-out pantry, spice pull-outs, tray dividers, and a double waste center near the sink deliver immediate gains. Place everyday dishes by the dishwasher for fast unloads and keep cooking tools near the range.
- What materials hold up best for busy GTA families?
- Quartz countertops resist stains; quality hinges/slides protect drawers; and properly finished MDF Painted or Prelaminated doors offer consistent profiles. Ask about care instructions to extend finish life.
- Can you handle condo rules and scheduling?
- Yes. Our project managers coordinate elevator bookings, protection requirements, delivery windows, and communication with building management to keep your install on schedule and within rules.
- How do I visualize the result before ordering?
- We develop 2D/3D designs that let you preview layouts, storage, and finishes under realistic lighting. It’s the fastest way to align on decisions and reduce change orders during installation.
Conclusion: Turn Ideas into a Kitchen You Love
Start with standards, tailor to your habits, and preview everything in 3D. Then rely on one team—design, factory, and installers—to deliver exactly what you approved. That’s the most reliable path to a GTA kitchen that works and looks the way you want.
- Key Takeaways:
- Plan clearances and landing zones per NKBA, then adapt to your routines.
- Invest in storage that speeds daily tasks: pull-outs, dividers, lighting.
- Use 3D to finalize choices before manufacturing begins.
- Choose factory-direct cabinetry for precision and accountability.
- Next steps:
- Gather inspiration photos and a quick inventory of what you store.
- Visit our Brampton showroom at 11 Edvac Drive, Units #13–19.
- We’ll design, manufacture, and install—end-to-end—so you can enjoy the results.
Related Posts

Why Choose Kitchen Renovation Company
Nowadays, Kitchen spaces are not only a place for cooking and serving food, but these areas act as a statement, as they speak a lot about a family, the philosophy and personality of individuals, and spaces. If you admire aesthetics and adorn the beauty of your home, you must pay attention to the interior design […]
How a Kitchen Renovation Contractor is Changing the Game
Lifestyle is all about bringing something coherent to the overall experience of living. The kitchen and closets stand as two of the most influential spaces in a home that add to the overall experience of living. A Kitchen Renovation Contractor in Whitby by the name of Altima Kitchen and Closets Inc. is changing the overall […]
How Media unit contractor in Whitby is Changing the Game
Lifestyle is all about bringing something coherent to the overall experience of living. The kitchen and closets stand as two of the most influential spaces in a home that add to the overall experience of living. A Media Unit Company in Whitby by the name of Altima Kitchen and Closets Inc. is changing the overall […]