Cabinet Makeover: 7 Easy Fixes for a Fresh New Style
Cabinet makeover is the process of refreshing existing kitchen or bathroom cabinets through targeted updates like refacing, repainting, hardware swaps, lighting, and organization upgrades. It preserves your layout while modernizing style and function. From our base near 11 Edvac Drive, Altima Kitchens and Closets delivers makeovers through factory-direct design, manufacturing, and installation.
By Ashok — Altima Kitchens And Closets
Last updated: 2026-06-02
Quick Summary & Table of Contents
A cabinet makeover updates your cabinets without full replacement. Focus on seven high-impact fixes: hardware swaps, repainting or respraying, refacing doors, trim details, lighting, organization accessories, and panel/backsplash coordination. Below, you’ll learn what it is, why it matters, how it works professionally, and best practices from our Brampton factory.
- What a cabinet makeover includes—and what it doesn’t
- When to choose paint vs. refacing vs. replacement
- 7 easy fixes to refresh style fast (without changing layout)
- Professional workflow: design, prep, finishing, and install
- Best practices from our Italian CNC shop and spray booth
- Tools and resources you’ll actually use
- Mini case studies across the GTA for real-world ideas
What Is a Cabinet Makeover?
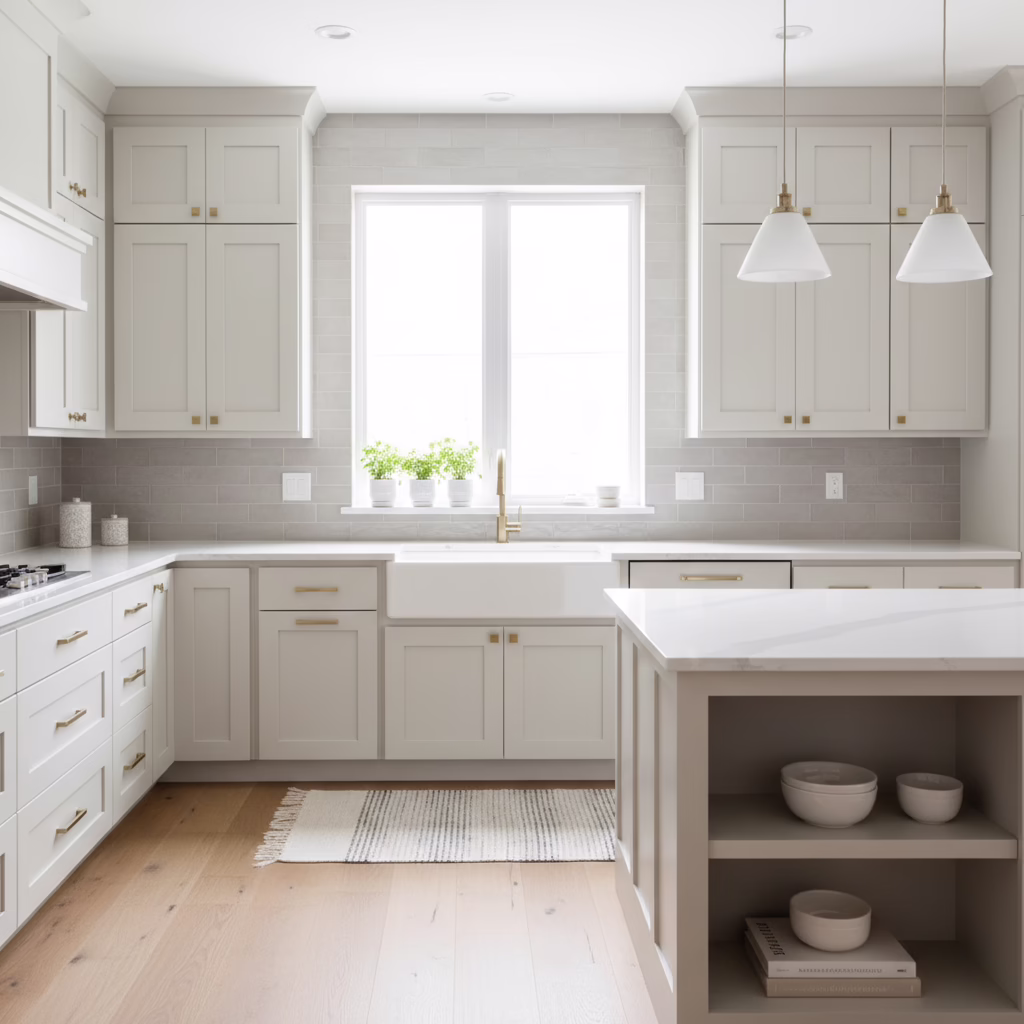
A cabinet makeover modernizes the look and function of existing cabinets using surface-level upgrades—like repainting, refacing, new hardware, lighting, and storage accessories—while keeping the cabinet boxes and layout. It’s ideal when boxes are structurally sound, doors are dated, and you want a faster transformation with minimal disruption.
A makeover focuses on cosmetic and functional upgrades:
- Repainting/respraying: Professional-grade coatings deliver a durable, smooth finish.
- Refacing: New door/drawer fronts and matching panels/veneers change the style without new boxes.
- Hardware: Pulls, knobs, and hinges refresh touchpoints and usability.
- Lighting: Valance lights or under-cabinet LEDs brighten work zones.
- Organization: Pull-out pantries, spice pull-outs, and lazy Susans boost storage.
In our experience, most kitchens benefit from a mix of two or three tactics. For example, one GTA condo owner paired refacing with a slim pull-out pantry and new LEDs to solve both style and storage in a tight galley.
Why a Makeover Matters in the GTA
A cabinet makeover reduces disruption, keeps your existing layout, and shortens timelines while elevating style and storage. It’s practical for busy GTA households, condo rules, and tight schedules. You’ll modernize finishes, improve lighting, and add organizers without extensive demolition or long downtime.
- Less downtime: Repainting or refacing typically avoids major demolition, keeping your kitchen usable during phases.
- Layout preserved: Keep working triangle and appliance locations while updating finishes and function.
- Storage gains: Accessories like pull-out pantries can add dozens of linear inches of organized storage inside the same footprint.
- Sustainability: Reusing cabinet boxes diverts heavy materials from landfill and reduces transport emissions.
- Condo-friendly: Makeovers align with many condo rules because they involve less noise, debris, and elevator bookings.
Homeowners often pair a cabinet refresh with coordinated upgrades—like a new backsplash, quartz countertops, or a custom media unit elsewhere—to unify the home. For whole-space planning ideas, explore our renovation guide.
How a Professional Cabinet Refresh Works
A professional cabinet refresh follows a structured design-build workflow: assess cabinet condition, finalize 2D/3D design and finishes, remove doors and hardware, prep and finish surfaces in a controlled spray booth, and reinstall with precise alignment and lighting/organizer add-ons. Documentation and quality checks close out the project.
- Design + visualization: We map your current layout, then present finishes via 2D/3D drawings so you can preview color, sheen, and door profiles before build.
- Manufacturing plan: Our Italian CNC sets door profiles accurately; cabinet panels are cut for exact reveals; organizers are specified to fit.
- Controlled finishing: A professional spray booth delivers even film build and a smooth, consistent sheen.
- On-site upgrades: Doors, panels, lighting, and organizers are installed; hinges are tuned for proper overlay and soft-close action.
- Quality sign-off: We review reveals, clearances, lighting zones, and door alignment, then provide care instructions.
Want a paint deep dive? See our internal walkthrough on how to paint kitchen cabinets—it covers prep, primers, and curing times step-by-step.

7 Easy Fixes for a Fresh New Style
The fastest cabinet makeover wins come from seven moves: swap hardware, repaint/respray, reface doors, add trim, install under-cabinet lighting, integrate organizers, and coordinate end panels/backsplash. These changes deliver a modern look and better daily function without changing your layout.
- Swap hardware: Update pulls/knobs and consider a new backplate to cover old holes. Pair brushed brass or matte black with modern shaker doors. Our hardware selection guide shows profiles that fit most hand sizes.
- Repaint or respray: A professional respray evens out grain and delivers a durable surface. Neutral mid-tones or soft whites pair well with warm wood floors. For color direction, explore current palettes like soft taupe, greige, and muted greens discussed in recent color roundups.
- Reface doors: Change door style (shaker, slim shaker, slab) and finish while keeping boxes. Matching edge banding and finished panels complete the look. See a process overview in this third-party refacing guide.
- Add trim and valances: Crown, light valance, and toe-kick updates create a built-in, tailored feel. We cut trim with Italian CNC accuracy for tight, clean corners.
- Under-cabinet lighting: LED strips make prep safer and show off backsplash texture. Aim for a consistent run with diffusers to avoid hot spots.
- Organization accessories: Boost function with a pull-out pantry, lazy Susan, spice pull-out, tray dividers, and deep drawer inserts. Accessories often recapture unused corners and tall cabinet zones.
- Coordinate panels and backsplash: Finish exposed cabinet sides with new panels and align backsplash patterns (like a herringbone) to the hood centerline for symmetry.
Each move is modular—start with hardware and lighting, then layer in refacing or organizers when you’re ready. For more makeover ideas tied to space planning, scan our before-and-after ideas.
Methods Compared: Paint, Reface, Replace
Choose painting when boxes are solid and you like the door style. Choose refacing when boxes are solid but you want a new style. Choose full replacement when boxes are damaged, layout must change, or you’re adding features like new appliance towers or islands.
| Method | Scope | Skills/Setup | Typical Use Case | Pairs Well With |
|---|---|---|---|---|
| Repaint/Respray | Doors/panels finished; boxes cleaned and scuff-sanded | Spray booth or pro sprayer; controlled environment | Boxes are sturdy; you like current door style | New hardware, backsplash, lighting |
| Refacing | New doors/drawers; finished panels/veneers; hardware | Precision measuring, CNC cutting, pro finishing | Boxes are solid; want a new door profile and color | Quartz counters, organizers, valances |
| Replacement | New boxes, doors, layout updates | Full design-build; more trades coordination | Boxes failing; layout changes; appliance upgrades | Flooring, plumbing fixtures, lighting plan |
If you’re on the fence, this third-party overview pictures the decision points between a full remodel and updating cabinets only: remodel vs. cabinet replacement.
Best Practices from Our Brampton Factory
Factory-direct production improves fit, finish, and speed. Our CNC-cut doors and panels, professional spray booth, and in-house installers reduce rework and keep timelines predictable. Add clear 2D/3D drawings and itemized quotes, and you get control from design through installation.
- Visualize first: Approve 2D/3D designs before finishing. You’ll confirm color, sheen, reveals, and trim details in advance.
- Prep like a pro: Clean, degrease, scuff-sand, prime appropriately, and allow recommended cure time before reassembly.
- Use pro coatings: Controlled spray-booth finishing yields a smoother, more consistent film build than brush-only workflows.
- Door profile selection: Slim-shaker and slab styles deliver modern lines and are easier to keep clean.
- Accessory fit: Specify organizers to internal dimensions. Pull-outs should clear hinges and face frames comfortably.
- Lighting layout: Mount LED strips to illuminate work zones evenly; hide drivers inside accessible cabinets.
- Documentation: Keep a finish schedule and hardware list. It simplifies any future touch-ups or additions.
For whole-kitchen planning beyond cabinets, see our step-by-step on how to plan a kitchen renovation. It pairs well with a focused cabinet refresh.

Tools and Resources You’ll Actually Use
You don’t need a full shop to tackle small upgrades. A focused toolkit—paired with pro visualization and finishing resources—covers most makeovers. Start with layout planning, then handle hardware, lighting, and organizer installs; leave spray finishing and refacing to a controlled booth for best results.
Essential homeowner toolkit
- Measuring tape, layout square, and painter’s tape
- Screwdrivers, drill/driver, countersink bit, and level
- Stud finder and wire detector for safe lighting runs
- Degreaser, scuff pads, tack cloths, and protective gloves
- Quality caulk and wood filler for trim touch-ups
Pro resources to lean on
- 2D/3D design: We preview color, door profiles, and trim so you can sign off before build.
- Spray finishing: Our booth provides consistent temperature, humidity, and overspray control.
- Itemized quotes: Clear line items and upgrade options simplify decision-making without surprises.
- Installation: In-house installers align doors, tune soft-close hinges, and hide wiring cleanly.
Bookmark our maintenance tips to keep finishes looking fresh: maintain your kitchen cabinets.
Case Studies and Before/After Ideas
Real projects show how small moves create big change. Below are nine quick scenarios across GTA homes—condos, townhomes, and detached houses—highlighting how hardware, lighting, refacing, and organizers can work together to deliver a modern, functional space.
- GTA condo galley: Slim-shaker refacing + continuous LED strip + spice pull-out improved prep visibility and storage in a narrow footprint.
- Brampton family kitchen: Resprayed uppers in warm white with matte black pulls; a lazy Susan stabilized corner storage.
- Mississauga townhome: Hardware swap + light valance + panel refresh created a built-in look without moving boxes.
- Oakville entertainer’s space: Refaced doors, quartz counters, and a matching custom bar for a cohesive main floor.
- Vaughan modern update: Slab doors with integrated channel pulls; under-cabinet LEDs emphasized linear lines.
- Downtown Toronto condo: Repainted lowers in muted green; organizers transformed a tall pantry into zones for baking gear.
- Etobicoke bungalow: New crown and toe-kick; tray dividers finally tamed cutting boards and baking sheets.
- Scarborough rental refresh: Durable respray and easy-to-clean slab doors balanced style with maintenance needs.
- North York family hub: Refaced peninsula with panels; a coordinated backsplash tied the kitchen to the family room media wall.
If you’re considering a broader refresh, our kitchen remodels overview shows sequencing ideas—what to do before counters, floors, and paint for a cleaner install path.
Local considerations for 11 Edvac Drive
- Plan installs around peak GTA move-in seasons; book design reviews early to secure preferred timelines for spray finishing and refacing.
- Consider winter humidity: finish schedules and acclimation matter for wood doors and trim to stay true through seasonal swings.
- For condos, coordinate elevator bookings and quiet hours; makeovers with less demolition typically fit building policies more smoothly.
Free 3D visualization session: Book a showroom consult to preview colors, door profiles, and lighting before build. We’ll walk you through organizers that fit your exact cabinet interiors and recommend a finishing path.
Frequently Asked Questions
Homeowners ask about paint vs. refacing, timeline, durability, condo rules, and when replacement is smarter. These answers focus on practical choices and how our design-build process reduces uncertainty with 2D/3D visualization, itemized scopes, and in-house manufacturing and installation.
What’s the difference between repainting and refacing?
Repainting or respraying keeps your current doors and updates the finish. Refacing replaces doors and drawer fronts, then adds matching panels or veneers to visible cabinet sides for a brand-new style. Choose repainting if you like your door profile; choose refacing if you want a different look.
How do I know if my boxes are good candidates?
If cabinet boxes are sturdy, square, and free of moisture damage, they’re usually good for repainting or refacing. Doors should open and close without rubbing. If boxes are failing or you need layout changes, full cabinet replacement is likely the better path.
Will a makeover work in a condo with building rules?
Yes. Makeovers usually involve less noise and debris, which fits condo guidelines more easily than major renovations. We help plan elevator bookings, protection, and timing so refacing, repainting, lighting, and organizers fit building policies.
Can I add organizers during refacing?
Absolutely. Pull-out pantries, spice pull-outs, tray dividers, and lazy Susans integrate seamlessly during refacing or repainting. We size accessories to your interior dimensions, confirm clearances, and tune soft-close hardware during installation for smooth motion.
What should I update alongside a cabinet makeover?
Popular pairings include a new backsplash, quartz countertops, under-cabinet lighting, and end panels. These elements complete the look and improve daily function. For broader sequencing, review our step-by-step kitchen planning guide.
Conclusion and Next Steps
A cabinet makeover is the smartest way to refresh style and storage without changing your layout. Start with hardware and lighting, then layer repainting or refacing and organizers. Visualize in 3D, finish in a spray booth, and install with care for lasting results.
Key takeaways
- Use seven modular moves—hardware, paint, refacing, trim, lighting, organizers, panels/backsplash—for fast impact.
- Keep boxes and layout when they’re solid; replace only when structure or layout demands it.
- Factory-direct finishing, CNC doors, and in-house installation reduce rework and keep schedules on track.
- Pair upgrades with backsplash or quartz counters for a cohesive finish.
Action steps
- Book a 3D design consultation to preview colors and door profiles.
- Decide between repainting and refacing based on door style and box condition.
- Select hardware and organizers that fit hand feel and cabinet interiors.
- Plan lighting runs and panel finishes to complete the look.
Ready to see options in person? Schedule a showroom visit and book a discovery session near 11 Edvac Drive to review finishes, organizers, and lighting hands-on.
Related Posts

Why Choose Kitchen Renovation Company
Nowadays, Kitchen spaces are not only a place for cooking and serving food, but these areas act as a statement, as they speak a lot about a family, the philosophy and personality of individuals, and spaces. If you admire aesthetics and adorn the beauty of your home, you must pay attention to the interior design […]
How a Kitchen Renovation Contractor is Changing the Game
Lifestyle is all about bringing something coherent to the overall experience of living. The kitchen and closets stand as two of the most influential spaces in a home that add to the overall experience of living. A Kitchen Renovation Contractor in Whitby by the name of Altima Kitchen and Closets Inc. is changing the overall […]
How Media unit contractor in Whitby is Changing the Game
Lifestyle is all about bringing something coherent to the overall experience of living. The kitchen and closets stand as two of the most influential spaces in a home that add to the overall experience of living. A Media Unit Company in Whitby by the name of Altima Kitchen and Closets Inc. is changing the overall […]