Pull-Out Pantry Organizer Systems: Save Space & Find Food Faster
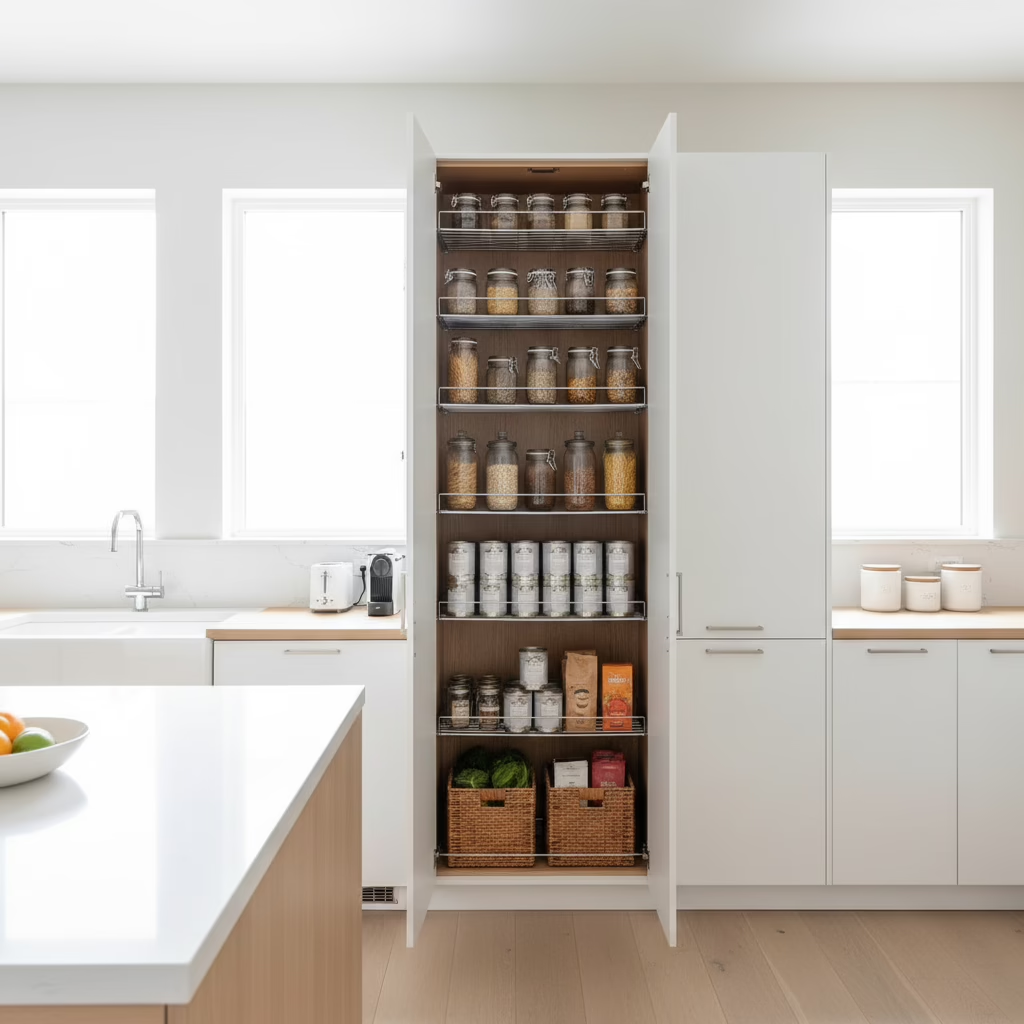
Pull-out pantry organizer systems are tall or base cabinet inserts with full-extension slides that bring shelves, baskets, and bins out to you. They maximize vertical space, keep items visible, and reduce food waste by ending back-of-the-shelf blind spots. In kitchen remodels, these systems speed up prep, cut clutter, and make storage more ergonomic.
By Ashok — Altima Kitchens and Closets
Last updated: April 19, 2026
Quick Summary
Pull-out pantry organizer systems convert hard-to-reach cabinet space into slide-out, clearly arranged storage. Choose the right frame, slides, and baskets, plan categories, and integrate lighting. For GTA homeowners, pairing pull-outs with professional design and factory-built cabinets ensures a perfect fit and long-term durability.
- What you’ll learn: Definitions, benefits, components, types, layout rules, installation steps, and upkeep.
- Who it’s for: GTA homeowners and condo owners who want faster, tidier meal prep and better use of space.
- Why Altima: In-house design + factory-direct cabinetry, 2D/3D layouts, lifetime warranty on select doors, and seamless install.
Quick Answer
Pull-out pantry organizer systems turn deep, hard-to-reach cabinets into smooth-gliding, full-visibility storage. At our Brampton showroom and factory at 11 Edvac Drive, Altima Kitchens and Closets designs, manufactures, and installs custom pull-outs so GTA homeowners can organize faster and find food in seconds.
What Are Pull-Out Pantry Organizer Systems?
A pull-out pantry organizer system is a cabinet interior fitted with a slide-out frame and baskets or shelves that extend fully for instant access. It uses vertical space efficiently, keeps categories visible, and reduces bending or hunting for items in the back of the cabinet.
- Core definition: A tall or base cabinet insert on full-extension slides that pulls entirely out, revealing organized shelves/baskets front to back.
- Main components: Frame, slides (soft-close recommended), shelves/baskets (wire or solid), vertical dividers, and optional door-mount kits.
- Cabinet formats:
- Tall pantry: 84–96 inch cabinet housing a multi-shelf pull-out “tower.”
- Base pull-out: 9–15 inch wide unit for oils, sauces, and spices near the range.
- Wall pull-out: Narrow spice and baking inserts above counters.
- Use cases: Weekly groceries, bulk storage, kids’ snacks at reachable heights, baking centers, coffee/tea stations, and specialty diets.
- Why it’s different: Unlike fixed shelves, you bring the contents out to you, eliminating blind corners and back-row waste.
For space-challenged layouts, we often pair tall pull-outs with base spice racks and a blind-corner solution. Our small kitchen tips to maximize space outline how to layer accessories for daily efficiency.
Why Pull-Out Pantry Organizer Systems Matter
Pull-out pantry organizers boost capacity, visibility, and speed. They cut food waste by keeping items in sight, reduce duplicate buys, and make prep zones smoother. For multi-cook households, they prevent traffic jams and keep essentials within reach without opening multiple doors or bending repeatedly.
- Faster prep, fewer steps: Everything slides out at once, so ingredients and snacks are visible and reachable in seconds.
- Less waste: Clear sightlines help you use what you have before it expires.
- Ergonomics: Full-extension slides reduce bending, twisting, and shoulder strain.
- Better zoning: Create stations (baking, breakfast, coffee) so family members find items without crowding the cook.
- Condo advantage: Narrow inserts turn shallow or tight kitchens into high-performance spaces without knocking down walls.
- Design-backed results: Industry groups like the National Kitchen & Bath Association highlight organized storage as a top remodel priority, reflecting what we hear in GTA consultations.
In our experience across Toronto and Brampton, families reclaim 10–15 minutes per meal routine when pantries are categorized and visible. That time compounds weekly—especially for parents juggling lunches and evening meals.
How Pull-Out Pantry Organizer Systems Work
These systems combine a rigid frame with full-extension slides and adjustable baskets. The frame anchors to the cabinet box, the slides carry the load smoothly, and shelves move as one unit. Door-mounted kits let the door pull the entire frame forward for single-motion access.
- Frame and anchor points: Fastened at top and bottom for rigidity; critical for tall pantry heights.
- Slides: Choose full-extension, soft-close slides with tested weight ratings to prevent sagging and racking.
- Shelves/baskets: Wire baskets maximize visibility; solid sides prevent tip-overs for loose packets and baking goods.
- Door-mount option: The door connects to the frame so one pull moves the entire unit—no extra reach inside.
- Adjustability: Move baskets to fit cereal boxes, bulk items, or appliances.
- Lighting: Add LED strips with door-activated switches to illuminate contents automatically.
For retrofits and new builds, our team aligns hardware specs with cabinet construction during design. See our broader process in this Toronto kitchen renovation overview to understand how accessories slot into a full plan.

Types and Approaches
Pick the format that matches your layout: tall pantry “tower” pull-outs for bulk storage, base pull-outs for oils and spices near the cooktop, narrow wall pull-outs for baking, and blind-corner pull-outs to reclaim dead space. Mix formats to create purpose-built zones.
Tall Pantry Pull-Outs
- Best for: Families, bulk buyers, weekly stock-ups, and snack visibility.
- Widths: Commonly 18–24 inches; ensure frame and slide ratings suit expected loads.
- Pro tip: Stagger basket heights—heavy items mid-level, kids’ snacks lower, fragile items higher.
Base Cabinet Pull-Outs
- Best for: Oils, sauces, baking sheets, cutting boards, and small appliances.
- Widths: 9–15 inches for spices and oils; 12–18 inches with tall dividers for trays and boards.
- Pro tip: Keep oil pull-outs on the “non-hot” side of the range to protect shelf finishes.
Wall and Narrow Pull-Outs
- Best for: Spices, teas, baking ingredients, and vitamins.
- Visibility: Wire sides keep labels visible; consider solid sides for powders or loose items.
- Pro tip: Pair with under-cabinet lighting for easy label reading.
Blind-Corner Solutions
- Options: Swing-out shelves, kidney pull-outs, or “magic corner” units to capture dead zones.
- When to choose: L-shaped kitchens where a tall pantry won’t fit or would block sight lines.
Comparison: Formats at a Glance
| Format | Ideal Uses | Pros | Watch-outs |
|---|---|---|---|
| Tall pantry pull-out | Bulk items, snacks, cereal, appliances | Massive capacity, one-motion access | Requires strong anchoring and precise leveling |
| Base pull-out | Oils, sauces, baking sheets, cutting boards | Perfect near cooktop; rescues narrow gaps | Heat and drips demand wipeable finishes |
| Wall/narrow pull-out | Spices, teas, vitamins, baking jars | Labels visible, easy grab-and-go | Limit heavy items to avoid sway |
| Blind-corner unit | Corner storage, pots, pantry refills | Reclaims dead space efficiently | Requires accurate measurements and swing clearance |
Best Practices for Planning and Use
Start with categories, then measure and map basket heights to your most-used items. Place heavy goods between knee and shoulder height, add lighting for visibility, and label sub-zones. Confirm door swing, slide ratings, and clearances before ordering or installing.
- Inventory first: List what you actually store—snacks, cans, baking, breakfast, coffee/tea, pet food, vitamins.
- Assign zones: One zone per shelf; avoid mixing “wet” (oils) and “dry” (flour) categories.
- Measure reality: Height of cereal boxes, mason jars, and refill containers informs basket spacing.
- Weight and reach: Heavy items mid-level; kids’ snacks low; fragile jars higher.
- Finishes that last: Wipeable shelf liners near oils; choose corrosion-resistant wire or sealed solid sides.
- Lighting: Motion or door-activated LED strips reveal back labels instantly.
- Label lightly: Use unobtrusive bin labels for quick resets after grocery runs.
- Traffic flow: Keep primary pull-outs away from fridge door swing and the oven handle zone.
- Condos: Narrow pull-outs beside the range can replace a full pantry without overcrowding.
We often combine pantry planning with backsplash and counter selections because material thickness, outlet placement, and appliance depths influence clearances. If you’re renovating, these finish upgrade insights help align aesthetics with storage practicality.
Tools and Resources (What We Provide and What You’ll Need)
Success comes from precise measurement, the right slides, and a frame built for your cabinet box. Altima provides 2D/3D designs, in-house manufacturing, and professional installation so your pull-outs glide smoothly, sit level, and last for years of daily use.
What You’ll Need (DIY or Planning Phase)
- Measuring tools: Tape measure, square, level, and story stick for basket heights.
- Fasteners and brackets: Manufacturer-specified screws, top/bottom anchors, and door-mount hardware.
- Slides: Full-extension, soft-close slides with appropriate load ratings.
- Frame and baskets: Compatible with your cabinet’s interior width and depth.
- Lighting (optional): LED strip, door switch, driver, and cable management clips.
What Altima Brings to the Table
- 2D/3D design: We model your exact groceries and small appliances to set basket heights before fabrication.
- Factory-direct cabinetry: Built in our Brampton facility using Italian CNC machinery and a professional spray booth for consistent quality.
- Installation team: In-house pros square, level, and anchor frames to spec so slides operate smoothly.
- Lifetime-backed door options: MDF Painted and Prelaminated doors with lifetime warranty give your pantry a durable face.
- Financing support: Flexible options with 0% down help you tackle storage upgrades within a full kitchen plan.

Free Design Chat (Soft CTA)
Want your pull-out pantry to fit perfectly the first time? Book a design chat with our in-house team at 11 Edvac Drive. We’ll map zones, set basket heights, and preview the look with 3D design—then build and install it end-to-end.
Real-World Examples (GTA Projects)
Altima’s GTA projects show how pull-out pantries transform routines. From narrow condo kitchens to busy family hubs, we size frames to the groceries you buy most and position zones to shorten prep paths and reduce clutter on counters.
- Toronto condo galley: Replaced a 24-inch pantry cabinet with a tall pull-out tower plus a 9-inch base spice pull-out near the range. Result: faster weeknight meals and clear counters.
- Brampton family kitchen: Added a tall pull-out with mid-level heavy baskets for bulk snacks and a lower kids’ zone. Result: fewer duplicate purchases and smoother mornings.
- Vaughan baker’s setup: Narrow wall pull-out for spices and extracts, base pull-out for sheet pans, and LED-lit tall pantry for flours and jars. Result: easy mise en place and less bending.
We coordinate accessories within the full renovation timeline—demo, cabinetry, counters, and backsplash—so every clearance, outlet, and door swing is dialed in. See how we organize full projects beyond the core downtown market in our Pickering kitchen renovation notes.
Local Tips
- Tip 1: If you’re visiting our showroom at 11 Edvac Drive (Units #13–19), plan around weekday rush on Steeles Ave and Bramalea Rd; bring a quick phone inventory of your pantry so we can size baskets on the spot.
- Tip 2: GTA humidity swings mean seasonal wood movement. We align clearances and adjust hardware so slides stay true year-round.
- Tip 3: Booking design and install together keeps one accountable team. Our factory-direct model helps synchronize parts, finishes, and timing for a clean handoff.
IMPORTANT: These tips help you get the most from a design consult and a hands-on showroom demo before fabrication.
Installation Guide (When to DIY and When to Call Us)
DIY is feasible for narrow base pull-outs if you’re comfortable measuring, leveling, and anchoring slides. For tall pull-outs, pro installation is best to ensure rigidity, smooth travel, correct door alignment, and long-term reliability under daily loads.
Step-by-Step Overview
- Confirm cabinet interior size: Measure width, depth, and height; account for hinges and face frames.
- Mark anchor points: Use a level to set top and bottom brackets square and plumb.
- Install slides and frame: Fasten per manufacturer sequence; verify glide is smooth at full extension.
- Set basket heights: Load mock items (cereal boxes, jars) and adjust for finger clearance.
- Door-mount (if applicable): Align door to frame; check reveals and adjust screws for an even gap.
- Add lighting: Install LED strip and door switch; route cables cleanly.
- Final test: Load gradually, test travel, and re-tighten hardware after 48 hours.
Common Mistakes to Avoid
- Ignoring load ratings: Overloading accelerates slide wear and causes racking.
- Skipping shims: Out-of-plumb cabinet boxes need shims for true slide alignment.
- Door misalignment: Adjust hinges and mount brackets to avoid rubbing and premature finish wear.
- Poor cable routing: Lighting wires must be secured to prevent snagging during travel.
Maintenance and Troubleshooting
Keep slides clean, check fasteners annually, and re-level baskets if you change categories. For squeaks or drag, vacuum debris from slides and verify mounting screws. If sway appears under heavy loads, move dense items to mid-level shelves and re-tighten anchors.
- Seasonal check: GTA humidity changes can alter clearances—re-check reveals in spring and fall.
- Slide care: Most soft-close slides are sealed; avoid solvents and use a dry cloth or vacuum brush.
- Finish care: Wipe oil drips promptly; use liners on leak-prone shelves.
- Hardware tune-up: Tighten set screws on door-mount plates annually.
- Re-categorize: After back-to-school or holiday seasons, reset zones to current habits.
FAQ: Pull-Out Pantry Organizer Systems
Plan for fit, load capacity, and daily habits. Choose slides with proper weight ratings, set shelf heights to your tallest containers, and place heavy goods between knee and shoulder level. Professional installation ensures smooth travel and long-term reliability.
- How do I choose the right size?
Measure your cabinet interior width, height, and depth. Then measure your tallest items—cereal boxes, bottles, and jars—to set basket spacing. Leave finger clearance so labels are readable and grabbing is effortless. - Are pull-out pantries strong enough for bulk goods?
Yes—when slides and frames are matched to the load. Use full-extension, soft-close slides with appropriate ratings, and distribute heavy items at mid-level to limit sway and wear. - Can I retrofit an existing cabinet?
Often. We evaluate hinge interference, interior width, and anchoring points. If the box is square and sound, a retrofit frame with door-mount hardware can deliver a near-built-in result. - What’s better—wire baskets or solid sides?
Wire maximizes visibility and airflow; solid sides secure packets and powders. Many homes mix both: wire for cans and jars, solid for baking goods and snacks. - Do I need lighting?
Not mandatory, but door-activated LED strips improve visibility and reduce rummaging, especially in tall, deep cabinets.
Key Takeaways
- Design first: Inventory, categorize, and map shelf heights before ordering.
- Right hardware: Full-extension, soft-close slides matched to real loads.
- Ergonomics matter: Heavy mid-level, labels visible, kids’ snacks low.
- Pro fit lasts: Factory-built cabinets and pro installation keep slides smooth for years.
- Local help: Visit our Brampton showroom at 11 Edvac Drive to see working display units.
Conclusion
Pull-out pantry organizer systems deliver instant access, better visibility, and smarter use of every inch. When paired with professional design and factory-direct cabinetry, they transform daily routines—cutting clutter and saving time without expanding your footprint.
- Your next step: Bring a list of your staple items and a few container measurements to our showroom.
- What we’ll do: Build a 2D/3D model, align accessories with appliances and finishes, and manufacture in-house for a precise install.
- Where to start: Explore our kitchen renovation process to see how storage planning integrates into the full project.
Related Articles
Explore complementary topics on planning zones, lighting, and finish coordination in our blog. You’ll find guides on small-kitchen layout strategies, cabinetry finishes, and full renovation workflows tailored to GTA homes.
Related Posts

Why Choose Kitchen Renovation Company
Nowadays, Kitchen spaces are not only a place for cooking and serving food, but these areas act as a statement, as they speak a lot about a family, the philosophy and personality of individuals, and spaces. If you admire aesthetics and adorn the beauty of your home, you must pay attention to the interior design […]
How a Kitchen Renovation Contractor is Changing the Game
Lifestyle is all about bringing something coherent to the overall experience of living. The kitchen and closets stand as two of the most influential spaces in a home that add to the overall experience of living. A Kitchen Renovation Contractor in Whitby by the name of Altima Kitchen and Closets Inc. is changing the overall […]
How Media unit contractor in Whitby is Changing the Game
Lifestyle is all about bringing something coherent to the overall experience of living. The kitchen and closets stand as two of the most influential spaces in a home that add to the overall experience of living. A Media Unit Company in Whitby by the name of Altima Kitchen and Closets Inc. is changing the overall […]