Hardwood Floors: Cut Install Costs and Stress in 2026
Hardwood flooring installation is the professional layout, fastening, and finishing of solid or engineered wood planks over a properly prepared subfloor. It includes acclimation, layout planning, and careful transitions so the floor performs for decades. At Altima Kitchens and Closets in 11 Edvac Drive, we install hardwood as part of integrated home renovation projects.
By Ashok — Altima Kitchens and Closets | Last updated: May 18, 2026
Overview: hardwood flooring installation at a glance
Hardwood floors succeed when the subfloor is flat, the wood is acclimated, and the right installation method (nail-down, glue-down, or floating) matches the space. Plan expansion gaps, manage humidity, and finish strong with trim and care. This guide explains every step, tool, and decision.
Here’s what you’ll learn in this complete guide designed for GTA homeowners planning floors with Altima:
- How hardwood floors are built, installed, and maintained
- When to choose nail-down, glue-down, or floating systems
- Subfloor prep standards, moisture targets, and layout best practices
- Tools, underlayments, and transition details that prevent future issues
- Step-by-step process you can follow or use to evaluate contractors
- Real GTA examples from our integrated renovation projects
- What is hardwood flooring installation?
- Why hardwood floors matter for GTA homes
- How installation works (step-by-step)
- Installation methods compared
- Best practices for a flawless finish
- Tools, materials, and prep checklist
- Case studies and examples (GTA)
- Frequently asked questions
- Key takeaways and next steps
What is hardwood flooring installation?
Hardwood flooring installation is the process of acclimating, laying out, fastening, and finishing solid or engineered wood planks over a prepared subfloor. Success depends on moisture control, level surfaces, and the correct method for the room. The result is a durable, refinished-in-place surface that adds long-term value.
At its core, hardwood installation blends craftsmanship and building science. Planks expand and contract with seasonal humidity. Subfloors must be flat within tight tolerances. Fasteners, adhesives, and underlayments must suit the wood species and the room’s conditions.
- Two main product types: Solid hardwood and engineered hardwood.
- Three main install methods: Nail/staple, full-spread glue, and floating click-lock.
- Critical conditions: Controlled indoor climate, correct moisture readings, and expansion gaps at perimeters.
Because Altima delivers full design-build renovations, we coordinate hardwood with kitchens, stairs, closets, and media walls so transitions, trim heights, and door clearances work perfectly across the home.
Why hardwood floors matter for GTA homes
Hardwood floors elevate resale appeal, unify open-concept spaces, and handle refinishing. In the GTA climate, humidity swings demand professional planning so gaps, cupping, and squeaks don’t appear. Strategically chosen species, widths, and finishes also align with kitchen and closet millwork for a cohesive design.
Hardwood remains a top upgrade for home renovation because it blends durability with timeless style. Planks with modern matte finishes hide wear better. Wider boards visually calm busy, open-concept layouts. Coordinated stain tones can tie a new kitchen to adjoining rooms for a seamless sightline.
- Design continuity: We align floor species and stain with cabinetry, closet systems, and media units.
- Refinish potential: Solid and many engineered floors can be refreshed years later.
- Sound and comfort: Underlayments improve acoustic performance in multi-story homes and condos.
Local considerations for 11 Edvac Drive
- Seasonal humidity swings in the GTA call for stable indoor ranges; we plan acclimation and recommend ongoing RH control for year-round performance.
- Busy renovation windows around holidays mean schedule coordination matters; we sequence floors with kitchen installs to protect fresh planks.
- Condo rules often control delivery, noise hours, and underlayment ratings; our design-build team manages approvals to keep projects moving.
When we plan hardwood with kitchens, closets, or basements, our in-house teams also manage thresholds, nosings, and trim so every transition looks intentional.
How hardwood flooring installation works (step-by-step)
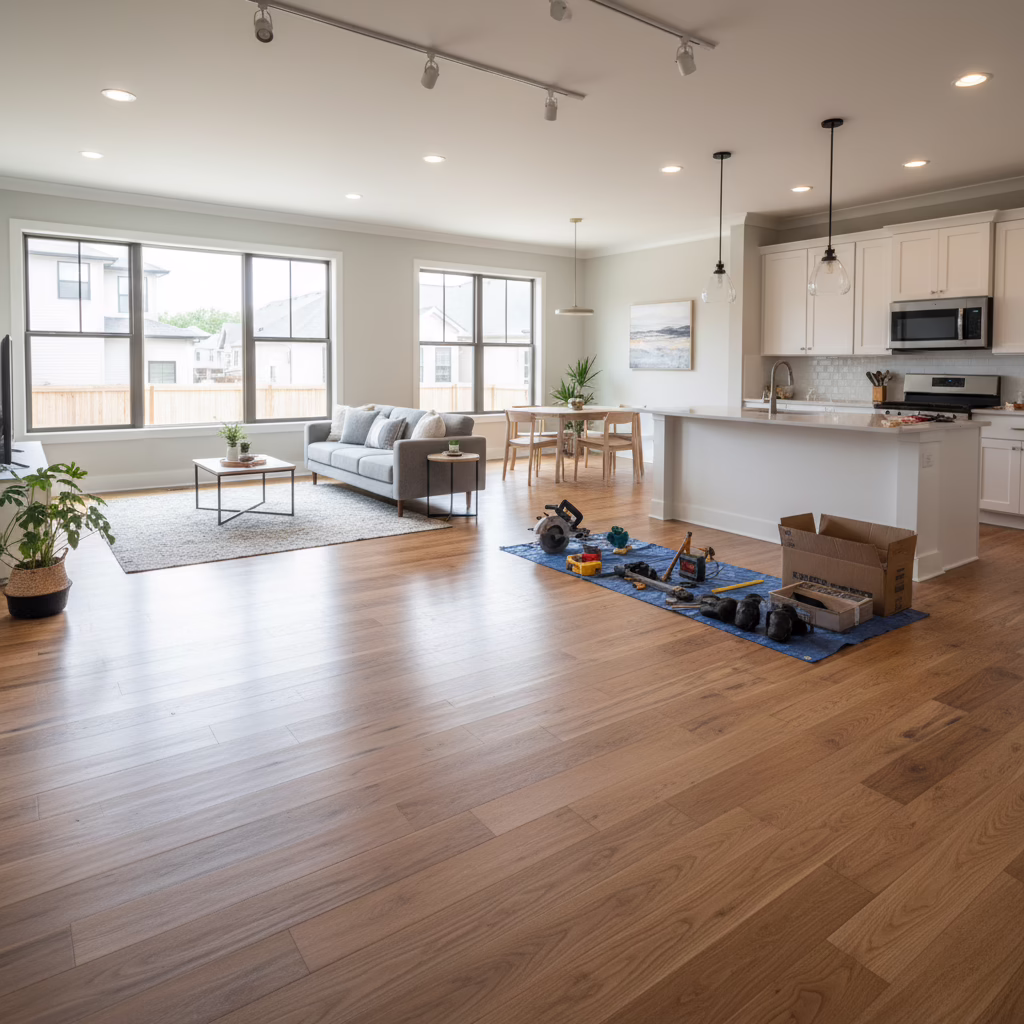
Professional installation follows a proven sequence: assess and flatten subfloors, check moisture and acclimate planks, dry-lay patterns, choose the right method, install with proper spacing, then finish with trim, transitions, and a clean handoff. Each step prevents squeaks, gaps, and premature wear.
Here is the typical workflow our flooring team follows during integrated renovations:
- Assess subfloor flatness: Variations are corrected so the surface is within strict tolerances across spans.
- Moisture checks: We verify subfloor and plank moisture alignment before acclimation.
- Acclimate flooring: Planks rest in the space so temperature and humidity stabilize.
- Layout planning: We center patterns, balance cut sizes, and plan around islands or built-ins.
- Select method: Nail/staple for wood subfloors, glue for slabs or wider engineered, floating for speed and sound control.
- Underlayment and vapor control: Match to subfloor type and condo acoustic needs.
- Installation: Planks are set with expansion gaps and tight joints; rows are racked to blend tones.
- Finish and trim: Base, shoe molding, stair nosings, and transitions complete the look.
- Walkthrough: We review maintenance, furniture pads, and climate targets for long-term performance.
Coordinating with kitchen or closet installations, we protect finished floors during cabinet delivery and adjust filler heights and toe-kicks to new flooring thickness, maintaining clean reveals.

For a deeper dive on project sequencing and region-specific logistics, explore our Toronto flooring installation approach and our GTA-wide flooring installation services—both outline how we manage timelines, materials, and on-site protection.
Hardwood installation methods compared
Choose nail-down for classic wood subfloors, glue-down for slabs or extra-wide engineered planks, and floating for speed and sound control—especially in condos. The correct method depends on subfloor type, plank width, and acoustic targets. Matching method to space improves stability and longevity.
Each method has strengths. The right choice balances subfloor type, plank width, acoustic requirements, and renovation sequencing with kitchens and built-ins.
| Method | Best for | Subfloor | Pros | Watch-outs |
|---|---|---|---|---|
| Nail/Staple Down | Solid hardwood; many engineered planks | Plywood/OSB | Classic feel; strong hold; refinish-friendly | Needs wood subfloor; fastener noise without underlayment |
| Full-Spread Glue | Engineered; extra-wide boards | Concrete slab or plywood | Great acoustic damping; stable over slabs | Requires proper adhesive; cleanup vigilance |
| Floating Click-Lock | Engineered; condo retrofits | Most flat subfloors | Fast install; replaceable boards; condo-friendly underlay | Relies on flatness; edge noise if underlay is thin |
In multi-room renovations, we often pair floating or glue-down floors with acoustic underlayments to hit condo ratings and reduce footfall noise under media units or along bedroom corridors.

If you’re comparing options across neighborhoods, our Mississauga flooring installation page and Oakville flooring installation guide share method-specific considerations for different building types and subfloors.
Best practices for a flawless finish
Great hardwood floors start with flat subfloors, conditioned interiors, and careful layout. Use expansion gaps, rack boards to mix tones, and protect the floor during adjacent renovations. Finish with the right trim, transitions, and furniture pads. Consistency across rooms creates a seamless, durable result.
In our experience delivering kitchen and full-home renovations across the GTA, these practices prevent callbacks and keep floors camera-ready on reveal day:
- Subfloor flatness: Plane, fill, or re-sheath as needed so plank joints stay tight along every run.
- Climate control: Maintain a stable indoor range during and after install to reduce movement.
- Expansion planning: Leave perimeter gaps and use appropriate transitions for long runs or doorways.
- Racking and staggering: Randomize joints and blend boards from multiple boxes for natural color flow.
- Protection sequencing: Install cabinets and heavy built-ins with floor protection in place to avoid compression marks.
- Trim accuracy: Scribe base and shoe moldings to walls for a tight, custom look.
Because Altima manufactures cabinets in-house, we can fine-tune toe-kick heights, panel lengths, and end gables so they land perfectly with new floor thicknesses and transition pieces.
Tools, materials, and prep checklist
Successful hardwood installs use moisture meters, straightedges, appropriate fasteners or adhesives, and acoustic underlay when needed. Prep includes cleaning, leveling, and dry-laying patterns. A clear checklist keeps the crew aligned and reduces rework, especially when kitchens or closets install nearby.
Essential tools and materials
- Moisture meter, long straightedge, chalk line, tapping block, pull bar
- Flooring nailer/stapler, finish nailer, appropriate fasteners
- Adhesive rated for hardwood (if glue-down), notched trowels
- Acoustic/thermal underlayment matched to the building’s requirements
- Spacers, shims, saws (miter, table, jigsaw), dust collection
- Baseboards, shoe molding, thresholds, stair nosings
Pre-install checklist
- Verify subfloor is clean, dry, and flat across the full span.
- Confirm climate control is running and stable indoors.
- Stage materials for acclimation and cross-mix boxes.
- Plan layout from focal walls and around islands or built-ins.
- Protect adjacent finishes and define walking routes.
Want to see how this folds into a broader renovation? Review our Halton Hills flooring process and our region-wide flooring installation service pages for sequencing tips and materials coordination across spaces.
Planning a kitchen and flooring upgrade together? Our design-build team coordinates cabinet heights, appliance clearances, and stair nosings with your new floor. Book a friendly design chat from our GTA showroom.
Case studies and examples (GTA)
Coordinating hardwood with kitchens, closets, and media units prevents awkward transitions. These GTA examples show how method selection, humidity planning, and trim details deliver quiet, stable, and photo-ready results—without disrupting the wider renovation schedule.
Open-concept kitchen refresh
We paired matte-finish engineered oak with a new custom kitchen. Floating installation and acoustic underlay minimized sound transfer to the level below. Cabinet toe-kicks and end panels were set to the new floor height, producing crisp, aligned reveals.
Condo retrofit with acoustic targets
In a condo, glue-down engineered planks over a slab delivered stability and reduced footfall noise. We coordinated elevator delivery windows, protected hallways, and matched transitions to existing tile for a clean threshold at the bathroom doorway.
Basement media room continuity
Engineered planks with a moisture-mindful underlayment unified a basement lounge and media wall. We detailed stair nosings for safe treads and integrated LED toe-kick lighting along the built-in for an elevated look.
To understand neighborhood-specific logistics and scheduling windows, browse our Oakville installation insights and our Mississauga process notes.
Maintenance and aftercare essentials
Maintain hardwood by controlling indoor humidity, cleaning with wood-safe products, and protecting traffic areas. Use felt pads under furniture, lift heavy items, and refresh finishes as needed. Simple habits preserve joints, sheen, and color consistency across rooms.
- Use furniture pads and area rugs at entries and sink zones.
- Clean with manufacturer-approved wood floor products.
- Avoid excess water; wipe spills promptly.
- Run climate control year-round for consistent performance.
- Refresh protective finishes per product guidance.
As part of our handoff, we review maintenance routines and provide guidance on pads, glides, and rug backings so your floor stays photo-ready.
Frequently asked questions
Homeowners ask about acclimation, installation timelines, and which method suits their subfloor. They also want to know how hardwood behaves in kitchens or basements and how to keep floors quiet in condos. These concise answers cover the most common decisions.
How long does acclimation take for hardwood planks?
Most floors benefit from a short acclimation period so temperature and humidity stabilize. We stage materials in the installation space and verify moisture alignment before installation to minimize movement after the floor is locked in.
Which installation method is best for my home?
It depends on your subfloor and goals. Nail-down works great over wood subfloors. Glue-down is ideal for slabs or extra-wide engineered planks. Floating systems are fast and can meet condo acoustic targets when paired with the right underlayment.
Can I install hardwood in kitchens or basements?
Yes, with the right product and planning. Engineered hardwood handles humidity swings better than solid in many cases. We also detail thresholds and use suitable underlayments, then review daily care to manage spills and traffic patterns.
How do you keep floors quiet in condos?
We combine floating or glue-down methods with acoustic underlayments rated for the building’s requirements. Proper subfloor flatness, perimeter spacing, and trim details also reduce edge noise and improve the overall sound profile.
Key takeaways and next steps
Pick the right method for your subfloor, condition the space, and plan transitions early with your renovation team. Professional sequencing with kitchens and closets prevents damage and delivers a seamless look. A short design consult sets the plan—and the floor—on the right track.
- Method, moisture, and flatness drive long-term performance.
- Coordinate floors with kitchens, closets, and media units.
- Use acoustic underlayments to meet condo needs.
- Protect surfaces during adjacent cabinet or appliance work.
- Adopt simple care habits for lasting beauty.
Ready to map your project? Start with our region-wide flooring installation overview, then see local specifics in Mississauga or Oakville. We can coordinate your kitchen, closets, and floors in one streamlined plan.
Design coordination resources
Coordinating floor sheen and color with cabinetry and built-ins reduces visual noise. Reviewing examples of glossy vs. matte finishes and simple millwork guides helps you choose the right undertones and textures so your hardwood pairing looks intentional throughout the home.
When you’re selecting hardwood finishes to match cabinets or media walls, it helps to review trusted finish comparisons and basic millwork guides. For inspiration on sheen and tone transitions, see this practical overview of glossy vs. matte cabinetry. If you’re curious how factory-built components are organized, this simple cabinetry guide is a helpful primer. For high-sheen pairings, this look at high-gloss refinishing can spark ideas for a balanced floor-and-casework palette.
Related Posts

Why Choose Kitchen Renovation Company
Nowadays, Kitchen spaces are not only a place for cooking and serving food, but these areas act as a statement, as they speak a lot about a family, the philosophy and personality of individuals, and spaces. If you admire aesthetics and adorn the beauty of your home, you must pay attention to the interior design […]
How a Kitchen Renovation Contractor is Changing the Game
Lifestyle is all about bringing something coherent to the overall experience of living. The kitchen and closets stand as two of the most influential spaces in a home that add to the overall experience of living. A Kitchen Renovation Contractor in Whitby by the name of Altima Kitchen and Closets Inc. is changing the overall […]
How Media unit contractor in Whitby is Changing the Game
Lifestyle is all about bringing something coherent to the overall experience of living. The kitchen and closets stand as two of the most influential spaces in a home that add to the overall experience of living. A Media Unit Company in Whitby by the name of Altima Kitchen and Closets Inc. is changing the overall […]