Kitchen Design Consultation: Your GTA Renovation Guide
Kitchen design consultation is a focused working session where a professional designer evaluates your space, listens to goals, and translates them into layout options, finishes, and a phased plan. For homeowners in 11 Edvac Drive and across the GTA, a kitchen design consultation aligns style, storage, and workflow early so decisions are confident and projects move smoothly.
By Altima Kitchens And Closets • Last updated: 2026-05-22
Quick summary
A successful kitchen design consultation clarifies how you cook, store, and move, then converts that insight into 2D/3D layouts, material pairings, and a clear renovation roadmap. At Altima, we streamline decisions with factory-direct cabinetry, in-house design/installation, and lifetime-warranty door options—so you preview the result before anyone lifts a tool.
Here’s what you’ll learn now—and use immediately in your planning:
- What a kitchen design consultation covers and why it matters
- How the process works (step-by-step) from discovery to drawings
- Types of consultations: showroom, in-home, and virtual
- Best practices to prep, decide faster, and avoid rework
- Tools and resources we use: 2D/3D design, factory-direct production
- Real GTA examples that show layouts, storage, and finish choices
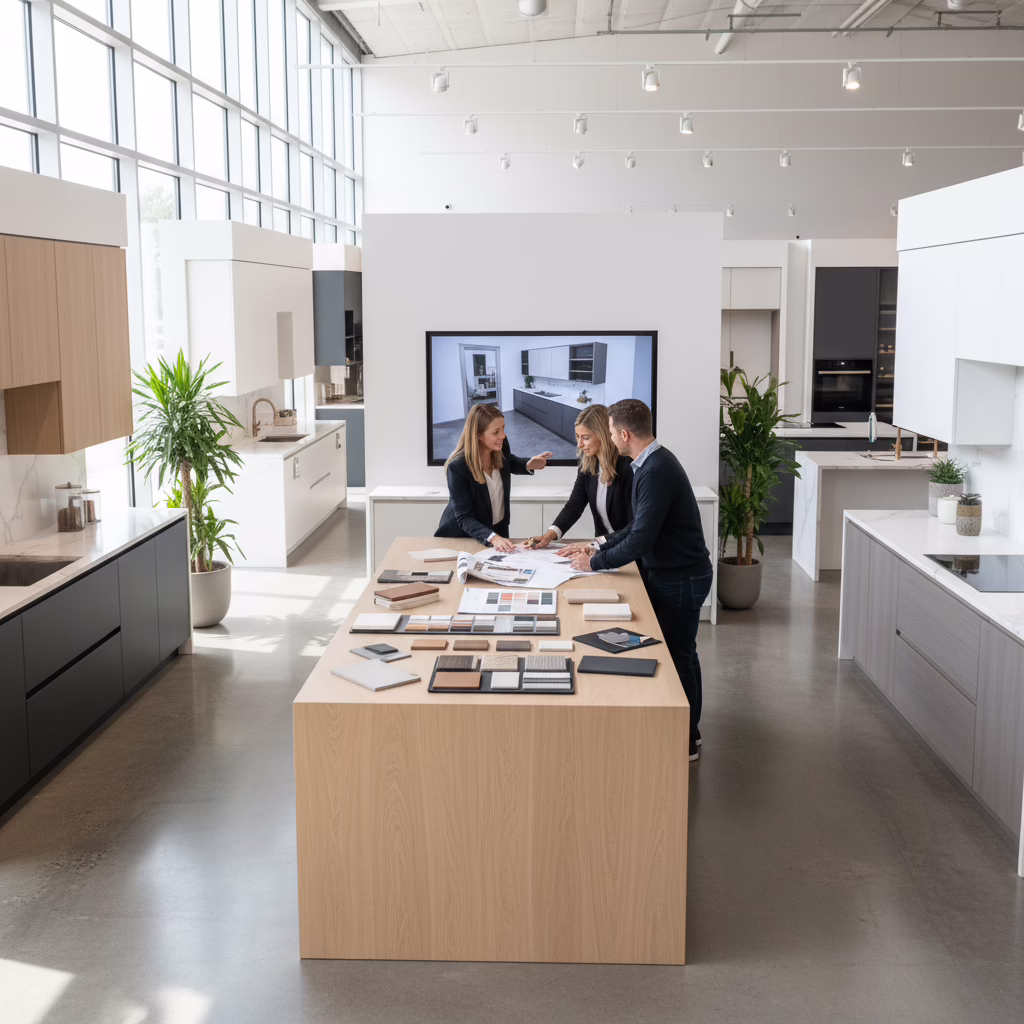
What is a kitchen design consultation?
A kitchen design consultation is a structured meeting where a designer documents your space, cooking habits, and style preferences, then turns that input into layout options and an action plan. The goal is alignment—on function, finishes, and timelines—before any demolition or ordering begins.
At Altima Kitchens And Closets, a consultation is practical and personal. We explore how you prep, cook, clean, and entertain—then map storage zones, lighting layers, and traffic paths. Because we design and manufacture under one roof, you’ll see what’s possible without guesswork.
What gets covered
- Functional goals: Prep surfaces, seating, and appliance placement for your routines.
- Storage priorities: Pull-out pantries, spice racks, lazy susans, tray dividers, and recycling.
- Finish direction: Cabinet door styles, paint or laminate, quartz countertops, backsplash ideas.
- Lighting plan: Task, ambient, and accent—valance and pantry lighting to reduce shadows.
- Constraints: Existing walls, HVAC runs, windows, or condo rules that affect layout.
- Documentation: Measured drawings, notes, and a plan for 2D/3D kitchen design.
Why it matters: design choices made early prevent scope drift and avoid late-stage changes. With itemized quoting and 2D/3D renderings, you choose with confidence, not guesswork.
Why a consultation matters for GTA renovations
The right consultation reduces risk. It exposes constraints, prioritizes must‑haves, and locks design intent before ordering custom cabinetry. That reduces rework, decision fatigue, and delivery delays—especially useful for GTA homes where timelines and condo specifications add complexity.
Here’s the thing—many kitchens fail due to small oversights. An inch lost to a panel or a missed outlet can ripple into weeks of delay. A strong design brief prevents that. We’ve found that documenting appliance models, ventilation needs, and clearances up front saves time on site.
Benefits you feel on day one of the build
- Clarity: You’ll know the exact cabinet line-up, fillers, crown heights, and hardware.
- Speed: With decisions finalized, we manufacture faster in our Brampton facility.
- Coordination: Trades align to drawings—tile setters, electricians, and installers work from the same plan.
- Confidence: 3D views confirm proportions—an island or banquette fits as imagined.
Because Altima is design-build with factory-direct cabinetry, we remove guesswork between designer, fabricator, and installer. That single-point accountability keeps your renovation moving.
How a professional kitchen consultation works (step-by-step)
A professional consultation moves from discovery to measurement, concepting, and 2D/3D drawings, then into material selections and an itemized scope. Each step narrows choices and formalizes decisions so manufacturing and installation proceed without surprises.
Step-by-step process
- Discovery call: Understand goals, timelines, and constraints. Identify must‑haves and nice‑to‑haves.
- Showroom visit or virtual meet: Review door styles, hardware, quartz, and accessories.
- Site measurement: Document dimensions, utilities, bulkheads, and windows; confirm appliance specs.
- Layout concepts: Iterate 2D plans—L‑shape, galley, U‑shape, or island—with storage zones.
- 3D kitchen design: Visualize finishes and proportions; refine details like crown and valance.
- Material pairing: Lock cabinet finish, quartz, backsplash, handles, and lighting approach.
- Itemized scope: Build a clear, structured work plan with selections captured line‑by‑line.
- Production & install window: Sequence manufacturing and on‑site dates; align trades.
Process at a glance
| Phase | Primary output | Your role | Altima’s role |
|---|---|---|---|
| Discovery | Goals and constraints summary | Share routines, inspiration | Guide questions and scope |
| Measure | Verified site dimensions | Provide access, specs | Document and verify |
| Concept | 2D layout options | React, prioritize | Propose and iterate |
| Visualization | 3D renderings | Confirm direction | Refine details |
| Selections | Finish and hardware list | Choose final set | Curate and advise |
| Scope | Itemized work plan | Approve scope | Plan production |
Want to see how we visualize options? Explore our kitchen design process overview with render examples and decision checkpoints.

Types of consultations: showroom, in-home, and virtual
You can meet in our showroom, schedule an in‑home visit, or begin virtually. Showroom sessions accelerate material choices, in‑home visits validate site realities, and virtual meetings are ideal when you’re collecting ideas or coordinating with family.
Strengths of each format
- Showroom: Fastest way to compare styles and colors; see full doors, quartz, and accessories together.
- In‑home: Confirms measurements, light conditions, and appliance clearances for accurate drawings.
- Virtual: Efficient for early planning and sharing screens to review 2D/3D layouts from anywhere.
Comparison table
| Type | Best for | What you’ll see | Typical next step |
|---|---|---|---|
| Showroom | Material decisions | Cabinet doors, quartz, hardware, lighting ideas | Schedule site measurement |
| In‑home | Layout validation | Real conditions, utilities, traffic flow | Create 2D/3D drawings |
| Virtual | Early alignment | Shared screen with plans and renderings | Book showroom or in‑home |
Prefer to start hands-on? Book a session through our consultation page and we’ll tailor the format to your timeline.

Best practices to get the most from your consultation
Arrive with priorities, appliance preferences, and a few inspiration images. Clear goals and decisions about how you cook—daily prep, batch cooking, or entertaining—help your designer propose the right storage, lighting, and layout faster.
Prep checklist
- Define three goals: e.g., more prep space, seating for four, and hidden charging.
- Bring inspiration: 6–10 photos that show door style, color tone, and countertop veining.
- List appliances: Confirm models and rough sizes to guide cabinet and clearance decisions.
- Note routines: Coffee station? Baking zone? Kids’ snacks? These drive cabinet inserts.
- Identify constraints: Condo rules, ventilation needs, or walls you want to keep.
Decision accelerators
- Zones over triangle: Plan prep, cook, clean, and serve zones; it reflects modern cooking.
- Lighting layers: Combine task and ambient light; valance lighting reduces shadows on counters.
- Storage within reach: Pull‑out pantry and spice pull‑outs reduce extra steps while cooking.
- Surface durability: Quartz handles daily wear; pair with a backsplash that’s easy to clean.
- Future‑proofing: Leave space for taller appliances or adding a steam oven later.
Curious how layouts become drawings? Walk through our custom kitchen renovations guide next.
Tools and resources we use at Altima
We combine showroom resources, 2D/3D modeling, and factory-direct cabinetry to translate ideas into buildable drawings. In‑house manufacturing with Italian CNC machinery and a professional spray booth keeps quality high and timelines predictable.
Design and visualization
- 2D kitchen plans: Cabinet schedule, clearances, and insert list for precise planning.
- 3D kitchen design: Photo‑real perspectives to evaluate island size, crown heights, and lighting.
- Finish boards: Door samples, quartz chips, backsplash swatches, and hardware in one view.
Manufacturing and quality
- Factory‑direct cabinetry: Built in our facility; better control over fit and finish.
- Italian CNC: Consistent accuracy for cabinet parts and custom door profiles.
- Spray booth finishing: Smooth, durable coatings; lifetime warranty on select doors.
Project coordination
- Itemized scopes: Transparent, line‑by‑line documentation of selections and work.
- Single‑team delivery: In‑house designers and installers reduce handoffs.
- Clear communication: Checkpoints at concept, 3D sign‑off, and pre‑production.
Ready to preview styles? Browse custom kitchen design ideas for GTA homes for inspiration we translate into your drawings.
Local considerations for 11 Edvac Drive
- Plan lead times around peak renovation seasons in the GTA; showroom bookings fill up quickly during spring and fall.
- Account for winter conditions when scheduling deliveries and on‑site work; protect floors and entryways for smooth installs.
- Condo projects often require advance approvals; bring building guidelines to your consultation to streamline drawings.
Real‑world examples from GTA projects
Examples show how small choices change daily life. From a tight condo galley to a family island kitchen, consultations align storage, lighting, and layout with real routines—before we manufacture anything.
Example 1: Condo galley that finally flows
- Challenge: Narrow corridor kitchen with poor lighting and no pantry.
- Consultation focus: Bright finishes, continuous valance lighting, and a pull‑out pantry.
- Outcome: 2D/3D confirmed slimmer handles and light doors reduce visual bulk; storage grew without widening walls.
Example 2: Family island that serves breakfast to homework
- Challenge: Busy household needed seating, charging, and baking storage.
- Consultation focus: Island with seating overhang, outlets, and tray dividers near ovens.
- Outcome: 3D views validated knee space and pendant spacing; clutter moved off counters.
Example 3: Classic style, modern function
- Challenge: Keep a timeless look with easier maintenance.
- Consultation focus: Shaker doors with durable finishes, quartz surfaces, and an easy‑wipe backsplash.
- Outcome: Lifetime‑warranty door options and quartz reduced upkeep while preserving the feel.
If you’re mapping a bigger project, our kitchen renovation planning guide covers sequencing cabinets, floors, and tiles.
Materials and finishes: how to compare options quickly
Group finishes in natural light and decide by feel and function. Door durability, quartz maintenance, and backsplash cleanability matter more than photos. Use samples to confirm undertones and sheen alongside your flooring and lighting.
What to compare
- Door style and finish: Painted MDF vs. prelaminate; profile depth; edge details.
- Countertops: Quartz patterns, thickness, and edge styles that match your door profile.
- Backsplash: Tile size and grout tone that simplify cleaning and suit your lighting.
- Hardware: Pull lengths and finishes that feel comfortable for daily use.
For general perspectives on refreshing cabinetry finishes and refacing approaches, see this cabinet refacing overview and a primer on professional cabinet painting. When you’re choosing between standard and custom door directions, this door comparison article offers background you can discuss with our team.
Common pitfalls a consultation helps you avoid
Most regrets come from late changes, unclear appliance specs, and overlooked lighting. A structured consultation reduces these risks by locking the layout and documenting selections early, so manufacturing and site work proceed without scrambling.
- Unclear appliance choices: Cabinet sizes change with models; confirm specs early.
- Lighting last: Task lighting planned up front prevents shadows and extra wiring later.
- Under‑estimating storage: Pull‑outs and dividers cost less than living with clutter.
- Forgetting outlets: Islands and coffee stations need power where you’ll actually use it.
- Scope creep: Lock decisions with itemized selections to keep momentum.
We capture these details during our design workflow and reflect them in 2D/3D views before production.
How to book your kitchen design consultation
Share your goals, pick a format, and bring inspiration. We’ll measure, model, and finalize selections—then manufacture in‑house. The result is a kitchen that fits your routines, not the other way around.
- Choose your format: Showroom, in‑home, or virtual—whatever fits your schedule.
- Bring a short list: Three goals, appliance preferences, and sample photos.
- Expect clear outputs: 2D/3D drawings, finish selections, and an itemized scope.
Ready when you are—start on our consultation request page and we’ll coordinate the next step.
Soft CTA: Prefer a guided walk‑through? Visit our GTA showroom to compare doors, quartz, and hardware in one place. Book a time on our consultation page.
Frequently Asked Questions
These quick answers help you prepare for a productive meeting and make fast, confident decisions about layouts, storage, and finishes.
What should I bring to a kitchen design consultation?
Bring 6–10 inspiration images, a list of goals, rough appliance preferences, and any building guidelines. Photos of your current kitchen help your designer spot quick wins for storage and lighting.
Do I need measurements before the first meeting?
Rough measurements are helpful for early conversations, but we complete detailed site measurements before creating final 2D/3D drawings. That way your cabinet sizes and clearances are accurate.
Is a showroom visit better than an in‑home consultation?
Both serve different goals. Showroom visits speed up finish and hardware decisions. In‑home sessions validate measurements, lighting conditions, and appliance clearances. Many clients do both for the best outcome.
How do 3D renderings help me decide?
3D views show proportions—like island depth, crown height, and pendant spacing—so you can confirm comfort and flow before anything is ordered. It’s the clearest way to choose finishes with confidence.
Key takeaways
A strong kitchen design consultation simplifies choices, locks layout and finishes, and keeps your renovation on schedule. Align goals, confirm measurements, and use 2D/3D visuals to decide once—then manufacture and install without surprises.
- Define goals and bring inspiration to accelerate decisions.
- Pick the right consultation format for your stage and schedule.
- Use 2D/3D drawings to validate proportions and storage.
- Document selections line‑by‑line to avoid rework.
When you’re ready, we’ll meet you where you are—showroom, in‑home, or virtual—and turn ideas into a buildable plan.
Next step: Book your kitchen design consultation in 11 Edvac Drive and across the GTA on our consultation page. We’ll guide you from first sketch to final install.
Related Posts

Why Choose Kitchen Renovation Company
Nowadays, Kitchen spaces are not only a place for cooking and serving food, but these areas act as a statement, as they speak a lot about a family, the philosophy and personality of individuals, and spaces. If you admire aesthetics and adorn the beauty of your home, you must pay attention to the interior design […]
How a Kitchen Renovation Contractor is Changing the Game
Lifestyle is all about bringing something coherent to the overall experience of living. The kitchen and closets stand as two of the most influential spaces in a home that add to the overall experience of living. A Kitchen Renovation Contractor in Whitby by the name of Altima Kitchen and Closets Inc. is changing the overall […]
How Media unit contractor in Whitby is Changing the Game
Lifestyle is all about bringing something coherent to the overall experience of living. The kitchen and closets stand as two of the most influential spaces in a home that add to the overall experience of living. A Media Unit Company in Whitby by the name of Altima Kitchen and Closets Inc. is changing the overall […]