Best Pantry Lighting Options for Small Homes in 2026
Pantry lighting design ideas are strategies and fixtures that make stored items easy to see, safe to reach, and beautiful to display. The right setup uses layered LEDs, smart sensors, and glare control. From our base at 11 Edvac Drive, Altima Kitchens and Closets designs custom cabinetry with integrated lighting that fits GTA homes.
By Ashok, Altima Kitchens and Closets
Last updated: 2026-05-01

Above the fold: why great pantry lighting matters
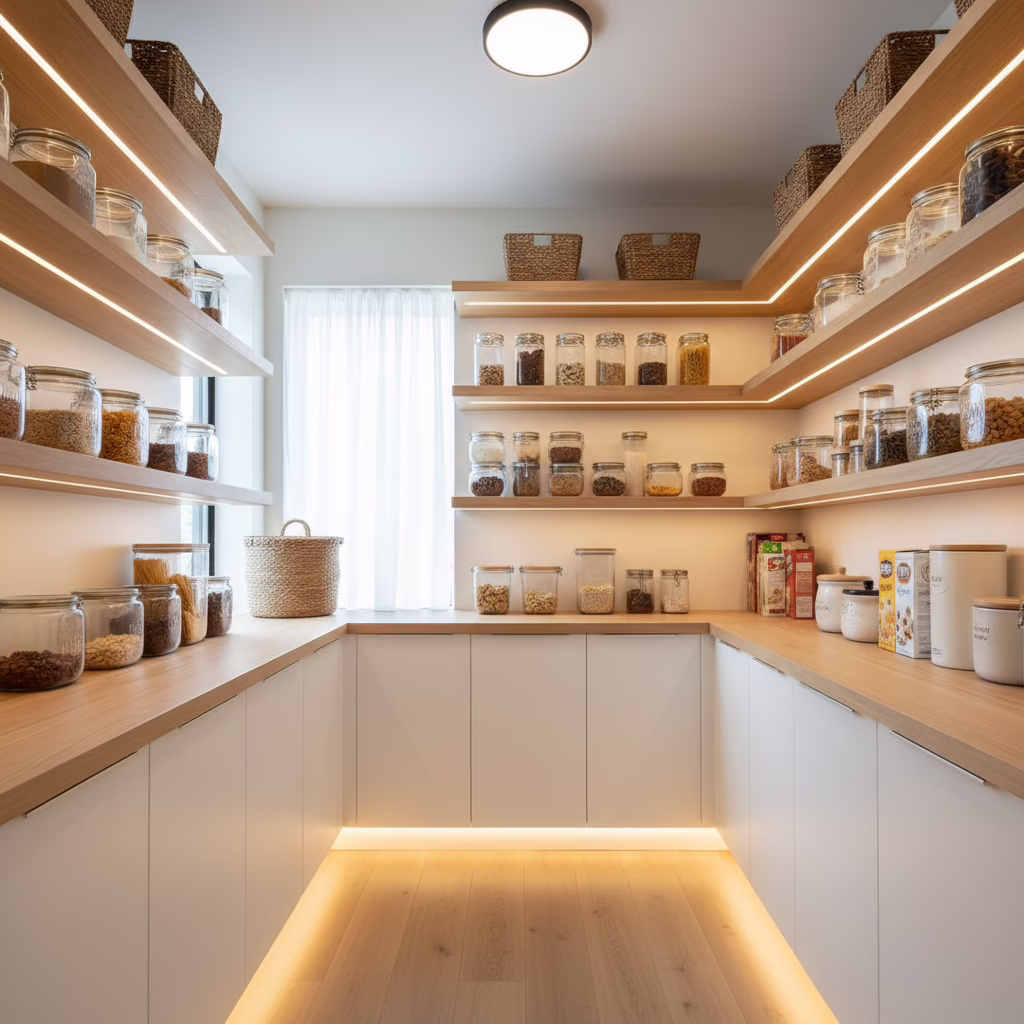
Great pantry lighting eliminates dark corners, speeds up meal prep, and reduces waste from forgotten items. Aim for layered light: an overhead fixture for general visibility, under-shelf strips for labels, and motion sensors for hands-free access. Done well, your pantry becomes faster, safer, and more enjoyable to use daily.
Your pantry gets opened dozens of times a week. If labels are hard to read or corners stay dark, you waste time and buy duplicates. Thoughtful lighting solves this. In our GTA projects, we integrate lighting during cabinet design, so wiring, channels, and sensors disappear into the millwork.
Quick summary
- Use a three-layer plan: ambient (ceiling), task (under-shelf), and accent (toe-kick or backlight).
- 2700–3000K for warm, inviting tones; 90+ CRI to see true food colors and labels.
- Choose LED strips with diffusers for even light; add motion sensors for hands-free access.
- Plan wiring and driver placement during cabinet design to keep everything concealed.
- In small pantries, low-profile bars and pucks avoid glare and door shadows.
Local considerations for 11 Edvac Drive
- Winter evenings are long in the GTA; prioritize brighter ambient fixtures and motion sensors so you aren’t fumbling with switches while carrying groceries.
- Busy family schedules mean frequent door opens; reliable, rechargeable light bars or wired strips reduce maintenance between weekly shops.
- Condos and narrow homes benefit from factory-integrated channels and slim drivers to preserve shelf space and keep a clean look in compact layouts.
What is pantry lighting?
Pantry lighting is the layered use of ceiling fixtures, under-shelf task lights, and accent sources to illuminate food storage. It prioritizes label legibility, even coverage, and safety. Effective pantry lighting hides wires and drivers, controls glare, and turns on automatically when you open the door.
In practical terms, pantry lighting combines three light types: an overhead for general visibility, task lights where your eyes read labels, and accents that guide movement. We typically integrate LED strips into custom shelves, add a low-glare flush mount overhead, and use motion switches so lights meet you at the door.
Because Altima manufactures cabinetry in-house, we route aluminum channels into shelves, tuck drivers in service cavities, and pre-drill for sensors before finishing. That way, installation is tidy, and maintenance is straightforward.
Why pantry lighting matters
Pantry lighting matters because it cuts search time, prevents duplicate purchases, and improves kitchen safety. Good lighting makes labels readable, highlights expiration dates, and reduces trip hazards. It also elevates your kitchen’s design by turning storage into a lit showcase that supports daily routines.
Here’s the thing: if you can’t see it, you won’t use it. Clear lighting helps you inventory at a glance and plan meals faster. That means less waste and fewer last-minute store runs. In family homes across the GTA, we’ve seen better lighting reduce clutter because every shelf becomes truly usable.
- Speed and clarity: Even illumination reveals what you have and where it sits.
- Safety: Motion-activated lights eliminate searching in the dark with arms full of groceries.
- Design impact: Backlit or toe-kick accents create a premium, custom look that ties to the rest of the kitchen.
Want a deeper dive into counter illumination for context? Our valance lighting guide explains glare control that also applies to pantries.
How pantry lighting works (layers, controls, and wiring)
Pantry lighting works by layering ambient, task, and accent light, then controlling them with door sensors or motion switches. Low-voltage LED strips connect to drivers hidden in cabinetry. Aluminum channels and diffusers spread light evenly and prevent glare on shiny jars and cans.
Think in layers. Ambient light from a flush mount or mini recessed cans sets the baseline. Task light comes from under-shelf strips or slim bars aimed at labels. Accents, such as toe-kick strips, guide footing at night. A door-activated switch or PIR sensor triggers the system, so hands stay free.
- Low-voltage layout: 24V LED strips fed by a driver (transformer) placed in an accessible but concealed cavity.
- Channels and diffusers: Recessed aluminum with opal lenses for dot-free illumination on labels.
- Controls: Magnetic door switches, PIR sensors, or wireless remotes; zoning lets you light only shelves in use.
- Wiring paths: Routed behind gables or through shelf uprights to keep faces and edges clean.
Because we build cabinets in our Brampton facility, we pre-cut channels and create a dedicated service chase. That keeps drivers cool and reachable, while preserving every inch of storage.
Pantry lighting design ideas (11 proven concepts)
Use a mix of LED strips, slim bars, pucks, and toe-kick accents, all tuned to warm 2700–3000K and 90+ CRI. Recess channels into shelves, add motion sensors, and zone lighting by shelf height. These pantry lighting design ideas maximize visibility without stealing storage space.
Here are 11 concepts we implement in GTA homes, from compact condos to walk-ins. Each balances performance, aesthetics, and ease of maintenance—and all can be integrated into custom cabinetry during design.
- Recessed under-shelf strips: Flush-mount channels for dot-free light on labels; aim toward the front lip of each shelf.
- Slim light bars: Surface-mount bars for retrofits where channel routing isn’t possible.
- Puck task lights: Targeted pools for specific prep zones or deep corner shelves.
- Toe-kick path lighting: Soft guidance at night; helpful for kids and late snacks.
- Backlit glass shelves: Even glow through translucent shelving for a gallery effect.
- Door-triggered activation: Magnetic or motion sensors that turn lights on as you open the door.
- Zoned shelves: Independent circuits per shelf stack reduce energy use and heat.
- Integrated dimming: Dial brightness for daytime vs. nighttime use; preserves night vision.
- Color-consistent LEDs: Match 2700–3000K across the kitchen so pantry light blends with task and ambient.
- Battery bars for rentals: Rechargeable, magnetic bars or pucks when hardwiring isn’t allowed.
- Accent the organizer system: Light pull-outs, spice racks, and wire baskets so nothing hides.
Prefer to see ideas in 3D before building? Our designers provide full GTA kitchen design visualizations so you can approve lighting placement with confidence.
Fixture types and comparisons
Choose LED strips for even shelf illumination, slim bars for fast retrofits, pucks for spot tasks, and a low-profile ceiling fixture for ambient light. Compare by beam spread, profile height, installation method, and maintenance access to pick the right mix for your pantry.
Every pantry layout benefits from a different fixture mix. Use this quick comparison to align performance with your space constraints and installation path.
| Fixture | Best for | Pros | Watch-outs | Altima tip |
|---|---|---|---|---|
| LED strips in channels | Even shelf lighting | Diffuse, low profile, continuous light | Needs routing and a driver location | Recess channels during cabinet build; match color temp to kitchen |
| Slim light bars | Quick retrofits | Easy install, clean look | May show hotspots without diffuser | Use bars with frosted lenses to soften output |
| Puck lights | Spot tasks, corners | Focused beams, simple | Uneven coverage on long shelves | Combine with strips for uniformity |
| Mini recessed cans | Ambient in walk-ins | Clear overall visibility | Can create door shadow if poorly placed | Center between shelves to reduce shadows |
| Toe-kick strips | Night navigation | Subtle, safe, stylish | Needs protected channel | Install within an aluminum lip to avoid bumps |
| Battery light bars | Rental/condo retrofits | No wiring, relocatable | Charging cycles and battery replacement | Pick magnetic mounts for quick removal |
If you’re curious about maximizing storage at the same time, our small-kitchen space tips pair perfectly with these lighting choices.
Best practices: brightness, color, and placement
Target 200–400 lux on shelves, 2700–3000K color temperature, and 90+ CRI for accurate labels. Mount strips 1–2 inches behind the front edge, aim forward to avoid glare, and keep driver access tool-free. Zone lights by shelf group and use motion sensors for hands-free activation.
Successful pantry lighting follows a few reliable rules. These keep light soft on the eyes but strong on labels, and make maintenance painless years down the road.
- Brightness: 200–400 lux is comfortable for label reading; dim higher at night.
- Color temperature: 2700–3000K blends with most kitchens and makes food look appetizing.
- Color accuracy (CRI): 90+ CRI avoids odd color shifts on spices and cans.
- Placement: Set strips near the front edge, angled to wash labels, not your eyes.
- Glare control: Use opal diffusers and recess channels when possible.
- Maintenance: Keep drivers accessible; label circuits for quick service.
- Safety: Protect toe-kick strips with aluminum lips and keep cables tidy.
Need help choosing materials and finishes alongside lighting? Our team walks you through selections under one roof and can coordinate backsplash, counters, and hardware in a single plan. See our kitchen renovation planning guide for the full workflow.
Tools and resources homeowners actually use
Homeowners use rechargeable light bars, motion pucks, LED strip kits with diffusers, and simple door switches to upgrade pantries fast. For custom builds, pro-grade 24V strips, aluminum channels, and cabinet-routed wiring deliver the cleanest, longest-lasting results.
Different homes call for different tools. DIYers in condos may choose magnetic, rechargeable bars. Full kitchen projects favor hardwired, integrated solutions that vanish into the cabinetry.
- Rechargeable bars and pucks: Fast installs with magnets for rentals; explore a representative motion-sensor light bar for concept and features.
- LED strip kits: Look for 24V options, high CRI, and aluminum channels with diffusers.
- Controls: Magnetic door switches or PIR sensors keep hands free.
- Pro integration: Our in-house manufacturing routes channels and hides drivers for a showroom finish.
- Visualization: We include 2D/3D lighting placement in your design package so you can approve beam coverage before we build.
For broader energy considerations on commercial-scale installs, see this overview of commercial lighting upgrades to understand efficiency features that often trickle down to residential products.
Step-by-step process we follow (from consult to switch-on)
Our process: understand your pantry and habits, design in 2D/3D, select fixtures and controls, manufacture channels and cabinets in-house, install with concealed wiring, and commission with dimming and sensors. This keeps your pantry bright, organized, and maintenance-friendly.
- Consultation: Discuss pantry size, shelf styles, and how you shop and cook.
- Design: Place fixtures in drawings; simulate brightness and beam angles.
- Selections: Confirm color temperature, CRI, and control style.
- Manufacturing: Route channels, drill for sensors, and plan driver cavities.
- Installation: Conceal wiring; test each zone and tidy cable management.
- Commissioning: Set sensor timing and dim levels; label circuits for maintenance.
Because we build and install under one roof, timing is streamlined and communication stays clear. If you’re coordinating a larger kitchen update, we can align with cabinet boxes, finishes, and even backsplash sequencing for a smooth schedule.
Integrating lighting with cabinetry and storage
Integrate lighting by routing channels into shelves, hiding drivers in service chases, and selecting organizers that benefit from task light. Plan pull-outs, spice racks, and baskets so each zone receives targeted illumination without blocking storage.
Lighting is most effective when it’s designed with storage from day one. We coordinate shelf spacing, organizer types, and wiring paths before fabrication. That way, nothing competes for space, and every accessory gets the light it needs.
- Pull-out pantries: Mount strips along the side rails to light both open and closed positions.
- Spice pull-outs: Add narrow bars so label text pops; angle slightly downward.
- Wire baskets: Use back-mounted strips to avoid glare from reflective metal.
- Deep shelves: Combine front-edge strips with a secondary rear strip for long runs.
Curious about cabinet construction implications? Our breakdown of melamine vs. plywood boxes explains how we plan safe, concealed wiring in each type.
Mini case studies from recent GTA projects
In compact condos, we favor rechargeable bars and motion pucks. In family walk-ins, we recess 24V strips into every shelf, add toe-kick guidance, and use door sensors. These tailored solutions speed meal prep, reduce clutter, and elevate the kitchen’s overall design.
Condo retrofit pantry
A downtown condo owner wanted a brighter pantry without opening walls. We installed magnetic rechargeable bars and discrete pucks, then tuned color temperature to 3000K. The result: fast installation and 100% shelf visibility with no wiring changes.
Family walk-in, suburban home
For a busy household, we routed channels into solid shelves, added toe-kick night lights, and used a magnetic door switch for instant-on. Labels read clearly from any angle, and kids can grab snacks safely after dark.
Integrated new kitchen build
During a full kitchen renovation, we used the same 2700K strips for both pantry and under-cabinet valance lighting so the look felt consistent. Our factory prepped channels, and our installers completed wiring cleanly before countertops and backsplash went in.
Looking to pair lighting with better organization? Our closet organization guide features approaches we often reuse in pantries—clear labeling, consistent spacing, and decluttering rules that stick.
Troubleshooting and maintenance tips
If lights flicker, check driver connections, sensor alignment, and channel heat buildup. For dimming issues, confirm voltage and control compatibility. Keep lenses dust-free, label circuits, and maintain easy access to drivers for long-term reliability.
- Flicker: Re-seat connectors; verify driver wattage headroom and stable voltage.
- Uneven light: Replace aging strips in complete runs to match color and output.
- Sensor quirks: Adjust PIR sensitivity or magnet alignment on door switches.
- Cleaning: Wipe diffusers with microfiber; avoid harsh chemicals.
- Access: Ensure driver hatches are tool-free; label zones for quick service.
For quick inspiration on small upgrades that boost kitchen appeal alongside lighting, you can skim this short piece on kitchen ideas. While it’s not lighting-specific, it reinforces the value of simple, high-impact tweaks.
Safety first: simple rules to build by
Use quality low-voltage components, protect strips in channels, and keep drivers ventilated and accessible. Secure cables, avoid pinch points at pull-outs, and test sensors thoroughly. Planning during cabinet fabrication prevents most issues and keeps your pantry safe for years.
We build safety into design. That includes protected channels at toe-kicks, strain relief at moving parts, and proper ventilation around drivers. We also locate service panels where homeowners can reach them without unloading the pantry.
- Cable management: Fasten runs along gables; avoid sagging wires.
- Ventilation: Drivers need air space; don’t bury them in sealed cavities.
- Pull-out protection: Route flexible cabling through dedicated guides.
- Final test: Verify load, dimming, and sensor timing with shelves fully stocked.
Planning a pantry as part of your kitchen renovation
Plan lighting at the same time as cabinetry. Lock in shelf spacing, channel routing, and driver access before fabrication. Coordinating lighting with finishes, backsplashes, and appliance locations prevents rework and delivers a seamless, built-in look.
Lighting decisions are quicker when they’re part of a complete kitchen plan. Our structured workflow—analysis, design, manufacturing, and installation—keeps selections under one roof and timelines clear. If timing or budget are tight, our flexible financing helps you get the plan right the first time and start sooner.
Map your full project with our kitchen planning guide, and explore renovation financing options to launch when you’re ready.
Frequently asked questions
Homeowners ask about the best fixtures, brightness levels, motion sensors, and how to retrofit lighting without opening walls. The short answers: use 24V strips with diffusers, aim for 2700–3000K and 90+ CRI, add door or motion activation, and choose magnetic bars for rental-friendly upgrades.
What color temperature is best for pantry lights?
Most homes look best at 2700–3000K. This warm range matches typical kitchen lighting and keeps food looking appetizing. Use the same color temperature across the kitchen and pantry so the transition feels seamless and professional.
Should I choose LED strips or puck lights?
Use LED strips for long shelves and even coverage; add pucks for spot tasks or deep corners. Many pantries combine both. Strips in aluminum channels with diffusers deliver the cleanest look and most consistent label legibility.
Can I add lighting to a pantry without hardwiring?
Yes. Magnetic, rechargeable light bars and motion pucks install in minutes and don’t need wiring. They’re ideal for rentals or quick upgrades. Place them near the front edge of shelves and choose models with diffusers for softer light.
How do motion sensors work in a pantry?
Motion sensors (PIR) or magnetic door switches detect movement or opening to switch lights on automatically. They save time when your hands are full and ensure you never leave lights on. We can set zones and timer lengths during commissioning.
What brightness should I aim for on shelves?
A comfortable target is roughly 200–400 lux on shelf surfaces. This makes labels easy to read without creating harsh glare. Dimming lets you lower output at night or for shallow shelves where reflections can be distracting.
Key takeaways
Layer your pantry lighting, keep components concealed, and match color and quality across the kitchen. Prioritize under-shelf strips with diffusers, add motion control, and plan wiring during cabinet design for a clean, durable result.
- Layer ambient, task, and accent light for speed and safety.
- Target 2700–3000K, 90+ CRI, and 200–400 lux on shelves.
- Recess channels, hide drivers, and label circuits for easy service.
- Use motion or door sensors for hands-free access.
- Coordinate lighting with cabinetry, finishes, and organization.
Free lighting walkthrough (mid-article check-in)
If you want expert eyes on your pantry layout, book a quick walkthrough. We’ll sketch fixture placement, color, and controls, then show you how we conceal everything during manufacturing for a showroom-quality finish.
Ready to visualize your pantry? We’ll include lighting in your 2D/3D design package and align it with your storage accessories, backsplash, and appliance plan so the whole kitchen works as one.
Where to go next
Pair lighting with organization and a smart renovation plan. Review space-saving tips, choose cabinet construction that supports clean wiring, and map financing so you can start when it suits your schedule.
Explore practical steps in our kitchen refresh guide, compare cabinet box construction, and see financing options to move from idea to install without delay.

Let’s light your pantry—beautifully and simply
Book a discovery session from our base at 11 Edvac Drive and see your pantry lighting in 3D before we build. With in-house design, factory-direct cabinetry, and integrated lighting, we deliver a clean, durable setup that fits how you cook and live.
We serve homeowners across the GTA with a one-stop process—design, manufacture, and installation under one roof. Bring us your measurements or photos, and we’ll map a layered lighting plan that turns your pantry into a bright, organized ally.
Related Posts

Why Choose Kitchen Renovation Company
Nowadays, Kitchen spaces are not only a place for cooking and serving food, but these areas act as a statement, as they speak a lot about a family, the philosophy and personality of individuals, and spaces. If you admire aesthetics and adorn the beauty of your home, you must pay attention to the interior design […]
How a Kitchen Renovation Contractor is Changing the Game
Lifestyle is all about bringing something coherent to the overall experience of living. The kitchen and closets stand as two of the most influential spaces in a home that add to the overall experience of living. A Kitchen Renovation Contractor in Whitby by the name of Altima Kitchen and Closets Inc. is changing the overall […]
How Media unit contractor in Whitby is Changing the Game
Lifestyle is all about bringing something coherent to the overall experience of living. The kitchen and closets stand as two of the most influential spaces in a home that add to the overall experience of living. A Media Unit Company in Whitby by the name of Altima Kitchen and Closets Inc. is changing the overall […]