Old Bathroom Renovation: Avoid Big Mistakes in 2026
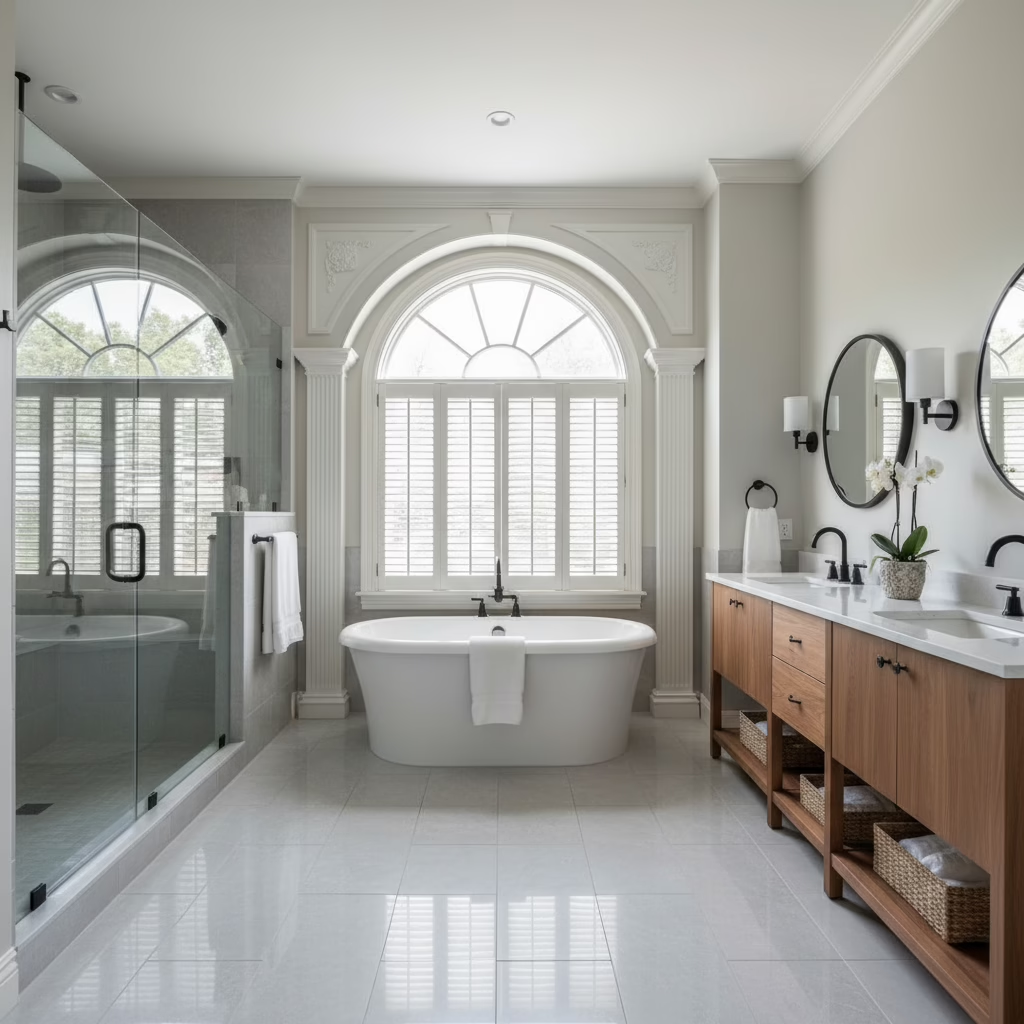
Old bathroom renovation is the full modernization of an aging bath—upgrading waterproofing, plumbing, ventilation, layout, and finishes to today’s standards. For homeowners in 11 Edvac Drive and across the GTA, Altima Kitchens and Closets delivers design-build makeovers that stop leaks, improve airflow, and add storage with 2D/3D planning and factory-direct cabinetry.
By Ashok — Altima Kitchens and Closets
Last updated: 2026-05-30
Start here: summary and contents
This guide shows how to renovate an older bathroom without costly mistakes. You’ll learn planning essentials, the design-build process, common pitfalls, code-aligned upgrades, and materials that last. Use the contents below to jump to waterproofing, ventilation, layout, accessibility, and finish selections.
Renovating an older bath can feel overwhelming. We’ve condensed what actually matters into a practical roadmap you can act on now.
- What “old bathroom renovation” really means in 2026
- Why tackling leaks, mold, and ventilation early prevents rework
- Design-build flow: consult, 2D/3D design, manufacture, install
- Approaches: refresh vs. refit vs. gut-and-rebuild
- Waterproofing, plumbing, electrical, and ventilation best practices
- Finish choices for durability: tile, cabinets, counters, lighting
- Accessibility updates that add comfort and future-proofing
- Checklists, tools, and a mid-project quality review
Table of contents
- What is an old bathroom renovation?
- Why it matters in 2026
- How the process works
- Types of renovation approaches
- Top mistakes to avoid
- Systems that matter
- Materials and fixtures
- Layout and accessibility
- Tools and resources
- Case studies and examples
- Budget and timeline factors
- FAQ
- Key takeaways
- Conclusion
What is an old bathroom renovation?
An old bathroom renovation updates aging baths to modern standards by replacing moisture-vulnerable surfaces, correcting plumbing and ventilation, improving lighting, and rethinking storage and layout. The result is a dry, efficient, easy-to-clean space designed through 2D/3D planning and delivered by a coordinated design-build team.
In our experience across the GTA, older bathrooms often hide water damage behind tile, undersized vent fans, and outdated electrical. Addressing those first prevents repeat demolition later.
- Scope clarity: Define whether you’re refreshing finishes, refitting fixtures, or rebuilding the wet zone.
- Moisture control: Prioritize a continuous waterproofing system in showers and around tubs.
- Flow & storage: Reclaim space with a right-sized vanity, medicine cabinets, and built-ins.
- Lighting: Layer task, ambient, and accent lighting for safety and comfort.
For homeowners who prefer a structured path, our design-build method integrates selections, drawings, and manufacturing under one roof—reducing handoffs and surprises. See how this compares with our design-build remodel guide.
Why renovating an older bathroom matters in 2026
Renovating an older bathroom protects your home from hidden moisture, improves indoor air quality, and upgrades comfort and safety. In 2026, better waterproofing, efficient ventilation, and water-wise fixtures extend lifespan, reduce maintenance, and support healthier living.
Left alone, small leaks compound: grout cracks let moisture travel, subfloors swell, and mold colonizes dark cavities. A proactive renovation stops the cycle and establishes a sealed envelope behind your finishes.
- Moisture management: Continuous membranes and proper slopes keep water moving to drains.
- Air quality: A right-sized exhaust fan removes humidity before it condenses.
- Safety & comfort: GFCI protection, slip resistance, and better lighting reduce risk.
- Efficiency: Modern valves, low-flow fixtures, and LED lighting curb waste and upkeep.
When we modernize older spaces, a simple rule guides us: fix what’s behind the walls first; then elevate the finishes. That order delivers lasting results.
How the renovation process works with a design-build team
A proven design-build flow reduces risk: discovery, 2D/3D design, detailed scope, factory-direct fabrication, site protection, professional installation, and final quality checks. One accountable team coordinates every step to keep plans, materials, and schedules aligned.
Here’s the process Altima uses to turn an old bath into a reliable, modern space—without the guesswork.
- Discovery & analysis: Measure, photograph, assess structure, ventilation, and plumbing sizes.
- 2D/3D design: Model layouts, clearances, tile patterns, and lighting scenes for approval.
- Itemized scope: Align selections (tile, vanity, counters, fixtures) with a documented workflow.
- Factory-direct production: Build vanities, panels, and trims in our GTA facility.
- Site protection: Dust control, floor protection, and daily cleanup maintain livability.
- Professional installation: Licensed trades handle waterproofing, plumbing, electrical, and tile.
- Quality verification: Flood tests, fan performance checks, and finish inspections before sign-off.
Prefer to see the big picture across your home? Our structured approach mirrors the steps in our home renovation guide and our project management timeline.
Local considerations for 11 Edvac Drive
- Plan ventilation upgrades early; high humidity seasons can expose weak fans. We target quiet fans sized to the room (about 1 CFM per sq. ft., minimum 50 CFM) to manage moisture build-up.
- Allow buffer time around long weekends and winter weather; lead times for tile and glass can fluctuate, affecting installation windows.
- Condo owners should pre-check building rules for wet-area changes, delivery hours, and elevator bookings to keep the schedule on track.
Types of renovation approaches (refresh, refit, or rebuild)
Choose between three practical paths: a cosmetic refresh, a fixture refit, or a wet-zone rebuild. Match the approach to your bathroom’s condition. If waterproofing and ventilation are failing, rebuild the wet area first; otherwise, refit fixtures and refresh finishes for fast impact.
We recommend aligning your path to underlying conditions found during discovery. Here’s a quick comparison.
| Approach | Best for | Typical scope | Pros | Watch-outs |
|---|---|---|---|---|
| Refresh | Sound waterproofing; tired finishes | Paint, mirrors, lighting, hardware, regrout | Quick lift, minimal disruption | Doesn’t fix hidden moisture issues |
| Refit | Decent layout; dated fixtures | New vanity, toilet, tub/shower door, counters | Big visual change; better storage | Limited by existing plumbing and layout |
| Rebuild | Leaks, soft subfloors, failing grout | Wet-zone demo, waterproofing, new tile & drain | Resets lifespan; stops water migration | Requires careful sequencing and testing |
Not sure which fits? Our team walks you through options during a showroom or in-home consult, similar to how we plan kitchen renovations with 2D/3D clarity.
Top mistakes to avoid in old bathroom renovations
Most failures come from skipping waterproofing details, undersizing ventilation, ignoring slope, crowding clearances, and choosing porous finishes in wet zones. Fix what’s behind the walls first, then invest in durable, easy-to-clean surfaces that match daily use.
Here are the errors we remediate most often—and how to avoid them.
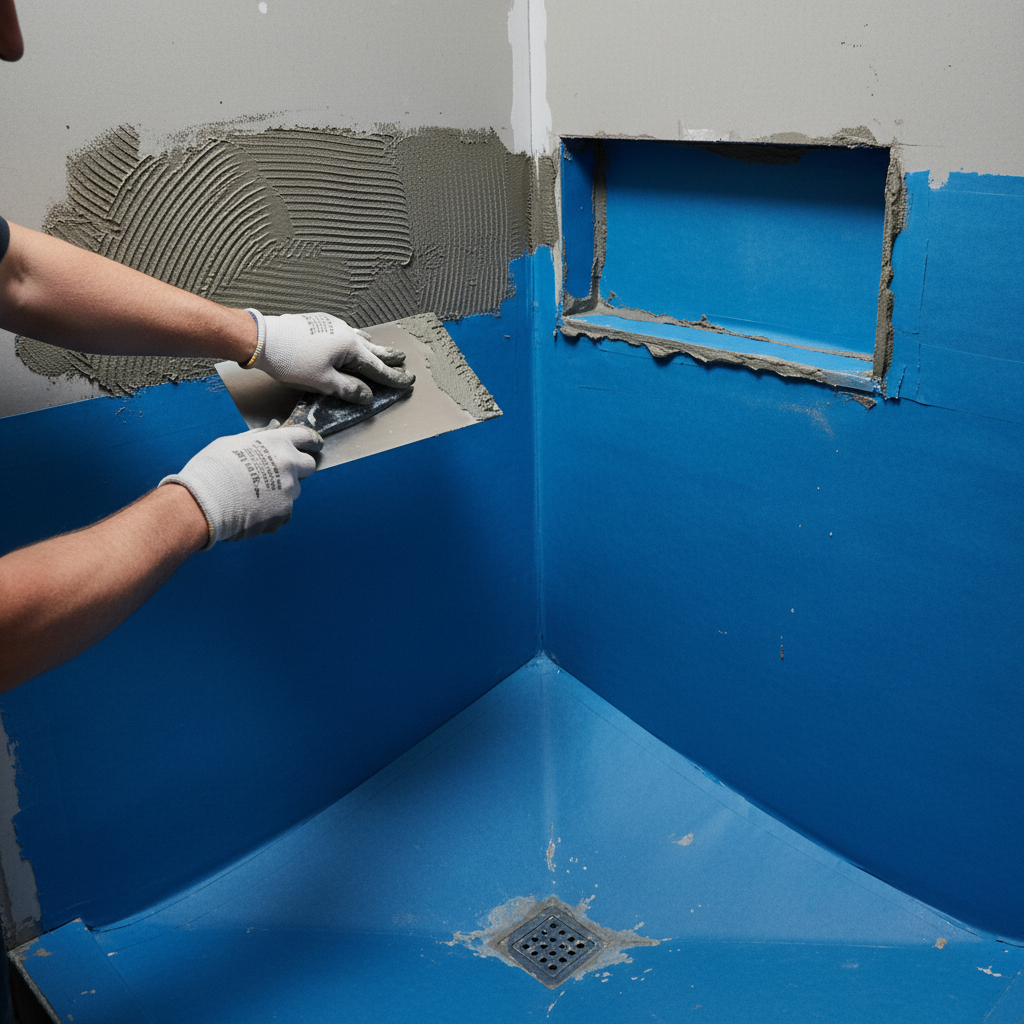
- No continuous waterproofing: Treat showers and tub surrounds as wet rooms; use a bonded membrane from floor to shower head height, with sealed corners and niches.
- Incorrect slope: Shower floors should fall about 1/4 inch per foot toward the drain; benches need a slight forward pitch.
- Undersized exhaust: Choose a quiet fan sized to the room (often 80–110 CFM for primary baths) and run it for 20–30 minutes after showers.
- Skipping flood tests: Water-test pans and check seams before tile goes up to prevent expensive rework.
- Tile on flexible subfloors: Reinforce or underlayment properly—tile wants stiff, flat substrates to avoid cracked grout.
- Poor niche placement: Place niches on interior walls where possible and slope their bottoms slightly to shed water.
- Cramped clearances: Aim for about 30 inches in front of fixtures and 24 inches to swing doors safely; avoid tight bottlenecks.
- Skipping GFCI and bonding: Wet locations demand protection; ensure outlets are GFCI and metal parts are properly bonded by a licensed pro.
- Porous stone everywhere: Reserve natural stone for lower-splash areas or seal diligently; use porcelain in direct wet zones.
- One-note lighting: Combine mirror task lights with ceiling ambient and a shower-rated recessed for balanced illumination.
- No storage plan: Pull-outs, tall linen towers, and mirrored cabinets keep counters clear and cleaning easier.
- Rushing selections: Approve tile lots, vanity specs, and hardware finishes up front to lock the design and schedule.
Want help validating your plan mid-stream? Book a technical walkthrough—our team often catches slope, fan, or substrate issues before tile goes up.
The systems that matter: waterproofing, plumbing, ventilation, electrical
Get the hidden layers right. Use a continuous shower membrane, slope at roughly 1/4 inch per foot, a 2-inch shower drain where feasible, a quiet right-sized fan, GFCI protection, and dedicated lighting circuits. These basics prevent leaks, odors, and nuisance trips.
Waterproofing, plumbing, ventilation, and electrical work together. Here’s how we approach each system in older baths.
Waterproofing
- Continuous membrane: Bonded waterproofing on floors, walls, benches, and niches with sealed seams.
- Slope & transitions: Maintain roughly 1/4 inch per foot to drains; flash transitions and penetrations.
- Flood test: 24-hour pan test before tile to verify integrity.
We document membrane coverage with photos before tiling—useful for warranties and peace of mind.
Plumbing
- Drain sizing: A 2-inch shower drain (where allowed) handles modern flow better than 1-1/2 inch.
- Pressure-balancing: Valves that maintain temperature when other fixtures run improve comfort.
- Shutoffs & access: Add service valves and thoughtful access points during the rebuild.
For additional context on planning wet-area plumbing, you can review this practical primer on bathroom renovation plumbing.
Ventilation
- Right-sized fan: About 1 CFM per sq. ft. (minimum 50 CFM) with quiet operation encourages daily use.
- Ducting: Short, straight runs with sealed joints and exterior termination improve performance.
- Controls: Use a humidity sensor or a 20–30 minute timer to clear steam after showers.
Humidity is the fastest path to recurring mold. A properly specified fan and duct path keep moisture in check even during back-to-back showers.
Electrical & lighting
- Protection: GFCI for receptacles in wet locations; use wet-rated fixtures in showers.
- Layering: Combine vanity task, ceiling ambient, and shower lighting for even, shadow-free coverage.
- Switching: Separate circuits and dimmers for flexibility and energy savings.
We frequently coordinate lighting and mirror heights during 3D visualization to eliminate glare and shadows before installation.
Materials and fixtures that last in older baths
Favor dense, low-porosity materials in wet zones, factory-finished vanities, and simple, serviceable hardware. Large-format porcelain, quartz counters, and moisture-resistant cabinet boxes clean easily and hold up to daily use.
Your material palette determines maintenance. We help clients choose finishes that survive splashes, steam, and scrubbing.
- Tile: Porcelain for wet zones; mosaic only where extra grip is needed. Check slip ratings for floors.
- Cabinetry: Factory-painted MDF doors with lifetime warranty options; melamine or plywood boxes with edge banding.
- Counters: Non-porous quartz resists staining from cosmetics and cleaners.
- Glass: Frameless shower doors with treated glass reduce spotting and squeegee time.
- Hardware: Choose finishes that match your faucet family to minimize maintenance.
Considering a vanity upgrade? Explore current storage-smart ideas in our vanity design trends.
Layout and accessibility updates that add comfort
Even small changes improve daily life: widen clear pathways, right-size the vanity, switch to a low-threshold shower, and add grab support hidden behind tile. Plan lighting and mirrors for all users and future-proof the space without making it look clinical.
We often modernize older baths by reclaiming inches. A shallow-depth vanity or a pocket door can unlock generous movement.
- Clearances: Target around 30 inches in front of fixtures; avoid door conflicts.
- Low-threshold shower: Safer entries with textured tile; reinforce for future grab bars.
- Controls: Place shower valves near the opening to avoid cold sprays.
- Lighting heights: Align mirror and sconces for eye-level illumination.
Accessibility doesn’t have to look utilitarian. With careful detailing and 3D previews, we integrate supports and comfort features seamlessly.
Tools and resources for a smooth project
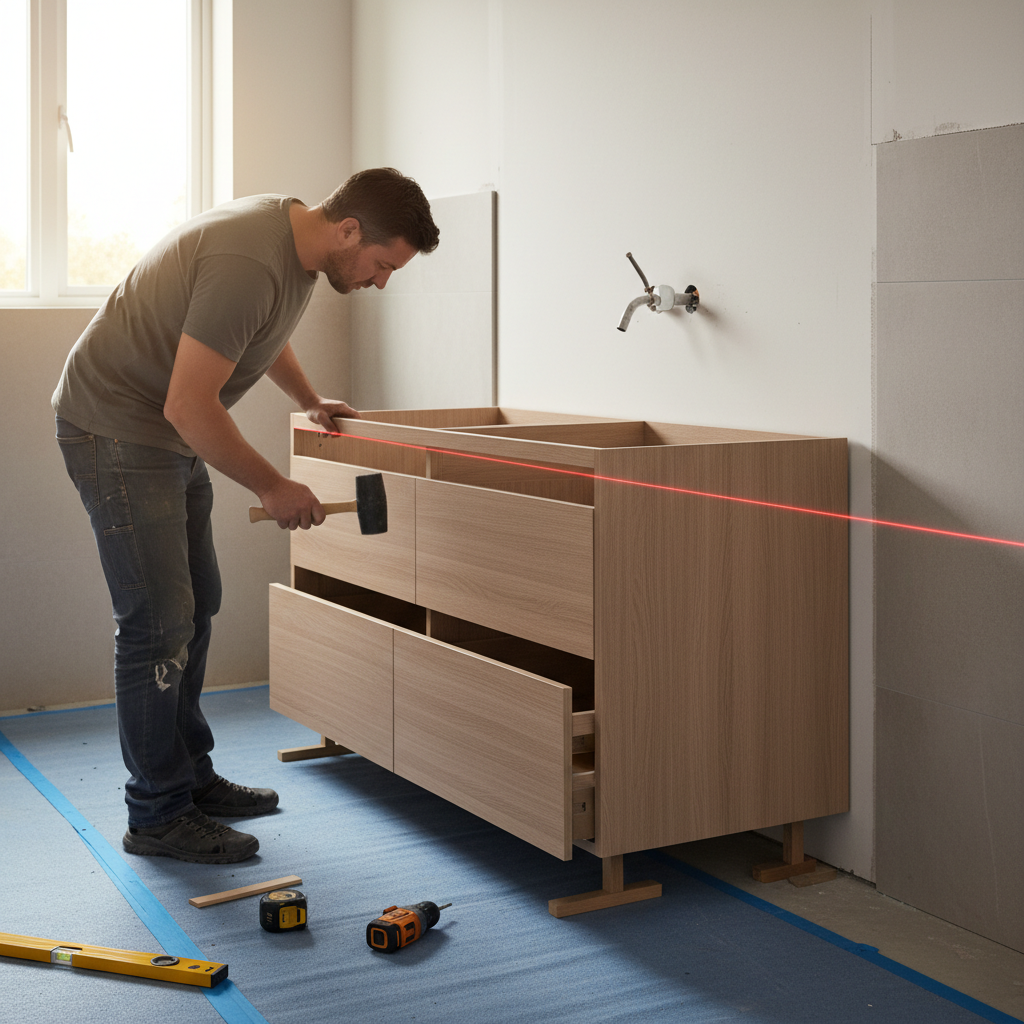
Clarity wins. Use a single, shared checklist, 2D/3D drawings, confirmed selections, and mid-project inspections. Centralized communication and photo logs help catch issues early and keep everyone aligned.
Here’s the toolkit we use on every old bathroom renovation to keep quality and momentum high.
- 2D/3D design: Visualize layouts, lighting, and tile patterns before manufacturing.
- Shared checklist: Track selections, specs, and approvals in one place.
- Progress photos: Document waterproofing coverage and mechanical rough-ins.
- Timelines: Lock key delivery dates (tile, glass, vanity) to sequence trades efficiently.
For homeowners exploring DIY-friendly refreshes between professional milestones, see this overview of bathroom remodeling benefits and practical ways to phase upgrades.
Case studies and examples
Before-and-after success hinges on hidden details. In older baths, we rebuild the wet zone, right-size ventilation, and add storage. The visible change is dramatic; the invisible upgrade—dry walls and fresh air—delivers the long-term win.
Three recent project patterns we see across GTA homes:
- 1930s semi: Tub-to-shower conversion with a low threshold, full-height porcelain, and humidity-sensing fan. Added a tall linen cabinet and mirror storage to keep counters clear.
- 1960s bungalow: Rebuilt shower pan after discovering soft subflooring; swapped a pedestal for a floating vanity to gain floorspace and easy cleaning access.
- 1990s condo: Vent fan rerouted to an exterior termination and rebalanced lighting. A pocket door solved fixture clearance conflicts.
Interested in a whole-home plan that coordinates kitchen, bath, and storage upgrades? Our custom home renovations guide shows how we phase multi-room projects.
Budget and timeline factors (without pricing)
Plan for sequencing, lead times, and quality checkpoints rather than fixating on line-by-line prices. Clear scopes, approved drawings, and locked selections protect schedules and reduce rework—often the hidden driver of overages.
We never publish price lists because each old bathroom tells a different story. What we can share are the variables that consistently affect schedules and decisions.
- Scope drivers: Wet-zone rebuilds, ventilation upgrades, and electrical corrections require careful sequencing.
- Lead times: Tile, custom vanities, and glass dictate pacing; approve early to lock manufacturing slots.
- Inspections & tests: Flood tests and performance checks create predictable, quality-focused milestones.
- Condo policies: Elevator bookings and quiet hours shape daily workflows; plan buffer days.
For a deeper dive into balancing scope and timelines across rooms, see our custom bathroom renovation overview and the principles we apply in kitchen projects.
Frequently Asked Questions
These quick answers address what homeowners ask most about renovating older bathrooms—timelines, ventilation, tile choices, and storage. Each reply is direct and actionable so you can move forward with confidence.
How do I know if my shower needs a full rebuild?
Signs include cracked or missing grout, stained ceilings below, soft subfloors, or a musty odor after showers. If the waterproofing layer has failed, replacing tile alone won’t help. A wet-zone rebuild with a continuous membrane and a flood test restores long-term reliability.
What size exhaust fan should I install?
Aim for about 1 CFM per square foot as a rule of thumb, with a minimum of 50 CFM. Choose a quiet model and run it for 20–30 minutes after showers. Keep the duct short and straight, sealed at joints, and vented outdoors for best performance.
Is large-format tile okay on bathroom floors?
Yes—if the substrate is flat and stiff. Large-format porcelain reduces grout lines and cleans easily, but it magnifies dips or humps. We prepare subfloors carefully and use appropriate mortars to achieve a durable, level surface with proper slip resistance.
How can I add storage without crowding the room?
Use a right-sized vanity with drawer organizers, mirrored medicine cabinets, and a tall linen tower if space allows. Consider a floating vanity to open floor area and add niches in the shower for everyday items. 3D design helps confirm clearances before ordering.
Key takeaways
Focus on hidden layers first: waterproofing, ventilation, and structure. Then select durable finishes and right-sized storage. A coordinated design-build team turns an older bath into a dry, efficient, comfortable space that stays that way.
- Repair the envelope first; finishes come second.
- Use a continuous membrane and verify it with a flood test.
- Right-size a quiet exhaust fan and vent it outdoors.
- Choose dense, low-porosity finishes for wet zones.
- Plan storage and lighting with 2D/3D clarity before manufacturing.
Conclusion
A successful old bathroom renovation blends solid building science with thoughtful design. When the hidden layers are correct, the room stays dry, bright, and easy to maintain—year after year.
Here’s the bottom line: the best-looking tile won’t save a leaky shower. Start with a clear plan, document the waterproofing, and verify ventilation. Then elevate the finishes and storage so your bathroom works beautifully, not just on day one but for the long haul.
Ready to modernize your older bath? Book a showroom or in-home consultation with Altima Kitchens and Closets. Our in-house design, factory-direct vanities, and coordinated installation remove the stress from complex remodels—so you can enjoy the results sooner.
Soft CTA: If you’re planning multiple spaces, our whole-home planning guide explains how to sequence kitchen, bath, and storage for fewer disruptions.
For additional homeowner context on water-use habits and phased upgrades, see this practical overview of ways to save water in the bathroom. If you’re exploring fixture refreshes between professional milestones, this guide to bathroom upgrades offers homeowner-friendly ideas to pair with a design-build plan.
Related Posts
Why Choose Kitchen Renovation Company
Nowadays, Kitchen spaces are not only a place for cooking and serving food, but these areas act as a statement, as they speak a lot about a family, the philosophy and personality of individuals, and spaces. If you admire aesthetics and adorn the beauty of your home, you must pay attention to the interior design […]
How a Kitchen Renovation Contractor is Changing the Game
Lifestyle is all about bringing something coherent to the overall experience of living. The kitchen and closets stand as two of the most influential spaces in a home that add to the overall experience of living. A Kitchen Renovation Contractor in Whitby by the name of Altima Kitchen and Closets Inc. is changing the overall […]
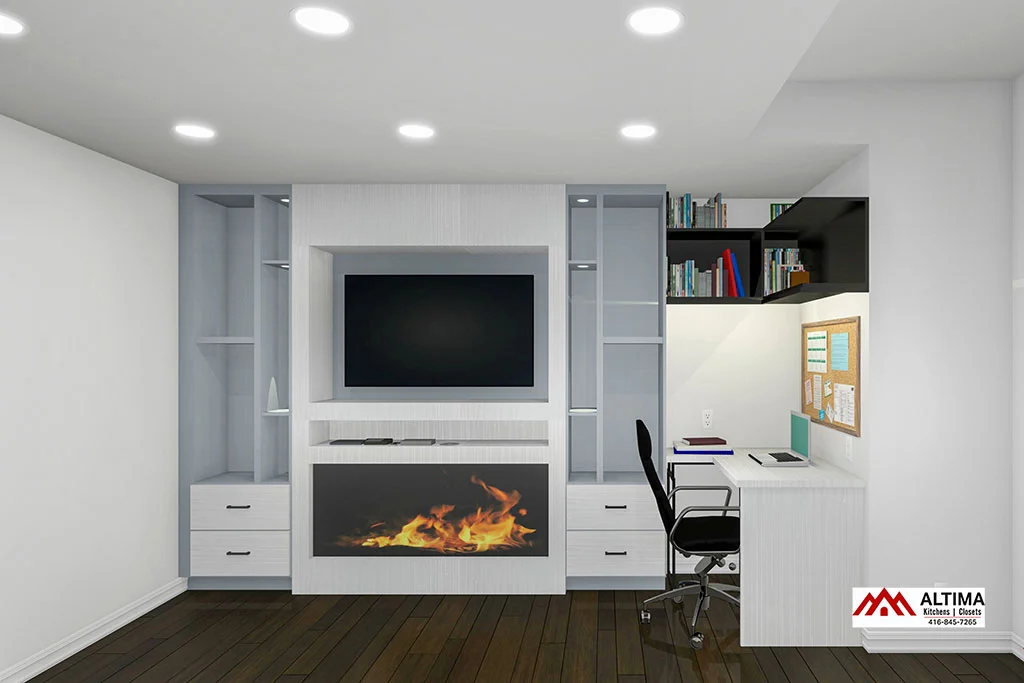
How Media unit contractor in Whitby is Changing the Game
Lifestyle is all about bringing something coherent to the overall experience of living. The kitchen and closets stand as two of the most influential spaces in a home that add to the overall experience of living. A Media Unit Company in Whitby by the name of Altima Kitchen and Closets Inc. is changing the overall […]