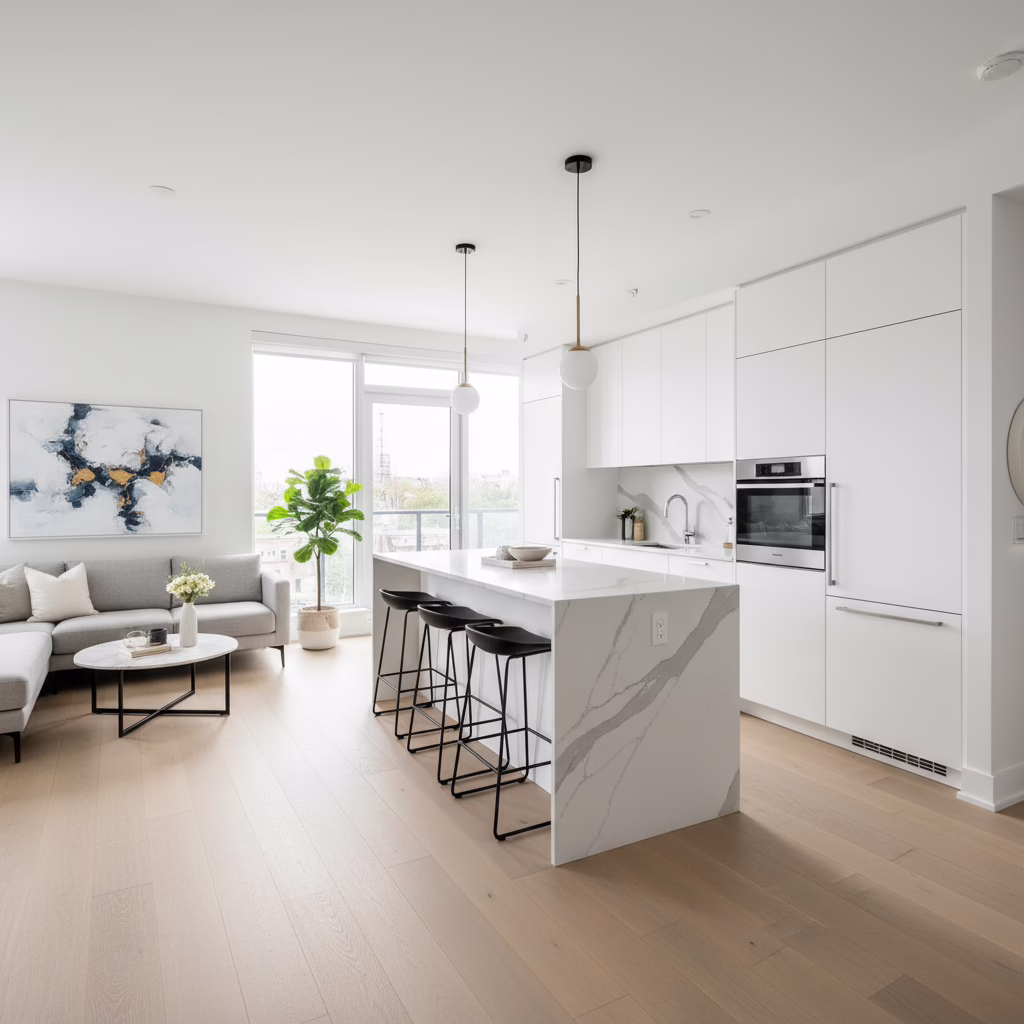
Condo Renovation: Save Space & Stress Less in 2026
Condo renovation is the planned upgrade of a condominium unit’s layout, finishes, lighting, and storage within building and condo-board rules. In 11 Edvac Drive and across the GTA, Altima Kitchens and Closets delivers end-to-end condo renovations with factory-direct cabinetry, 2D/3D design previews, and in-house installation to keep projects organized and stress-free.
By Ashok, Altima Kitchens and Closets • Last updated: 2026-05-16
Quick Summary and Table of Contents
This complete guide explains condo renovation from approvals to installation with GTA-focused tips. Learn how to plan, what rules apply, which upgrades add the most function, and how a one-stop design-build team manages design, manufacturing, and installation under one roof for a smoother experience.
- What condo renovation means and how it differs from freehold remodeling
- Why it matters for space, storage, and long-term livability
- How the process works step by step in a condo building
- Top upgrades: kitchens, bathrooms, closets, media walls, flooring
- Best practices for permits, logistics, and noise rules
- Tools and resources: 3D design, checklists, approvals
- Realistic case examples based on common GTA layouts
- What Is Condo Renovation?
- Why Condo Renovation Matters
- How Condo Renovation Works (Step-by-Step)
- Types and Approaches
- Best Practices
- Tools and Resources
- Case Studies and Examples
- Frequently Asked Questions
- Key Takeaways
- Conclusion and Next Steps
What Is Condo Renovation?
Condo renovation updates a condo’s interior—kitchen, bath, closets, flooring, and lighting—without altering common elements or violating building rules. It blends space-smart design, code-compliant construction, and tight logistics to transform compact square footage into an organized, modern home.
In our experience, the most successful projects pair a smart plan with precise execution. That’s why our team combines in-house design, factory-direct cabinetry, and professional installation. You preview ideas with 2D plans and 3D renderings before anything is built, reducing guesswork and change orders.
- Scope options: cosmetic refresh, focused room remodel, or full interior update within condo limits.
- Common targets: kitchen workflow, bathroom storage, closet capacity, layered lighting, and durable finishes.
- Typical constraints: concrete slabs/ceilings, plumbing stacks, electrical load limits, elevator access, and quiet-hour rules.
- Key dimensions: 36-inch clear walkways, 24-inch base cabinet depth, 18-inch typical backsplash height, and 12–15-inch island overhang for seating.
Building declarations and rules define what’s allowed. We confirm requirements early so design choices align with permits, timelines, and condo-board approvals. Clearances (like 36–42 inches for aisles) and access (elevator height and diagonal) drive cabinet module sizing and delivery planning.
Why Condo Renovation Matters
Condo upgrades maximize storage, workflow, and light in limited footprints. The right design increases daily comfort, reduces clutter, and supports long-term livability—especially in high-rises with tight access and strict rules.
Here’s the thing: square footage is fixed, but how that space works isn’t. Strategic cabinetry, right-sized appliances, and layered lighting make a small home feel generous. A clear plan also prevents mid-project delays and protects common areas during deliveries and demo.
- Function first: 36-inch pathways, efficient work triangles, and tall pantries change how a home feels day to day.
- Durability: quartz counters, quality drawer boxes, and moisture-smart bath materials stand up to daily use.
- Organization: pull-out pantries, spice pull-outs, and valet rods keep surfaces clean and mornings simple.
- Resale readiness: timeless finishes and thoughtful storage appeal to future buyers without feeling generic.
Before work begins, it’s wise to confirm coverage and responsibilities in your condo insurance. For a homeowner-friendly primer, review this practical condo insurance coverage guide. Even simple updates deserve a checklist so nothing is missed with your board or manager.
How Condo Renovation Works (Step-by-Step)
Winning condo renovation follows a disciplined sequence: discovery, design, approvals, manufacturing, site prep, installation, and handover. Aligning each phase with building rules, elevator bookings, and quiet-hour windows keeps projects on schedule and neighbors happy.
Below is the high-level process we use to deliver on-time results while protecting common areas and your suite.
| Phase | What Happens | Owner Tasks | Altima Tasks | Notes |
|---|---|---|---|---|
| 1) Discovery | Measure, assess building rules, discuss wish list. | Share goals, timelines, approvals process. | Site review, measurements, feasibility checks. | Identify plumbing/electrical constraints early. |
| 2) Design | 2D/3D layouts, material selections, itemized scope. | Review renderings; choose finishes and accessories. | Produce drawings, samples, upgrade options. | Visualize storage and lighting before build. |
| 3) Approvals | Condo-board and (if required) municipal permits. | Submit forms; reserve elevator windows. | Provide drawings/specs; coordinate with building. | Respect quiet hours and work windows. |
| 4) Manufacturing | Factory-direct cabinetry fabricated to spec. | Confirm final selections. | Italian CNC machining, pro spray finishing. | Quality control before delivery. |
| 5) Site Prep | Floor protection, containment, material staging. | Clear access routes; notify concierge. | Protect hallways & suite; schedule delivery. | Minimize disruption to neighbors. |
| 6) Installation | Demo (as approved), install, electrical/plumbing (as allowed). | Be available for quick decisions. | Skilled install, inspections, progress updates. | Respect rules at all times. |
| 7) Handover | Final walkthrough, adjustments, care tips. | Review punch list and manuals. | Document warranty and maintenance guidance. | Enjoy your transformed home. |
Mid-project communication matters. We share updates and photos so you can make quick, confident decisions. For a deeper dive into scheduling discipline, see our practical renovation timeline guide and how we apply it inside condos.
Approvals and permits
- Board approvals: most buildings require written approval and contractor insurance certificates.
- Permits: plumbing, electrical, or structural work may trigger municipal permits—submit drawings that match what’s built.
- Quiet hours: align demo and noisy tasks to approved windows; plan dust control and debris removal in advance.
Tip: reserve the service elevator for both delivery and waste removal. Confirm padding requirements and time windows with management at least a week ahead.
Logistics and protection
- Access: measure elevator clear opening, cab height, and hallway turns; design cabinets in modular sections that fit.
- Protection: use corrugated floor protection and corner guards along travel paths; contain dust inside the suite.
- Staging: pre-stage materials in sequence so installers can maintain pace without cluttering shared spaces.
Most base cabinets are 24 inches deep and uppers 12 inches deep. Designing in standard modules (e.g., 12, 15, 18, 24, 30, 36 inches) speeds both fabrication and installation in tight buildings.
Communication cadence
- Weekly checkpoints: short updates prevent small issues from becoming delays.
- Visual confirmations: share photos of rough-ins and blocking before surfaces close.
- Milestone sign-offs: approve design, finishes, and layout before we manufacture.
We operate as a single accountable team—design, factory, and installation—which removes hand-off friction. For more on the model, our design-build renovation explainer outlines why this approach keeps projects on track.
Types and Approaches
Condo remodels usually fall into three approaches: cosmetic refreshes, focused room renovations, and full interior updates within building constraints. Kitchens, bathrooms, closets, flooring, and media walls deliver the biggest daily impact in compact homes.
Kitchen-focused upgrades
- Workflow redesign: right-sized island, clear 36-inch aisles, and an efficient work triangle.
- Cabinetry: tall pantry towers; pull-out trash; spice pull-outs; lazy susans; drawer dividers.
- Surfaces: quartz countertops for durability and easy care with 1–1.5-inch edges.
- Lighting: undercabinet LEDs; dimmable task and ambient layers at 2700–3000K for warmth.
Factory-direct cabinetry and 3D design help you visualize storage and finishes before we build. For layout ideas and common mistakes to avoid, browse our kitchen renovation guide designed for compact GTA homes.

Bathroom improvements
- Space-smart vanities: drawer-based storage, tall mirrored cabinets, integrated lighting.
- Moisture-first materials: waterproof backer boards, quality tile, and proper ventilation strategies.
- Shower upgrades: niche storage, glass enclosures, and a 1/4-inch-per-foot slope for drainage.
We align fixture choices with your building’s plumbing constraints and access windows. For added context on why bath upgrades punch above their weight, see this short overview on the advantages of bathroom remodeling.
Closets and built-ins
- Custom wardrobes: double-hanging (about 40 inches each), valet rods, laundry pull-outs, and shoe organization.
- Entry solutions: bench seating, cubbies, and concealed hooks to reduce clutter in tight foyers.
- Media walls: tidy cables, integrated shelving, and statement finishes; center TV height around 42–48 inches.
Thoughtful built-ins remove visual noise and make small rooms feel intentional. Drawer depths of 12–14 inches and shelf depths of 12 inches often strike the right balance between capacity and access.
Comparison at a glance
| Approach | What Changes | When It Fits | Key Considerations |
|---|---|---|---|
| Cosmetic Refresh | Paint, hardware, backsplash, lighting swaps | Quick uplift for dated finishes | Confirm electrical load for new fixtures |
| Focused Rooms | Kitchen or bath overhaul; closet systems | Maximum impact in key zones | Elevator access and dust control plans |
| Full Update | Coordinated finishes, flooring, built-ins | Unified look and storage across the unit | Staged sequencing across rooms |
Need to weigh trade-offs room by room? Our full home renovation guide shows how coordinated finishes and storage create cohesion—useful even inside compact condos.
Best Practices
The best condo renovations start with approvals, respect building logistics, and use durable, low-maintenance materials. Clear communication, floor protection, and tidy staging reduce disruption and keep timelines on track from delivery to punch list.
- Start with rules: confirm board requirements and whether municipal permits apply.
- Protect common areas: floor protection, elevator padding, and scheduled deliveries in approved windows.
- Design for access: components that fit elevators and hallway turns; modular sections where needed.
- Plan storage: tall pantries, drawer-based vanities, and hidden charging stations for clutter control.
- Layer lighting: task, ambient, and accent lighting on dimmers at 2700–3000K for relaxed evenings.
- Choose resilient finishes: quartz counters, quality hardware, and moisture-smart bath materials.
Door clearances matter more than most people realize. Maintain at least 32 inches of clear opening where possible, and keep 36-inch walkways in high-traffic paths to avoid daily bottlenecks.
Local considerations for 11 Edvac Drive
- Coordinate service elevator bookings early so deliveries and waste removal fit your building’s time windows.
- Plan around seasonal demand; spring and fall often see higher renovation activity and tighter schedules in the GTA.
- Ask management about quiet hours and waste-handling expectations so demo and installs stay compliant from day one.
We bring samples to your home or you can visit our showroom to review selections under one roof. For common pitfalls and smoother workflows, our concise condo renovation challenges guide outlines how we prevent delays.
Tools and Resources
Use checklists, 2D/3D design previews, and approval templates to simplify decisions. A single accountable team that designs, manufactures, and installs reduces back-and-forth and helps meet building requirements without drama.
- Visualization: 2D plans and 3D renderings to preview layouts, storage, lighting, and finishes.
- Organization: itemized scopes with upgrade options, so you can prioritize with confidence.
- Quality manufacturing: Italian CNC machining and professional spray finishing for consistent fit and finish.
- Installation: in-house teams that understand condo logistics—from floor protection to final clean.
- Support: flexible financing with 0% down approvals to make timing easier.
Free planning consult: Book a design session to review goals, rules, and a preliminary 3D concept. One team handles design, factory production, and installation—plus lifetime warranties on select doors.
Cabinet door style impacts both look and cleaning. For a quick primer on profiles, see this accessible overview comparing standard vs. custom cabinet doors. Use it as a conversation starter during your design meeting.
Case Studies and Examples
Small changes, big impact. In one-bedroom, two-bedroom, and studio layouts, rethinking storage, lighting, and workflow transforms daily life. Here are concise examples showing how targeted upgrades deliver outsized benefits.
One-bedroom refresh
- Kitchen: removed a bulky peninsula; added a slim 24-inch-deep island with deep drawers and two seats.
- Closet: reconfigured to double hanging plus shoe pull-outs; weekday routines sped up.
- Lighting: undercabinet LEDs and a dimmable living room circuit for evening comfort.
Result: better circulation, more prep space, and tidy surfaces. The 36-inch walkway around the island eliminated traffic jams at the entry.

Two-bedroom transformation
- Kitchen zone: full-height pantry, spice pull-outs, and a waterfall peninsula for extra seating.
- Primary bath: drawer vanity, mirrored storage, and a glass shower with two recessed niches.
- Media wall: concealed wiring and floating shelves to declutter the living area.
Outcome: more storage, better sight lines, and a cohesive finish palette. A 15-inch counter overhang created comfortable seating without crowding the aisle.
Studio condo: calm, not cramped
- Zoning: a shallow partition with integrated storage separated sleeping and living areas.
- Wardrobe wall: 24-inch-deep cabinets with a mix of drawers and double hanging.
- Lighting plan: warm 2700K fixtures on separate circuits to shift between work and rest modes.
Result: a studio that functions like a one-bedroom with concealed clutter and clear pathways.
Entertainer’s nook in a compact two-plus-den
- Bar/media combo: undercounter fridge in a 24-inch cabinet, glass uppers with integrated lighting.
- Acoustic awareness: soft-close hardware and felt pads to keep evening noise down.
- Charging shelf: hidden outlets and cable management behind a flip-down panel.
Outcome: a tidy entertainment zone where cables disappear and surfaces stay clear, even in a busy living area.
Frequently Asked Questions
These quick answers address common condo renovation concerns—from approvals and timelines to noise rules and material choices. For building-specific guidance, schedule a consultation with our design team.
Do I need my condo board’s approval before renovating?
Yes. Most buildings require written approval, proof of contractor insurance, and compliance with quiet hours and elevator bookings. Structural, plumbing, or electrical changes usually need extra documentation and, in some cases, municipal permits. Start approvals before ordering materials.
Can I move plumbing or add new lighting in a condo?
Often within limits. Plumbing stacks and concrete slabs create constraints, and electrical loads must meet code. We design within these boundaries and coordinate any required permits or inspections with your building and municipality.
What makes condo cabinetry different?
Components should be sized for elevators and tight turns. We often build in modular sections, use resilient finishes, and include space-maximizing accessories like pull-out pantries, spice racks, and drawer dividers to make every inch count.
How can I minimize disruption to neighbors?
Book elevators, use floor and wall protection, stage materials efficiently, and follow quiet hours. Communicate with management ahead of time and schedule noisy tasks inside approved windows to keep work moving without friction.
Where should I start if I want a full refresh?
Start with a discovery meeting and measurements, then review a 3D concept and itemized scope. Prioritize kitchens, baths, closets, flooring, and lighting—these deliver the most daily function per square foot in condos.
Key Takeaways
Plan, visualize, and coordinate. The winning formula is clear approvals, thoughtful design, factory-direct quality, and professional installation—managed by one accountable team that understands condo logistics in the GTA.
- Start with rules and approvals to prevent delays and rework.
- Use 2D/3D design to see storage and lighting before build.
- Protect common areas and schedule work within building windows.
- Choose resilient finishes and space-smart storage accessories.
- Work with a single design-build team to simplify decisions and communication.
Conclusion and Next Steps
A well-planned condo renovation turns a compact unit into a calm, functional home. With coordinated design, manufacturing, and installation, you’ll save space and stress less—while staying fully compliant with building rules and condo-board expectations.
Ready to explore your options? Book a discovery session in 11 Edvac Drive. We’ll review your goals, building rules, and an initial 3D concept, then manufacture and install with care. For broader context on whole-home planning that also applies in condos, skim our full remodel timeline guide and our bathroom renovation playbook.
Related Posts

Why Choose Kitchen Renovation Company
Nowadays, Kitchen spaces are not only a place for cooking and serving food, but these areas act as a statement, as they speak a lot about a family, the philosophy and personality of individuals, and spaces. If you admire aesthetics and adorn the beauty of your home, you must pay attention to the interior design […]
How a Kitchen Renovation Contractor is Changing the Game
Lifestyle is all about bringing something coherent to the overall experience of living. The kitchen and closets stand as two of the most influential spaces in a home that add to the overall experience of living. A Kitchen Renovation Contractor in Whitby by the name of Altima Kitchen and Closets Inc. is changing the overall […]
How Media unit contractor in Whitby is Changing the Game
Lifestyle is all about bringing something coherent to the overall experience of living. The kitchen and closets stand as two of the most influential spaces in a home that add to the overall experience of living. A Media Unit Company in Whitby by the name of Altima Kitchen and Closets Inc. is changing the overall […]