Best Dream Kitchen Designs for Small Spaces in 2026
Dream kitchen designs are detailed plans that align layout, storage, lighting, and finishes so your kitchen works beautifully every day. For homes near 11 Edvac Drive, small-space designs thrive when you combine measured layouts, multi-use storage, and light-reflecting materials. The result is a compact kitchen that cooks, hosts, and cleans like a larger room.
By Ashok — Altima Kitchens and Closets • Visit our showroom site • Last updated: 2026-06-26
Summary and table of contents
To build a small-space dream kitchen, verify measurements, test two to three layouts in 2D/3D, assign storage to every cabinet, and choose durable, factory-built cabinetry. In our experience, these steps eliminate surprises and make compact kitchens bright, efficient, and easy to maintain.
What you’ll learn in this complete guide from Altima Kitchens and Closets:
- What “dream kitchen design” really means for small homes and condos
- Why tight footprints magnify every design decision—and how to win
- How our 2D/3D design-to-installation process works, end to end
- Which layouts, storage inserts, lighting, and finishes perform best
- A step-by-step plan you can use this week, plus real GTA examples
Jump to a section:
- What is a dream kitchen design?
- Why small-space dream kitchens matter
- How the dream-kitchen process works
- Types and layouts that win in small spaces
- Best practices for storage, lighting, and ergonomics
- Step-by-step: Plan your small dream kitchen
- Materials and finishes that stretch small spaces
- Appliances and smart tech for compact kitchens
- Tools and resources you can use now
- Compact-kitchen examples from recent projects
- Layout comparison at a glance
- Frequently Asked Questions
- Key Takeaways
- Conclusion and next steps
What is a dream kitchen design?
A dream kitchen design aligns your cooking habits, storage needs, and style into a measured layout with verified clearances and durable materials. It turns constraints—like small footprints—into advantages through tailored cabinetry, efficient work zones, and layered lighting that makes the space feel larger and calmer.
At Altima Kitchens and Closets, “dream” isn’t code for extravagance; it’s precision. We map how you prep, cook, dine, and clean. Then we draft 2D plans and a 3D walkthrough so you can explore door swings, landing zones, and sightlines before we build cabinetry in our Brampton factory using Italian CNC machinery and a professional spray booth.
Key characteristics we validate during design:
- Ergonomic work zones: Prep, cook, clean, and store without backtracking.
- Clearances that work: Aim for a consistent walkway; in compact condos we often target 36–39 inches for safe movement.
- Dedicated storage: Assign every drawer and pull-out a job to keep counters clear.
- Lighting layers: Ambient, task, and accent lighting to eliminate shadows.
- Durable finishes: Factory-painted MDF or prelaminated doors with lifetime warranties on select door types.
Because our team designs, manufactures, and installs under one roof, you preview everything—door styles, hardware, quartz, backsplash tile, and flooring—in a single showroom visit, reducing guesswork and delays.
Why small-space dream kitchens matter
Small-space dream kitchens matter because limited square footage magnifies every decision. Smart planning improves safety, speeds daily tasks, and adds meaningful storage. The right choices let a compact kitchen function like a larger room while staying bright, calm, and easy to clean.
In tight condos and townhomes near 11 Edvac Drive, the usual pain points are predictable: nowhere for bulk items, cramped prep zones, and cluttered counters. We address them by prioritizing deep drawers, vertical dividers, and a tall pantry to replace overcrowded uppers. Layered lighting brightens surfaces so the room reads bigger and cleaner.
- Safety: Clear walkways and dedicated landing spaces cut jostling around hot cookware.
- Speed: Deep drawers for pots and pans reduce bending and searching.
- Storage: Pull-out pantries and tray dividers make every inch earn its keep.
- Serenity: Light-toned finishes and under-cabinet LEDs reduce visual noise.
We’ve found that measuring habits (How many pans? Bulk spices? Baking sheets?) at the start removes 80% of mid-project second-guessing. When every item has a home in the design, your day-to-day feels lighter the first week you cook.
How the dream-kitchen process works
A reliable process blends discovery, measurement, 2D/3D design, factory build, and professional installation. Each step reduces risk: drawings prevent surprises, material selections lock quality, and a defined sequence keeps your home running while the kitchen transforms on schedule.
Our end-to-end, in-house workflow:
- Discovery interview: Goals, cooking style, number of cooks, seating needs, and must-have appliances.
- Site measure: Wall lengths, ceiling height, windows/doors, and existing plumbing/electrical.
- 2D layout options: Typically two to three variants (galley, L-shape, or one-wall + peninsula).
- 3D walkthrough: Explore clearances, door swings, sightlines, and lighting effects.
- Factory-direct production: Cabinets built on Italian CNC machines; finishes cured in a pro spray booth.
- Installation: In-house team verifies reveals, adjusts hardware, and cleans the site daily.
- Handover: Final inspection, adjustments, and care guidance for cabinetry and surfaces.
Because design, fabrication, and install live under one roof, you avoid vendor handoffs. You also get itemized documentation and proactive updates (we’re known for clear communication), keeping the project predictable from first sketch to final hardware tweak.
Types and layouts that win in small spaces
Winning small-kitchen layouts concentrate activity and preserve clear walkways. Galley and L-shaped plans often outperform U-shapes in tight rooms. Pair them with a peninsula or a slim cart, deep drawers, and a tall pantry to free counters and keep the space feeling open.
How we evaluate your room:
- Galley: Efficient for narrow rectangles. Keep a consistent aisle, place sink opposite cooktop, and cluster prep tools within a few steps.
- L-shape: Great for corner windows or open plans. Use a lazy susan or blind-corner pull-out to capture the corner volume.
- U-shape (compact): High storage potential but can feel enclosed. Maintain a generous center aisle to prevent crowding.
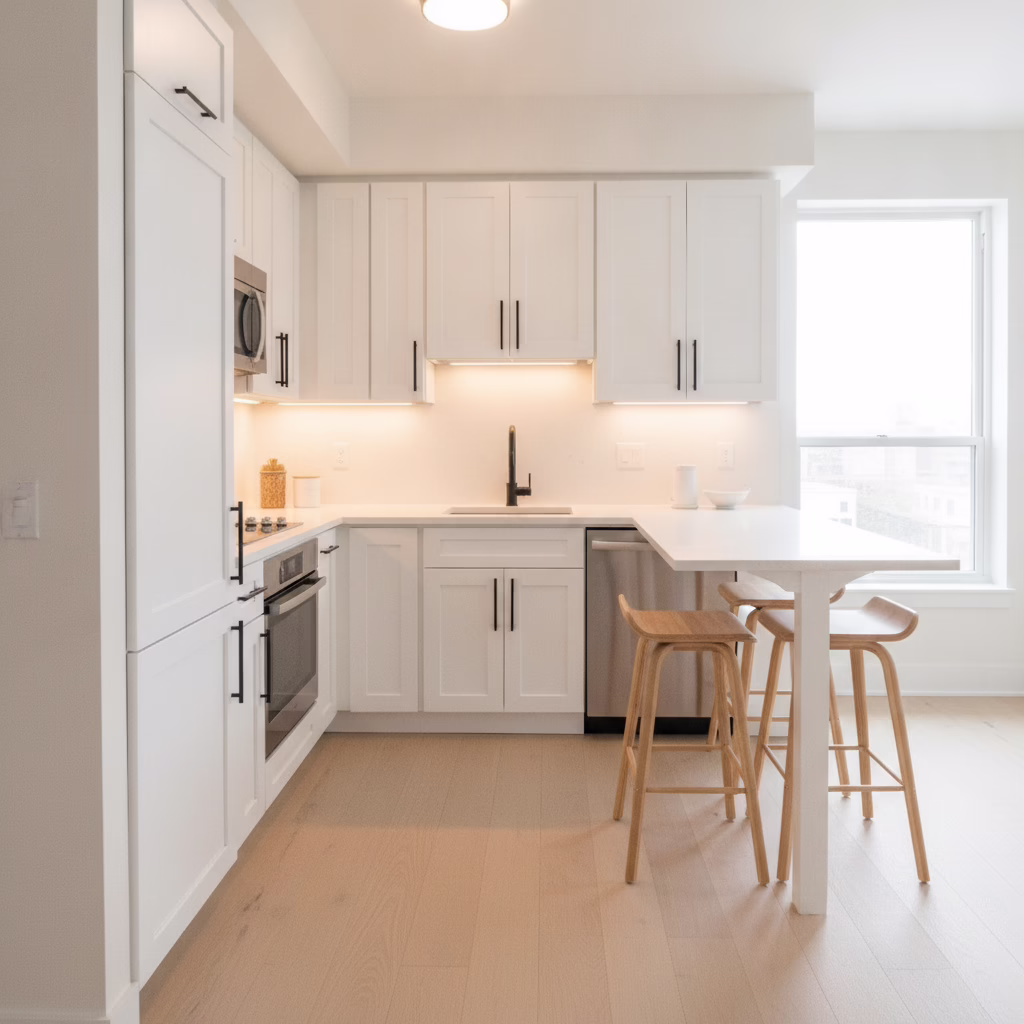
- One-wall + peninsula: Ideal for studios. The peninsula adds seating and storage while shielding the cook zone.
Planning numbers we often target in compact GTA kitchens:
- Walkway width: 36–39 inches where possible for a single-cook flow.
- Landing areas: Keep set-down space near the fridge (typically 15 inches minimum on one side) and beside the cooktop.
- Corner function: Corner accessories (lazy susan, pull-out) turn awkward reaches into usable storage.
For a deeper dive into flow, see our kitchen flow guide and our functional design walkthrough—both expand on aisle strategies that keep small kitchens comfortable.
Best practices for storage, lighting, and ergonomics
Prioritize deep drawers for pots, vertical tray dividers, and a tall pull-out pantry. Add layered lighting—ambient, task, and accent—to brighten surfaces. Keep everyday items between knee and shoulder height. These moves improve speed, reduce strain, and keep counters clear in a compact room.

Storage that multiplies space
- Deep drawers: Pots and pans glide out to you; no crawling into base cabinets.
- Pull-out pantry: Narrow units (often 12–18 inches wide) hold weeks of staples in easy reach.
- Tray dividers: Vertical storage for baking sheets and cutting boards over the oven.
- Corner solutions: Lazy susans or blind-corner pull-outs make dead zones productive.
- Waste systems: Double-bin pull-outs keep recycling and trash off the floor.
Lighting that makes rooms feel bigger
- Ambient: Even overhead lighting to remove harsh contrasts.
- Task: Under-cabinet LEDs for shadow-free prep; consider toe-kick lights as night guides.
- Accent: Warm pendants over a peninsula soften the space for evening meals.
Ergonomics that reduce strain
- Heights that help: Keep everyday items between knee and shoulder height; reserve high shelves for rarely used pieces.
- Handles and pulls: Choose hardware that’s secure to grip and consistent across doors/drawers.
- Landing spaces: Plan set-down zones near the fridge, oven, and sink to prevent awkward reaches with hot dishes.
Want a fast checklist? Our small-kitchen tips and this design concept guide map each insert and lighting layer to a real daily task.
Step-by-step: Plan your small dream kitchen
List your daily tasks, measure the room, set appliance sizes, and test two to three layouts in 2D/3D. Approve storage inserts for each cabinet, then finalize finishes and lighting. Schedule factory build and installation in a defined sequence to keep the project tidy and on time.
- Define the brief: Cooking style, number of cooks, seating, and storage pain points.
- Measure precisely: Wall lengths, ceiling height, window/door locations, plumbing and electrical points.
- Fix appliance specs early: Range and hood width, fridge depth, dishwasher model, microwave placement.
- Draft 2–3 layouts: Galley, L-shape, or one-wall with peninsula; note aisle width and landing zones.
- Assign storage by cabinet: Drawers for pots; pull-out for spices; tray dividers for sheets; tall pantry for bulk.
- Select finishes: Door style, quartz tone, backsplash tile, hardware, flooring, and lighting color temperature.
- Validate in 3D: Confirm clearances, seating overhangs, and lighting effects; adjust before build.
- Schedule production and install: Coordinate factory lead time with on-site prep and delivery windows.
Local considerations for 11 Edvac Drive
- Plan showroom visits around peak times; traffic near Bottomwood Park can add minutes. Early morning appointments help you compare samples without rushing.
- Winter installs run smoother with prefinished cabinetry from our factory; sealed finishes limit on-site odors and reduce open-door time in cold weather.
- If you commute via Williams Pkwy at 2500 Williams Pkwy, time deliveries to avoid rush hours so condo elevator bookings stay stress-free.
Free design conversation: Book a quick session to explore 2D and 3D options, choose factory-direct cabinetry, and map a clean installation plan—start with a visit to our Brampton showroom.
Materials and finishes that stretch small spaces
Choose light, low-gloss cabinet finishes, bright quartz counters, and a simple backsplash pattern. Add matte black or brushed hardware for definition. Durable, factory-finished doors and sealed cabinet boxes clean easily and reflect light, making compact kitchens feel open without sacrificing resilience.
Cabinetry is the biggest surface in most kitchens. In compact rooms, lighter door colors and consistent hardware lines visually widen walls. Factory-painted MDF and prelaminated doors—both covered by our lifetime warranty on select door types—stand up to daily use and wipe clean without fuss.
- Cabinet doors: Shaker profiles stay timeless; slab doors create a sleek, modern line.
- Cabinet boxes: Melamine for value and easy cleaning; plywood options for moisture-sensitive areas.
- Counters: Light-toned quartz resists stains and bounces light back into the room.
- Backsplash: Smaller format tiles or calm, continuous slabs reduce visual clutter.
- Hardware: Matte black or brushed metals give contrast and grip without glare.
- Flooring: Warm, light woods or stone-look tile unify adjacent living spaces in open plans.
Want perspective on door options? See this third-party discussion of door types—standard vs custom—where tradeoffs in flexibility and fit are outlined in practice: standard vs custom cabinet doors.
Appliances and smart tech for compact kitchens
Select counter-depth refrigerators, slide-in ranges, and panel-ready dishwashers to keep lines clean. Consider microwave drawers, induction cooktops, and smart lighting controls. These choices protect aisle space, improve safety, and simplify daily routines in tight rooms.
Appliances shape clearances as much as walls do. We lock appliance models during design so we can finalize cabinet widths, door swings, and landing spaces with confidence. In small rooms, depth is king—counter-depth fridges and slide-in ranges reduce protrusions that crowd walkways.
- Counter-depth fridge: Keeps the traffic lane consistent and prevents door collisions.
- Slide-in range: Minimal side trim; easier to integrate with counters.
- Induction cooktop: Faster boil times and a cooler kitchen, with an easy-to-wipe surface.
- Microwave drawer: Safer access below the counter; frees the upper sightline.
- Panel-ready dishwasher: Seamless look that visually quiets the room.
- Smart controls: Dimmers and scenes pair bright prep light with warm dining light.
For turnover-focused spaces like rentals, outside perspectives emphasize sequencing and maintenance-readiness; see these remodeling notes for apartment owners and their view on renovation timelines for rentals for context on planning logistics.
Tools and resources you can use now
Use a printable measuring guide, a cabinet-by-cabinet inventory sheet, and a digital 3D walkthrough to validate choices before you build. These tools convert opinions into data, reducing change orders and giving you confidence in every selection.
Our clients love seeing styles, edge profiles, and hardware in one showroom. A measuring template plus photos of existing conditions makes remote reviews simple. A 3D model clarifies island overhangs, seating space, and sightlines from living rooms—critical in open-concept condos and townhomes.
- 2D/3D design: Visualize how door styles and quartz tones play with your lighting.
- Cabinet inventory: List items by cabinet to match inserts with your daily routine.
- Lighting plan: Note where task lights, pendants, and toe-kick LEDs will mount.
- Finish samples: Compare in daytime and evening to catch color shifts.
Explore more design ideas and planning frameworks in our GTA kitchen ideas guide and this kitchen planning overview.
Compact-kitchen examples from recent projects
Three projects show what’s possible: a 9-foot galley that doubled prep area, an L-shaped condo kitchen that added seating, and a one-wall plan that gained pantry capacity. Each used factory-built cabinets, quartz counters, and tailored lighting to amplify space.

Example 1: Narrow galley, wider feel
A narrow galley replaced upper cabinets with a full-height pantry plus two floating shelves. Deep drawers under the cooktop captured pots and pans. Under-cabinet LEDs brightened the backsplash, making the room feel wider without moving walls.
Example 2: L-shaped condo with seating
An L-shaped condo added a slim peninsula with two stools. A lazy susan handled bulk items, while a paneled dishwasher and counter-depth fridge kept lines clean. Valance lighting warmed the workspace for relaxed evening meals.
Example 3: One wall, double the function
Near 11 Edvac Drive, a one-wall plan integrated a pull-out spice rack and a tray divider over the oven. A tall broom closet beside the fridge corralled cleaning tools, freeing the under-sink area for a compact pull-out waste system.
For more before/after planning ideas, see our kitchen upgrade ideas page.
Layout comparison at a glance
Choose a layout based on aisle width, corners, and seating needs. Galleys excel in tight rooms, L-shapes balance storage and openness, and one-wall plans benefit from a peninsula. The table summarizes strengths and typical storage wins for each approach.
| Layout | Best Fit | Storage Potential | Clearance Focus |
|---|---|---|---|
| Galley | Tight, rectangular rooms | Great with tall pantry + deep drawers | Keep aisle consistent; manage opposing doors |
| L-shape | Open corner with two walls | Strong if corner accessories are used | Watch corner appliance conflicts |
| U-shape (compact) | Wider rooms with three walls | Excellent base storage; can feel enclosed | Preserve center aisle for safe movement |
| One-wall + peninsula | Studios and open plans | Moderate; add a tall pantry to compensate | Balance seating overhang with walkway |
Once you’ve short-listed a layout, our GTA kitchen ideas article shows how finishes and lighting transform each plan type in real homes.
Frequently Asked Questions
Common questions focus on layout selection, storage add-ons, timelines, and finishes. Pick a layout that matches your room, add inserts to every cabinet, and use 3D visuals to finalize finishes. A structured process keeps small-kitchen projects predictable and low-stress.
What layout works best for a very narrow kitchen?
A galley layout typically wins in narrow rooms. Keep a consistent aisle, place the sink opposite the cooktop, and use a tall pantry on one end. Deep drawers and under-cabinet lighting increase usability without making the space feel tight.
How do I add storage without crowding the room?
Use dedicated inserts: pull-out spice racks, tray dividers, and deep drawers for pots. A full-height pantry replaces cluttered uppers. Keep everyday items between knee and shoulder height to reduce reaching and keep counters clear.
Should I choose drawers or doors for base cabinets?
Choose drawers for most bases. Drawers bring contents to you, reducing bending and wasted space at the back of shelves. Use doors for under-sink areas or where vertical dividers (like trays and cutting boards) work best.
Do I need 3D kitchen design for a small space?
3D design is especially helpful in compact rooms because inches matter. You can validate door swings, seating overhangs, and lighting effects before build. It also speeds finish decisions when you can preview how tones work together.
Key Takeaways
Small-space dream kitchens succeed when you measure precisely, pick a layout that fits, assign storage to every cabinet, and validate choices in 3D. Durable, light-reflecting finishes and layered lighting complete the transformation without moving walls.
- Lock appliance models early so cabinet widths and clearances are precise.
- Use deep drawers, tray dividers, and a tall pantry to clear counters.
- Layer ambient, task, and accent lighting to eliminate shadows.
- Favor light, durable finishes to visually open the room.
- Move from 2D plans to a 3D walkthrough before manufacturing.
Conclusion and next steps
The fastest route to a small-space dream kitchen is a measured plan, 2D/3D validation, factory-built cabinetry, and an organized install. With a clear brief and the right inserts and lighting, compact kitchens can feel open, calm, and ready to cook from day one.
Here’s how to begin with Altima Kitchens and Closets:
- Bring photos and basic measurements to our Brampton showroom.
- Review two to three layouts and a cabinet-by-cabinet storage map.
- Confirm finishes from one showroom, then preview everything in 3D.
- Schedule factory production and installation with proactive updates.
Ready to create a kitchen you love to use? Book a discovery session near 11 Edvac Drive and let’s turn your vision into a precise, buildable plan.
Related Posts

Why Choose Kitchen Renovation Company
Nowadays, Kitchen spaces are not only a place for cooking and serving food, but these areas act as a statement, as they speak a lot about a family, the philosophy and personality of individuals, and spaces. If you admire aesthetics and adorn the beauty of your home, you must pay attention to the interior design […]
How a Kitchen Renovation Contractor is Changing the Game
Lifestyle is all about bringing something coherent to the overall experience of living. The kitchen and closets stand as two of the most influential spaces in a home that add to the overall experience of living. A Kitchen Renovation Contractor in Whitby by the name of Altima Kitchen and Closets Inc. is changing the overall […]
How Media unit contractor in Whitby is Changing the Game
Lifestyle is all about bringing something coherent to the overall experience of living. The kitchen and closets stand as two of the most influential spaces in a home that add to the overall experience of living. A Media Unit Company in Whitby by the name of Altima Kitchen and Closets Inc. is changing the overall […]