Bathroom Remodel Guide: Plan Better and Stress Less in 2026
Renovating bathrooms is the end-to-end process of updating layouts, fixtures, finishes, and waterproofing to improve function, safety, and style. Done right, it increases home value, saves water and energy, and prevents moisture damage. For homeowners near the 11 Edvac Drive area in Brampton, a structured plan and the right team make renovation smoother and faster.
By Ashok — Altima Kitchens And Closets • Last updated: July 3, 2026
Above the Fold: Hook and Table of Contents
Plan your bathroom remodel with a clear scope, code-compliant waterproofing, and a sequenced schedule. Lock design decisions early, order long-lead items first, and align trades to avoid downtime. A precise plan reduces change orders, accelerates installation, and minimizes stress.
Here’s what you’ll learn and how to use this guide:
- The bathroom renovation process from concept to final clean.
- What “renovating bathrooms” really covers and why sequencing matters.
- Design, waterproofing, ventilation, lighting, tile, and storage best practices.
- How factory-direct cabinetry and 3D design shorten timelines.
- Common pitfalls to avoid and how a one-stop team streamlines work.
Quick Summary
Renovating bathrooms succeeds when planning leads the build. Finalize layout in 2D/3D, choose a continuous waterproofing system, size ventilation correctly, and schedule trades in the right order. These four moves prevent rework, keep dust down, and deliver a durable, clean-lined result.
- Decide layout, storage, and lighting layers before demolition.
- Pick materials early to avoid backorders and delays.
- Use factory-direct vanities for tighter fit and faster installs.
- Document field heights, clearances, and niche sizes to the millimeter.
What Is Renovating Bathrooms?
Renovating bathrooms means redesigning and rebuilding the space to improve layout, safety, water management, and finishes. It includes design, demolition, rough-ins, waterproofing, tiling, fixtures, cabinetry, and inspections, all executed in a defined sequence.
Think of a bathroom as a moisture-managed envelope wrapped around plumbing and electrical. Success depends on decisions made before demolition: layout, storage, lighting layers, shower system, and ventilation strategy. With our in-house design and 2D/3D drawings, you preview the space before we touch a wall, reducing surprises.
For deeper planning context, our bathroom renovation company guide explains how roles, timelines, and scopes interact so choices stay on budget and on schedule.
- Scope clarity: Define must-haves vs. nice-to-haves to manage decisions.
- Moisture control: Select a complete waterproofing system, not a patchwork.
- Cabinetry: Choose materials and finishes built for humidity and daily wear.
- Accessibility: Consider curbless showers, grab bars, and wider clearances.
Why Renovating Bathrooms Matters
A well-planned bathroom remodel boosts safety, conserves water and energy, and prevents costly moisture damage. Modern storage, lighting, and ventilation improve daily life while increasing long-term home value and buyer appeal.
Bathrooms concentrate water, heat, and electricity in tight quarters. That mix rewards thoughtful choices—especially waterproofing and ventilation. Efficient fixtures can lower daily consumption, and safer layouts reduce slip-and-fall risks. Durable, factory-finished cabinetry and proper substrates stand up to steam and everyday traffic.
For additional perspective on benefits, see this concise overview of remodeling advantages from a Canadian trades publisher: bathroom remodeling benefits.
- Daily usability: Better lighting, storage, and ergonomics save time every morning.
- Durability: Waterproof backer boards, sealed seams, and graded floors extend lifespan.
- Future flexibility: Plan blocking in walls for future grab bars or accessories.
How a Bathroom Renovation Works (Step-by-Step)
Bathroom renovations follow a fixed sequence: discovery, design, approvals, demolition, rough-ins, waterproofing, tiling, cabinetry, fixtures, paint, and punch list. Locking decisions early keeps trades coordinated and the schedule on track.
- Discovery: Measure, document current conditions, and discuss goals.
- 2D/3D Design: Visualize layouts, tile patterns, lighting, and storage.
- Selections: Choose tile, fixtures, cabinetry, counters, lighting.
- Approvals: Condominium/association and permit requirements if applicable.
- Demolition: Protect paths, demo carefully, and separate waste streams.
- Rough-ins: Plumbing and electrical to new locations as designed.
- Waterproofing: Continuous membrane with sealed seams and corners.
- Tiling: Layout dry-run, set tile, grout, and movement joints.
- Cabinetry: Install vanities, towers, and integrated organizers.
- Fixtures: Mount faucets, shower systems, glass, and accessories.
- Finishing: Paint, trim, mirrors, and lighting aim.
- Punch list: Test systems, caulk lines, and final clean.
| Phase | Main Deliverable | Owner Decisions |
|---|---|---|
| Discovery | Measured drawings | Goals, style, storage |
| Design | 2D/3D layouts | Layout, tile pattern |
| Selections | Spec sheet | Finishes, fixtures |
| Approvals | Greenlight | Condo/permit docs |
| Build | Installed work | Field confirmations |
| Closeout | Deficiency-free space | Sign-off |
If you prefer a compact, shower-first approach, our small bathroom remodel with shower guide shows how to prioritize clearances, lighting, and waterproofing in tight footprints.
Types of Bathroom Renovations
Bathroom projects range from cosmetic refreshes to full gut-and-rebuilds. Options include vanity swaps, tub-to-shower conversions, mid-scale upgrades, and complete reconfigurations with new plumbing and electrical.
- Cosmetic refresh: Paint, hardware, lighting swaps, mirror updates.
- Fixture-focused: New vanity, toilet, and faucet set without moving lines.
- Tub-to-shower conversion: Popular for aging-in-place and space gains.
- Mid-scale remodel: Tile, waterproofing, ventilation, and storage upgrades.
- Full renovation: Layout changes, new rough-ins, and custom cabinetry.
Curious which path fits your goals? Our custom bathroom renovation primer outlines when to refresh versus rebuild, and how to phase upgrades if you’re juggling a busy household.
Design Best Practices for Renovating Bathrooms
Start with layout, then layer lighting, storage, and materials. Prioritize moisture-safe substrates, durable tile, and ventilation. Use 2D/3D design to finalize dimensions, fixture clearances, and door swings before ordering materials.
- Layout first: Confirm door swings, clearances, and sight lines.
- Lighting layers: Combine ambient, task, and accent lighting with dimmers.
- Storage: Integrate towers, medicine cabinets, and niche locations.
- Materials: Choose porcelain tile, quartz counters, and moisture-sealed cabinetry.
- Glass: Decide framed vs. frameless and swing vs. slider early.
For more reasons homeowners choose to upgrade now, skim this context piece: why people renovate their bathrooms.
Lighting and Electrical Upgrades
Layer ambient, task, and accent lighting, then add dimming and dedicated GFCI-protected circuits. Place light at face level for mirrors, maintain safe clearances, and plan switching that supports morning and evening routines.
- Mirror lighting: Vertical sconces or backlit mirrors reduce shadows.
- Wet-rated fixtures: Choose for shower and tub zones as required.
- Smart controls: Timers and scenes simplify daily use and ventilation run-on.
- Outlets: Add in-drawer charging for shavers and hair tools.
We often integrate valance lighting beneath medicine cabinets and towers. This simple move brightens tasks without glare and pairs well with our factory-direct cabinetry for clean wiring and seamless finishes.
Waterproofing and Ventilation Essentials
Use a continuous, manufacturer-approved waterproofing system and size your exhaust fan correctly. Seal every seam, corner, and niche. Run ventilation to the exterior and control it with a timer or humidistat.
Shower zones demand redundant protection: sloped pans, sealed overlaps, and movement joints at changes of plane. Fan sizing should match room volume and duct guidance, and ducts should exhaust outdoors—not into attics or joist bays. In our experience, consistent post-shower fan run-on is the easiest way to keep mirrors clear and surfaces dry.
- Membrane continuity: No gaps at valves, benches, or niches.
- Backer boards: Use moisture-resistant substrates behind tile.
- Exhaust capacity: Match CFM to space and duct length; keep runs short.
- Controls: Timers or humidistats ensure post-shower run time.

Tile Standards and Installation
Plan tile layout before setting, choose the right trowel and mortar, and respect movement joints. Flat, plumb substrates and consistent grout joints deliver a premium finish that lasts.
- Layout dry-run: Center lines, balance cuts, and avoid slivers.
- Mortar choice: Match mortar to tile size, material, and substrate.
- Level and plumb: Correct surfaces before tile for crisp lines.
- Grout: Use stain-resistant or epoxy where appropriate.
| Decision | Option A | Option B | Best For |
|---|---|---|---|
| Shower curb | Curbed | Curbless | Mobility needs, sleek look |
| Glass | Framed | Frameless | Budget vs. minimal profile |
| Tile size | Large-format | Mosaic | Few grout joints vs. high slip resistance |
We detail more tile choices and layout strategies in our bathroom home improvement guide, including niche heights, bench sizes, and transition profiles for clean lines.
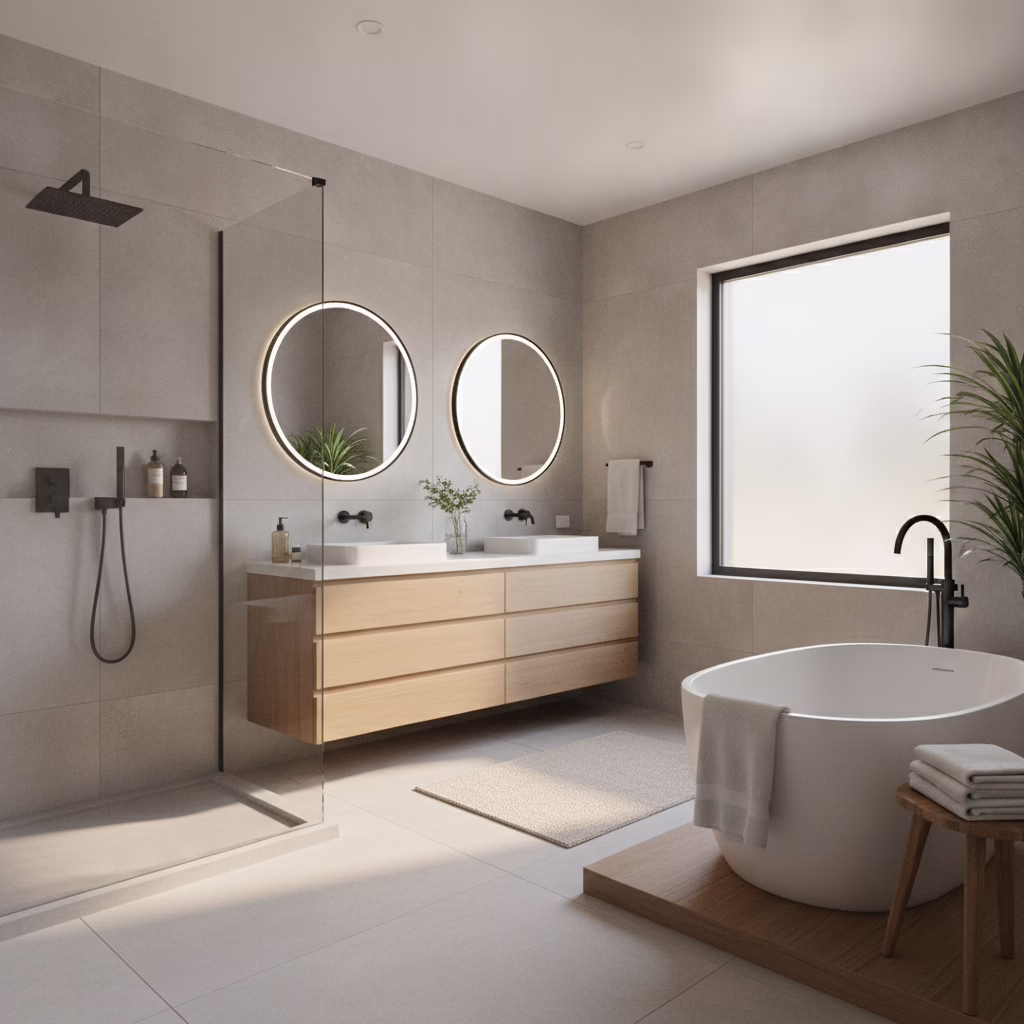
Cabinetry, Vanities, and Storage
Select moisture-resilient cabinet boxes and finishes, then accessorize for everyday efficiency. Factory-direct vanities with integrated organizers and LED lighting elevate both form and function.
We build custom vanities, towers, and medicine cabinets with durable finishes and smart storage: pull-out hampers, drawer dividers, and power outlets. Factory-direct production shortens lead times and improves fit—especially in condos where every inch matters and walls aren’t always perfectly square.
- Boxes and doors: Choose materials and finishes suited to humidity.
- Organization: Pull-outs, drawer organizers, and hidden hampers.
- Lighting: Valance lights and mirror-integrated LEDs.

Shower Systems and Plumbing Fixtures
Pick your shower system early—pressure-balance, thermostatic, or digital—and confirm rough-in dimensions before tile. Match flow rates to your water supply and choose durable finishes that clean easily.
- Valve type: Pressure-balance for simplicity; thermostatic for precise control.
- Head count: Overhead rain, handheld, and body sprays if your supply supports it.
- Finish durability: Brushed or matte hides fingerprints better than polished.
- Cleaning ease: Simple geometries and removable traps save time.
Coordinating valves, niches, and glass lines in 3D avoids conflicts later. Our installers verify heights and centerlines before closing walls, preventing costly tile rework.
Scheduling and Trade Sequencing
Lock design and selections first, then schedule trades in sequence: demo, rough-ins, waterproofing, tile, cabinetry, fixtures, and finishing. Pre-order long-lead items to prevent idle days and rework.
- Lead times: Order glass, specialty tile, and custom vanities early.
- Field checks: Verify rough-in heights and niche locations before tile.
- Inspections: Coordinate any required inspections to avoid delays.
For multi-room renovations, see our whole home renovation guide to understand how bath timelines mesh with kitchen, flooring, and painting work.
Common Mistakes When Renovating Bathrooms
The biggest mistakes are late design changes, partial waterproofing, underpowered ventilation, and skipping field checks before tile. Each one creates rework, schedule slips, and durability risks.
- Late changes: Moving a niche or sconce after rough-in doubles work.
- Patchwork membranes: Gaps at corners or valves invite leaks.
- Fan issues: Short-cycling or venting indoors traps moisture.
- No mockups: Without a layout dry-run, grout lines can misalign.
To avoid hidden traps in older homes, review our old bathroom renovation checklist—it flags common surprises like ungrounded wiring, offset drains, and uneven subfloors.
Accessibility and Aging-in-Place Upgrades
Plan curbless entries, wider clearances, sturdy blocking, and slip-resistant surfaces. These upgrades improve safety for all ages without compromising modern aesthetics.
- Curbless showers: Continuous floor lines reduce trip hazards.
- Grab bars: Add blocking now for future install flexibility.
- Lighting: Night-lights and low-level paths help with visibility.
- Lever handles: Easier to operate with wet hands or limited mobility.
With thoughtful detailing, accessibility reads as luxury: larger format tile, linear drains, and frameless glass can all serve inclusive design goals while keeping the space sleek.
Sustainability and Indoor Air Quality
Choose WaterSense-style fixtures, LED lighting, low-VOC paints, and long-life materials. Durable selections reduce replacements, while proper ventilation preserves air quality and the building envelope.
- Water efficiency: High-performance showerheads and dual-flush toilets conserve without sacrificing comfort.
- Lighting: LEDs lower heat and power draw—great for small rooms.
- Low-VOC finishes: Better air quality during and after the remodel.
- Long-life materials: Porcelain tile and quartz counters resist staining and wear.
For renovating bathrooms in occupied buildings, here’s a practical planning article focused on safety, noise, and dust control: remodeling in occupied buildings.
Pricing (Without Numbers): What Drives Investment
Bathroom renovation investment depends on scope, material selections, layout changes, and specialty items. Clear specifications and itemized quotes reduce uncertainty and keep budgets under control.
- Scope: Cosmetic vs. full gut with layout changes.
- Materials: Tile grade, cabinetry construction, counters, and glass.
- Systems: Waterproofing, ventilation, and lighting complexity.
- Access: High-rise/condo rules, elevator bookings, and staging.
Altima’s process uses itemized quotations and 2D/3D design so you can weigh upgrades before we build. If you’re comparing approaches, our step-by-step cost drivers explainer details how scope and selections influence timelines—without listing prices.
Tools and Resources for Homeowners
Use a shared selections sheet, a room-by-room checklist, and a weekly schedule to keep momentum. 2D/3D visuals help lock dimensions and avoid late changes that ripple through the timeline.
- Selections tracker: Tile SKUs, grout colors, grout joint sizes.
- Field checklist: Rough-in heights, niche sizes, blocking locations.
- Weekly plan: What’s arriving, who’s on site, dependencies.
- Photo log: Before/after progress with measurements for reference.
We can walk you through these tools in a quick session and share 3D snapshots. That way, when the first tile goes up, everyone’s aligned on cuts, joints, and fixture heights.
Case Studies and Real-World Examples
Smart planning compresses timelines. In our GTA projects, in-house design, factory-direct cabinetry, and coordinated trades routinely shave days off the schedule while improving finish quality.
- Family ensuite (detached home): Curbless shower with linear drain, quartz-topped double vanity, dimmable layers of light; coordinated rough-ins eliminated rework.
- Condo main bath (near 11 Edvac Drive): Noise-optimized fan, stacked tile layout, slim floating vanity to widen the walkway; deliveries staged to meet condo booking windows.
- Guest bath refresh: New vanity, mirror, and sconces with a paint update—no rough-in moves, minimal downtime.
Looking ahead to an integrated project? This Ontario-wide planning article expands on scheduling multiple trades and decisions across rooms.
Local considerations for 11 Edvac Drive
- Plan material pickups to avoid peak times near Williams Pkwy at 2500 Williams Pkwy.
- Winter humidity swings can affect drying; schedule waterproofing and grout with proper curing windows.
- Coordinate condo permissions early; deliveries and elevator bookings tighten installation windows.
Frequently Asked Questions
Homeowners ask about timelines, permits, waterproofing details, and living through a remodel. Here are fast, clear answers to the most common questions we hear.
How long does a typical bathroom renovation take?
Most projects run several weeks depending on scope, selections, approvals, and lead times. Locking design, ordering long-lead items first, and coordinating trades keeps schedules predictable.
Do I need permits for a bathroom remodel?
Permits are typically required when moving plumbing or electrical. We handle drawings and coordination as needed so work is inspected and documented.
What’s the best way to prevent mold?
Combine continuous waterproofing in wet zones with a properly sized exhaust fan that vents outdoors. Run the fan during showers and for 20 minutes afterward to purge humidity.
Can I live at home while the bathroom is being renovated?
Yes, most clients do. We set up dust control, protect floors, and sequence noisy or high-impact tasks. If you have a single bath, we can plan temporary setups.
Key Takeaways
Lock your layout and selections, insist on continuous waterproofing, and size ventilation correctly. A coordinated design-build team with factory-direct cabinetry streamlines timelines and elevates finish quality.
- Finalize design in 2D/3D before ordering.
- Use continuous membranes and moisture-safe substrates.
- Sequence trades to reduce idle days and rework.
- Document field dimensions and heights to avoid conflicts.
- Choose durable, easy-clean fixtures and finishes.
Conclusion: Renovating Bathrooms with Confidence
The best bathroom remodels start with decisions, not demolition. Define scope, finalize design in 2D/3D, select a complete waterproofing system, and book trades in sequence. That plan keeps timelines predictable and quality high.
Here’s the thing: bathrooms compress water, power, and people into a tight footprint. That’s why layout, waterproofing, ventilation, and lighting carry so much weight. When we guide homeowners near the 11 Edvac Drive area, we start with a measured survey, then build clarity with drawings and a selections tracker. Our in-house factory shortens lead times and ensures vanities, towers, and medicine cabinets fit perfectly—even in condos with quirky walls. If you’re weighing a refresh versus a full gut, we’ll map the trade-offs and create an itemized plan so you can move forward with confidence.
Free technical walkthrough
Book a showroom or virtual session to review your layout, storage, and tile strategy. We’ll share 2D/3D views and a structured plan so you can move forward confidently.
Ready to start renovating bathrooms with a proven process? Schedule a design chat with our Brampton showroom team and we’ll build a step-by-step roadmap for your space.

Related Posts

Why Choose Kitchen Renovation Company
Nowadays, Kitchen spaces are not only a place for cooking and serving food, but these areas act as a statement, as they speak a lot about a family, the philosophy and personality of individuals, and spaces. If you admire aesthetics and adorn the beauty of your home, you must pay attention to the interior design […]
How a Kitchen Renovation Contractor is Changing the Game
Lifestyle is all about bringing something coherent to the overall experience of living. The kitchen and closets stand as two of the most influential spaces in a home that add to the overall experience of living. A Kitchen Renovation Contractor in Whitby by the name of Altima Kitchen and Closets Inc. is changing the overall […]
How Media unit contractor in Whitby is Changing the Game
Lifestyle is all about bringing something coherent to the overall experience of living. The kitchen and closets stand as two of the most influential spaces in a home that add to the overall experience of living. A Media Unit Company in Whitby by the name of Altima Kitchen and Closets Inc. is changing the overall […]