Kitchen Reno: Save Money Without Cutting Style in 2026
Kitchen reno on a budget is a focused refresh that maximizes what you already have while upgrading high-impact areas like doors, hardware, lighting, and backsplash. From our 11 Edvac Drive base in Brampton, Altima Kitchens and Closets designs and installs factory-direct cabinetry, refacing solutions, and 3D plans so GTA homeowners save smart without sacrificing style.
By Altima Kitchens And Closets | Last updated: June 20, 2026
Above-Fold Overview: Your game plan
A budget kitchen remodel preserves your layout and structure, then targets high-ROI upgrades: cabinet refacing, paint, new hardware, efficient lighting, and a modern backsplash. Use a simple, staged plandesign, prep, refresh, and finishto reduce waste, shorten timelines, and keep your project tidy and stress-free.
Heres the reality: most kitchens dont need a full gut. This guide shows you how to prioritize changes, visualize the design before build, and decide what to DIY versus what to leave to pros like Altimas in-house designers and installers.
- What kitchen reno on a budget really means (and what it isnt)
- Why targeted upgrades deliver outsized impact
- How the design-build workflow reduces waste and delays
- Refresh vs refacing vs replacing: which path fits your goals
- Best practices: storage, lighting, finishes, and durability
- Tools and resources: 3D design, factory-direct cabinetry, checklists
- Real GTA examples from our Brampton showroom team
Quick Summary
Start with a clear design and inventory what stays. Reface sound cabinets, refresh walls and hardware, upgrade lighting to efficient LEDs, and add a simple backsplash. Use 3D design to avoid rework. Reserve skilled tasks for pros and keep DIY to paint, pulls, and minor assembly.
Think sequence: design, materials, prep, installation, and finishing. A small number of smart moveslike door style changes, better storage, and brighter task lightingcan make your kitchen feel new. In the Regional Municipality of Peel, access to our 11 Edvac Drive showroom and factory speeds selections and production.
Local considerations for 11 Edvac Drive
- Plan showroom visits around peak traffic near Williams Pkwy at 2500 Williams Pkwy; weekday mornings are quieter for quicker consultations.
- Winter installs in Brampton benefit from interior finishing first; stage paint and backsplash while outdoor temps fluctuate, then schedule door deliveries accordingly.
- If youre staging materials, use garage space with protective coverings; proximity to Bottomwood Park means humidity swingslet doors acclimate 48 hours indoors before install.
What is a budget kitchen renovation?
A budget kitchen renovation is a scoped refresh that keeps your layout and cabinet boxes, then upgrades high-impact surfaces and storage. You preserve whats solid, reface or repaint doors, modernize lighting, add a durable backsplash, and organize interiors to achieve a fresh look without a full rebuild.
Its not a compromise; its a strategy. By focusing on door styles, hardware, lighting, and counters/backsplash, you control scope and disruption. In our experience across Toronto, Mississauga, and Vaughan, clients who keep their existing footprint finish faster and enjoy a space that feels custom-built.
- Keep: cabinet boxes, plumbing/sink location, major appliances (unless end-of-life)
- Upgrade: doors/drawer fronts, hinges, pulls/knobs, backsplash, lighting, faucet
- Add: storage accessories (pull-out pantry, spice pull-outs, lazy susans)
- Visualize: 2D/3D drawings to confirm proportions, colors, and light distribution
With Altimas factory-direct cabinetry and in-house installation, you get one accountable team for design through execution, backed by lifetime warranties on select doors.
Why budget-focused planning matters
Planning a budget-first kitchen reno aligns design dreams with practical steps. You reduce waste, avoid scope creep, and focus on durable upgrades that stand up to daily use. The result is a faster, cleaner install and a kitchen that looks designer-made without the downtime.
Homeowners tell us their pain points are vendor juggling, unclear scope, and delays. A structured plan solves that. When we map selections in one showroom visit, finalize drawings, and schedule fabrication, projects stay on track. Clear priorities also keep the work triangle efficient and code-friendly.
- Less waste: keep sturdy cabinet boxes; reface doors and drawers
- Fewer surprises: itemized scopes and upgrades reduce change orders
- Faster timelines: factory-direct doors shorten lead times
- Better daily living: brighter task lighting and organized storage reduce clutter
Design choices pay off in workflow: a matte black pull, soft-close hinges, and under-cabinet LED strips improve everyday function immediately. Typical clearances like 36 inches in walkways and 18 inches of landing space beside the fridge keep the room moving smoothly.
How a budget kitchen reno works (step-by-step)
The best process is design-led: measure, plan in 2D/3D, stage materials, then install in a tight sequence. Limit demolition, protect surfaces, and assign DIY to paint and hardware while pros handle doors, counters, and tile. A disciplined order avoids rework and keeps your home usable.
Heres a proven, low-disruption workflow we use across the GTA:
- Discovery and measurements Document appliance sizes, openings, ceiling height, and electrical points. Photograph inside cabinets to plan accessories.
- Design in 2D/3D Align door style, finish, and hardware with your homes architecture. Confirm sightlines, lighting coverage, and landing zones.
- Scope the refresh Decide what stays, what gets refaced, and what gets replaced (sink/faucet, cracked tile).
- Material staging Receive doors, hinges, pulls, backsplash tile, grout, and lighting. Inspect finishes and quantities.
- Surface prep Mask floors, remove doors/drawers, clean boxes, and prime paintable surfaces. Protect counters if retaining.
- Cabinet refacing/installation Hang new doors, align reveals, set soft-close hardware, and adjust for clean gaps.
- Lighting and electrical Install under-cabinet LEDs and swap dated fixtures. Keep continuous light spacing (every 1012 inches under runs).
- Backsplash Cut outlets cleanly, check level every 23 rows, and finish with silicone where tile meets counter.
- Finals Mount pulls/knobs using a jig, reinstall shelves, add organizers, caulk, and touch up paint.
- Walkthrough Verify door alignment, soft-close action, grout color, and light temperatures (keep 30003500K warm-neutral for kitchens).
Assign DIY wisely. Painting walls and installing hardware are weekend-friendly. Door hanging, tile, and electrical upgrades reward pro precisionand our in-house team handles them daily.
Approaches: refresh vs. refacing vs. replacing
Choose between three scopes: a cosmetic refresh (paint, pulls, lighting), cabinet refacing (new doors/drawers on existing boxes), or full replacement (new cabinets and layout). Most budget-minded makeovers land in refresh or refacing for big visual change with minimal disruption.
Each path has a different impact profile. Use this comparison to align goals with effort.
| Scope | What changes | Timeline feel | Best when | Notes |
|---|---|---|---|---|
| Refresh | Paint walls, swap pulls/knobs, add under-cabinet LEDs, simple backsplash | Fastest | Boxes and doors are solid; style is dated | Minimal disruption; strong style lift |
| Refacing | New doors/drawers, soft-close hinges; keep cabinet boxes and layout | Moderate | Boxes are sturdy; you want a new door style/color | Factory-built doors; precise fit and finish |
| Replacing | New cabinets; optional layout changes and added storage | Longest | Boxes are damaged or layout is inefficient | Highest customization potential |
We often blend scopes: reface perimeter doors in a timeless shaker, refresh the island with a contrasting paint color, and replace one cabinet with a tall pull-out pantry for daily efficiency.

Best practices to save smart and look custom
Prioritize door style, lighting, and organization. Keep the footprint, add storage where it counts, and select durable, easy-care finishes. Use warm-neutral LED temperatures, soft-close hardware, and a simple backsplash pattern to create a timeless, designer look without complexity.
Design decisions that punch above their weight
- Pick a timeless door Shaker with a slim rail reads modern and classic.
- Unify metals Match faucet and pulls; mix only with intent (e.g., brass + matte black).
- Right light, right place Task LEDs under cabinets; 30003500K CCT keeps food colors natural.
- Simple backsplash Subway or stacked rectangles speed install and look crisp.
- Hardware scale 56 inch pulls on drawers keep proportions balanced.
Durability and maintenance that pay off daily
- Soft-close hinges and slides reduce wear and noise instantly.
- Moisture-smart finishes on doors and panels resist everyday splashes.
- Sealed grout behind the range simplifies cleanup; pick a mid-tone.
- Ventilation alignment with range width (e.g., 30-inch hood for 30-inch range) improves capture.
Storage upgrades that feel custom
- Pull-out pantry near the fridge organizes snacks and dry goods.
- Lazy susan corners reclaim hard-to-reach space.
- Spice pull-outs keep 46 rows visible at a glance.
- Valance lighting along long runs evens light and adds glow.
In our Brampton factory, Italian CNC machines and a professional spray booth deliver consistent finishes and tight toleranceskey for refacing that looks brand new.
Tools and resources that simplify decisions
Lean on 2D/3D design to confirm look and fit, then source factory-built doors for precision. Use a room-by-room checklist and a simple install sequence to stay organized. One accountable teamdesign, manufacturing, and installationkeeps momentum from selections to sign-off.
At our 11 Edvac Dr showroom, everything is under one roof: door samples, counters, backsplash tile, organizers, and lighting. Clients appreciate reviewing drawings, then approving selections in one sitting. That clarity prevents rework and protects timelines.
- See our design planning guide for measuring and layout checks.
- Explore quick wins in our cabinet makeover ideas to refresh style fast.
- Browse budget kitchen renovation tips tailored for GTA homes.

Want external perspectives on cabinet updates? This cabinet refinishing guide and this refacing contractors overview outline common processes and finish options, and this general kitchen and bathroom renovation resource discusses typical scopes.
Free design walkthrough: Bring photos and rough measurements to our Brampton showroom (Units 1319). Well sketch options, show door profiles, and map a clean, staged installwith financing options that can start at 0% down.
Book a design chat and leave with a practical plan.
Step-by-step checklist to stay on track
Use a simple checklist: measure, design, select, prep, install, and finish. Label boxes, protect floors, and stage hardware and lighting before install day. Keep DIY to paint and pulls; schedule pros for doors, tile, and electrical for the best fit and finish.
- Measure openings, ceiling height, appliance sizes; photograph interiors.
- Design door style, color, hardware, lighting plan; confirm clearances (36-inch walkways).
- Select doors, hinges, pulls, backsplash tile, grout, faucet, and organizers.
- Prep mask floors, remove doors, clean boxes, patch walls, prime.
- Install hang doors, align reveals, set LEDs, lay backsplash, mount pulls.
- Finish seal grout, touch up paint, adjust hinges and slides, vacuum dust.
Document each stage with photos. A 10-minute end-of-day review reduces punch-list items and keeps everyone aligned.
Materials and finishes that stretch your budget
Select timeless door profiles, durable paint or laminate finishes, quartz-look counters, and a simple backsplash. Use mid-tone grout, soft-close hardware, and warm-neutral LEDs. Prioritize materials that clean easily and age well to avoid early replacements.
Cabinet doors and fronts
- MDF painted doors with lifetime warranty on select lines provide a crisp, uniform finish.
- Prelaminated doors offer consistent color and strong scratch resistance.
- Edge details and rail widths influence style; slimmer rails read more modern.
Counters and backsplash
- Quartz-look surfaces deliver visual continuity and easy care.
- Subway or stacked tile speeds install; maintain a consistent 1/8-inch grout line.
- Mid-tone grout hides daily wear better than bright white.
Lighting and hardware
- Under-cabinet LED bars spaced every 1012 inches give even task light.
- 30003500K color temperature keeps food tones natural and comfortable.
- Matte black or brushed brass pulls in 56 inches balance most drawer widths.
Pairing an off-white perimeter with a deeper island tone grounds the room and adds depth without complex detailing.
Layout and ergonomics (keep it efficient)
Keep the existing work triangle when possible. Maintain 36-inch walkways, 15 inches minimum landing by the oven and fridge, and set under-cabinet lighting to cover the full counter run. These practical numbers help your refresh feel like a complete redesign.
- Triangle efficiency stove, sink, and fridge should flow without crossings.
- Landing zones at least 18 inches near the fridge and 15 inches beside the oven.
- Vertical storage use tall pull-outs where you canhigh yield per inch.
- Outlet spacing consistent gaps keep small appliances usable without cord clutter.
Small ergonomic tweakslike relocating a rarely used microwave to a shelffree counter space for everyday prep.
Case studies and GTA examples
Real projects prove the point: by preserving structure and updating the right elements, you get a custom look fast. These GTA mini case studies show how refacing, simple lighting, and a clean backsplash transformed daily usewithout a layout overhaul.
Brampton family refresh
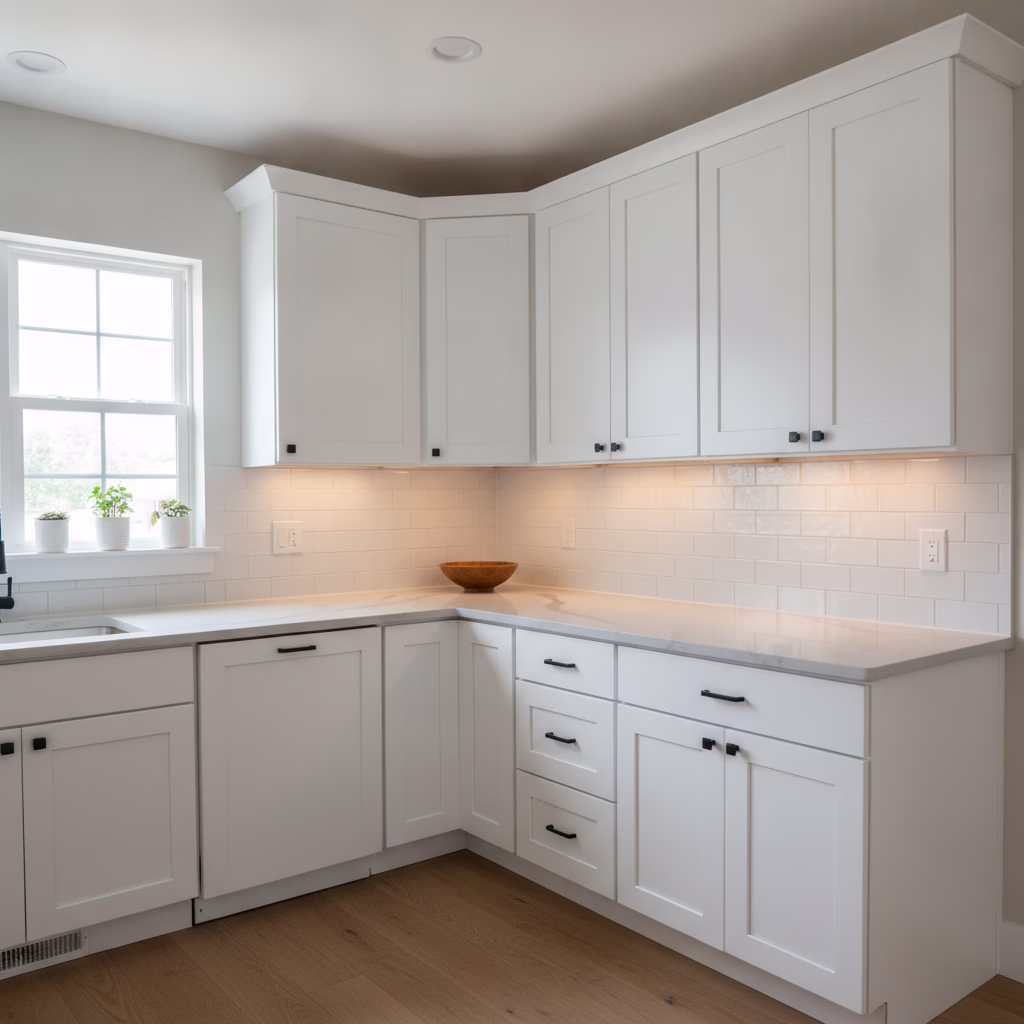
A busy family near our Brampton factory kept their L-shaped layout. We refaced doors in a warm white shaker, added under-cabinet LEDs, and installed a stacked tile backsplash. Pull-out pantry and spice pull-outs increased visibility. The room feels larger, with smoother morning routines.
Toronto condo facelift
In a midtown condo, we preserved cabinet boxes and swapped slab-style doors in a matte finish. A single open shelf replaced a small cabinet to create breathing room. Task lighting and a crisp backsplash frame the cooktop wall, making the compact kitchen feel bright and intentional.
Mississauga starter home upgrade
This galley kitchen kept its footprint. New doors and soft-close hardware eliminated slamming; a lazy susan turned an awkward corner into usable space. A subtle two-tone scheme anchors the range wall. Weekend DIY paint and hardware installs trimmed downtime between workdays.
See inspiration in our before-and-after gallery featuring practical, fast-turn projects.
Common mistakes to avoid
The biggest pitfalls are scope creep, skipping design sign-off, mixing too many finishes, and under-planning lighting. Lock the design in 3D, unify metals, stage materials early, and follow a tight install order. These moves protect your schedule and the final look.
- Skipping 3D approvals leads to avoidable rework.
- Mixing finishes arbitrarily makes small kitchens feel busy.
- Under-lighting counters leaves tasks in shadow; add continuous LED runs.
- Unprotected floors and counters risk scratches and chips during install.
A short site-protection checklist (floor paper, edge guards, plastic zipper walls) keeps dust down and surfaces clean through tile day.
DIY versus pro tasks
Do paint and hardware yourself if youre handy. Hire pros for door hanging, tile, electrical, and any plumbing adjustments. Precision in these trades pays off daily in straighter lines, quieter doors, and safer, brighter lighting.
- DIY-friendly: wall painting; pull/knob installation using a jig; shelf organization.
- Pro-recommended: door/drawer installation and alignment; backsplash tile; LED wiring and dimmer setup.
- Shared tasks: demolition and cleanuppros can advise on what to remove and what to protect.
Our in-house installers move quickly because the design is finalized up front, the hardware list is complete, and all doors arrive labeled and ready.
How Altimas design-build approach saves stress
One accountable teamdesign, factory manufacturing, and installationmeans fewer handoffs and faster decisions. Itemized scopes, 2D/3D drawings, and WhatsApp-style progress updates keep projects predictable from first sketch to final wipe-down.
Heres how we streamline the journey from idea to install:
- Single showroom: all selections under one roof at 11 Edvac Dr, Units 1319.
- Factory-direct cabinetry: Italian CNC precision and spray-booth finishes for consistent quality.
- Lifetime warranties on MDF Painted and Prelaminated doors (select lines) add long-term peace of mind.
- Financing options: flexible plans with 0% down and fast approvals to remove upfront barriers.
When working with clients across the GTA, weve found that early design clarity and a clean, staged sequence are the biggest stress reducers.
Planning without pricing: how to think about value
Skip price guessing and think in priorities: what matters most to how you cook and live? Put door style, lighting, and organization at the top. Keep your footprint to stretch your investment further, then layer in finishes that clean easily and age well.
- Rank top three goals: style update, brighter prep, better storage.
- Protect what works: keep the triangle and boxes if theyre sound.
- Invest in touch-points: hinges, slides, pulls, and faucet.
- Choose timeless: neutral doors plus a textural backsplash last longer.
Value isnt about cutting corners; its about choosing the right corners to keep.
Frequently Asked Questions
These quick answers address the most common questions we hear about budget-friendly kitchen remodels in the GTA, including what to keep, where to invest, and how to plan a low-disruption install.
What should I keep during a budget kitchen reno?
Keep any component thats solid and functional: cabinet boxes, appliances that work well, and your existing layout if its efficient. Update doors, hardware, lighting, and backsplash for the biggest transformation with the least disruption.
Is cabinet refacing a good idea if my boxes are old?
If cabinet boxes are sturdy and square, refacing is an excellent path. Youll get brand-new doors and drawers, modern hinges, and a fresh style without changing the layout. If boxes are water-damaged or out of square, consider replacement for long-term reliability.
Which upgrades make the biggest visual impact?
Door style and color, continuous under-cabinet LEDs, and a clean backsplash create the fastest, most noticeable change. Add coordinated hardware and a well-chosen faucet to complete the look. These upgrades improve both form and function immediately.
What tasks can I DIY to save time?
Painting walls and installing pulls or knobs are common DIY wins. Use a hardware jig for consistency. Leave door hanging, tile, and electrical to pros for better alignment, cleaner grout lines, and safe, code-friendly lighting.
How do 3D designs help on a tight budget?
3D drawings let you confirm proportions, finishes, and lighting before anything is built. That clarity prevents rework and change orders, speeds approvals, and ensures the final kitchen matches your vision the first time.
Conclusion and next steps
A smart, budget-first kitchen reno preserves structure, upgrades high-impact elements, and follows a clean, staged plan. With factory-direct doors, in-house design, and precise installation, you can achieve a custom look quickly and confidently.
- Key takeaways: keep the footprint, reface for style, light the tasks, and organize interiors.
- Action step: book a 3D design walkthrough and material review in one visit.
- Momentum: approve drawings, schedule fabrication, and plan a tidy, two-phase install.
Ready to start? Visit our showroom at 11 Edvac Dr, Units 1319, Brampton for a design chat. Well map a budget-first plan with factory-direct options and flexible financing. Explore more ideas in our planning guide and budget-focused tips.
Related Posts

Why Choose Kitchen Renovation Company
Nowadays, Kitchen spaces are not only a place for cooking and serving food, but these areas act as a statement, as they speak a lot about a family, the philosophy and personality of individuals, and spaces. If you admire aesthetics and adorn the beauty of your home, you must pay attention to the interior design […]
How a Kitchen Renovation Contractor is Changing the Game
Lifestyle is all about bringing something coherent to the overall experience of living. The kitchen and closets stand as two of the most influential spaces in a home that add to the overall experience of living. A Kitchen Renovation Contractor in Whitby by the name of Altima Kitchen and Closets Inc. is changing the overall […]
How Media unit contractor in Whitby is Changing the Game
Lifestyle is all about bringing something coherent to the overall experience of living. The kitchen and closets stand as two of the most influential spaces in a home that add to the overall experience of living. A Media Unit Company in Whitby by the name of Altima Kitchen and Closets Inc. is changing the overall […]