Built-In Appliance Cabinets: What to Confirm Before You Request a Quote
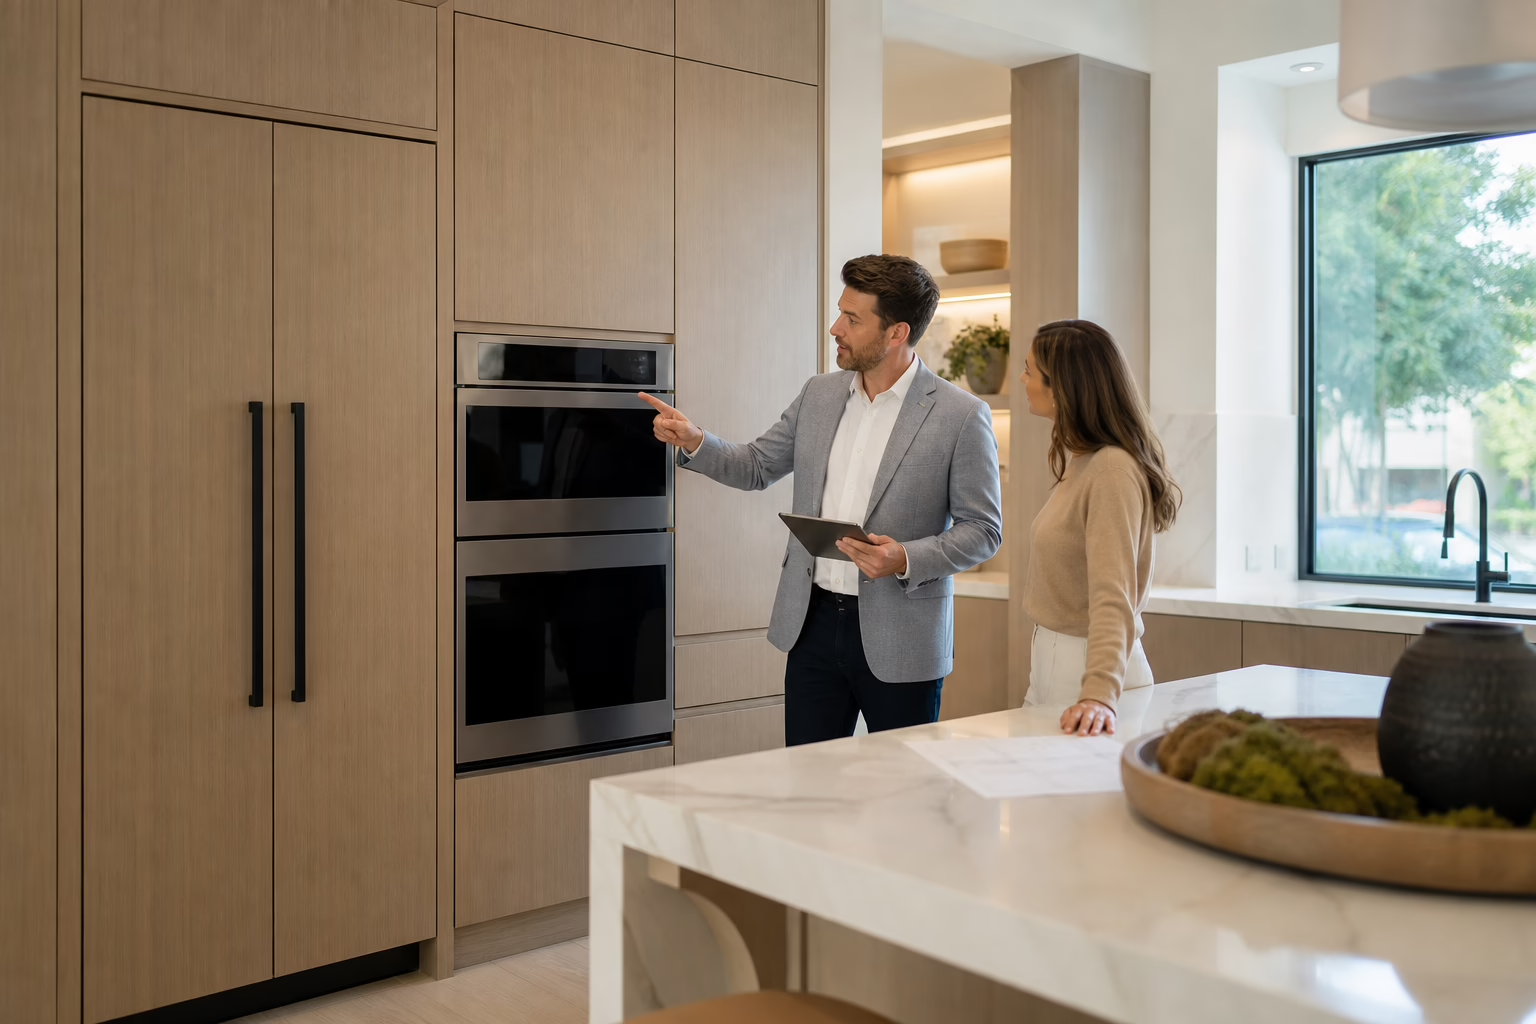
Built-in appliance cabinets can give a kitchen a cohesive appearance and make better use of vertical space. However, they require more planning than placing a freestanding appliance between standard cabinets. The layout must account for the exact appliance model, door movement, ventilation, utility connections, service access, and panel requirements.
The best approach is to choose or shortlist appliances first, collect their manufacturer specifications, and then design the cabinetry around your workflow and storage needs. This prevents an attractive cabinet plan from becoming an expensive installation problem.
What Are Built-In Appliance Cabinets?
Built-in appliance cabinets are cabinetry planned to frame, surround, conceal, or support kitchen appliances. They can create a continuous run of doors and panels, place appliances at a more comfortable height, or turn unused vertical space into organized storage.
Freestanding appliances are designed to stand independently. Built-in appliances fit into a prepared opening or tower. Panel-ready or integrated appliances accept a custom cabinet panel so they blend with surrounding doors. Each arrangement has different requirements, so the cabinet design should follow the appliance installation documentation rather than a generic opening size.
Compare Common Built-In Appliance Cabinet Configurations

| Configuration | Potential benefit | Details to confirm |
|---|---|---|
| Refrigerator or freezer columns | A coordinated wall of refrigeration and storage | Height, depth, door swing, fillers, ventilation, panels, trim, and delivery access |
| Wall-oven and microwave tower | Vertical storage efficiency and ergonomic placement | Stacking order, opening height, heat requirements, landing space, utilities, and servicing |
| Integrated dishwasher | A continuous cabinet-front appearance near the sink | Panel size, hinge clearance, handle placement, plumbing, electrical access, and floor height |
| Appliance garage or compact-appliance cabinet | A dedicated place for coffee machines, toasters, or microwaves | Outlet access, door clearance, heat management, counter workspace, and appliance dimensions |
Refrigerator Columns and Appliance Panels
Refrigerator and freezer columns are usually planned as tall cabinetry because their height, depth, and door movement affect the entire wall. Fillers may be needed for full door opening, while finished end panels create a polished appearance on exposed sides.
Confirm whether the appliance will remain visible, use a manufacturer trim kit, or accept a custom panel. Also consider delivery. The appliance must be able to pass through doorways, hallways, elevators, and stairs before the cabinet wall is installed.
Wall-Oven and Microwave Towers
A tall oven and microwave cabinet can free counter space and place cooking appliances at accessible heights. It also replaces some pantry or base storage, so its location should be evaluated against food preparation areas and nearby landing space.
Do not rely on a generic oven opening. Stacked appliances can have different cutout, ventilation, electrical, and service requirements. Final cabinet dimensions should use the selected models and their installation manuals.
Integrated Dishwashers
An integrated dishwasher sits behind a cabinet-style front, helping it blend with the kitchen. Its panel, handle, hinge movement, lower clearance, plumbing, and electrical access must work with adjacent doors and the finished floor.
Because dishwashers are commonly installed near the sink, confirm that the appliance can be removed for servicing without dismantling unrelated cabinetry.
Appliance Garages and Compact-Appliance Storage
An appliance garage can keep a coffee machine, toaster, blender, or microwave accessible without leaving everything on display. It needs sufficient depth, a convenient outlet, safe door movement, and appropriate ventilation for the intended equipment.
In a compact kitchen, storage accessories such as pull-out pantries, drawer dividers, and Lazy Susans can improve usable space around integrated appliances. Choose these accessories alongside the appliance layout, not after the cabinet design is complete.
Start With Appliance Specifications, Not the Cabinet Sketch
- Shortlist appliances: Record the brand, model number, and intended configuration.
- Collect specification sheets: Save installation, cutout, clearance, ventilation, panel, hinge, and utility information.
- Verify the room: Measure walls, corners, ceiling height, windows, doors, flooring transitions, and existing utilities.
- Map the workflow: Consider where food is stored, prepared, cooked, served, and cleaned.
- Develop the cabinet design: Coordinate openings, fillers, panels, countertops, pantry storage, lighting, and circulation.
- Approve materials and drawings: Check details carefully before manufacturing.
- Confirm installation responsibility: Establish who handles cabinetry, appliance placement, electrical, plumbing, ventilation, and adjustments.
Measurements, Clearances, Ventilation, and Utilities
There is no universal clearance or opening size for every refrigerator, oven, dishwasher, or microwave. Confirm the manufacturer’s requirements for width, height, depth, door swing, adjacent obstructions, ventilation, and service access.
Identify outlets, water lines, drains, gas connections where applicable, and ventilation routes. These details can affect cabinet depth, drawer positions, countertop space, and whether additional work is needed before installation.
For renovations involving building elements or utilities, regulatory questions should be reviewed according to the project. Ontario’s Building Code provides the provincial framework for applicable building regulations. Review the Ontario Building Code information and obtain project-specific advice where needed.
Coordinate Appliance Cabinets With the Kitchen
Appliance cabinetry should support how you use the kitchen, not only create a seamless visual line. A refrigerator needs nearby space for unloading groceries, an oven needs a safe landing area, and a dishwasher should not block the main route or sink.
Review how appliance doors interact with corners, islands, handles, drawers, and each other. Small filler panels can provide the clearance needed for doors and drawers while maintaining consistent sightlines across custom kitchen cabinets.
Also account for countertop transitions, backsplash height, lighting, waste storage, and frequently used accessories. Altima Kitchens And Closets states that its kitchen service includes tailored layouts, material guidance, and 2D and 3D design, allowing homeowners to review these relationships before fabrication.
Choose Cabinet Boxes, Doors, and Panels Together
- Cabinet box: The structural body containing the sides, bottom, top, and interior.
- Door or drawer front: The visible operating front and its finish.
- Appliance panel: A door-style panel attached to a panel-ready appliance.
- Filler and finished end panel: Pieces that resolve clearances, exposed sides, and transitions.
- Hardware: Hinges, slides, handles, and lift mechanisms affecting movement and access.
Melamine and plywood are both cabinet-box options. The suitable choice depends on design, budget, moisture exposure, expected use, installation details, and preferences. For a closer comparison, see melamine versus plywood cabinets.
Ask how appliance panels will match the door finish, how exposed ends will be treated, and whether the hardware supports the panel weight. These details matter especially when a panel is wide, tall, or attached to a specialized hinge system.
Make Integrated Appliances Work in a Compact Kitchen
In a condo or smaller kitchen, integrated appliances can make the room feel calmer, but they also consume valuable cabinet volume. A tall oven tower may reduce pantry capacity, while a deeper refrigerator enclosure can narrow circulation or reduce counter space.
Use vertical space deliberately, keep frequently used items near their point of use, and avoid placing every appliance in one crowded wall. Pull-out pantries, drawer storage, corner solutions, and compact appliance zones can improve access without eliminating all available counter space.
Condo owners should check building access rules, elevator bookings, delivery windows, work-hour restrictions, and requirements for modifying utilities or shared elements before approving the plan.
Use 2D and 3D Design Before Fabrication
A design drawing should show more than cabinet colors. Check appliance locations, opening directions, panel alignment, filler widths, countertop transitions, storage accessories, outlet locations, and future service access.
Use the 3D view to assess sightlines and proportions, then use technical drawings to inspect dimensions and relationships that may not be obvious in a rendering. Request revisions while the design is still being coordinated. Changes after manufacturing can affect connected cabinets, panels, countertops, and utilities.
What an Itemized Quote Should Show
- Cabinet boxes, doors, drawer fronts, appliance panels, fillers, and finished end panels
- Hardware, handles, pull-outs, pantry systems, lighting, and accessories
- Countertops, backsplash work, and related finishes
- Delivery, installation, measurement, adjustment, and cleanup
- Electrical, plumbing, ventilation, flooring, demolition, or structural work
- Included materials, upgrade prices, exclusions, assumptions, and taxes
- Payment milestones, change-order procedures, warranty coverage, and schedule expectations
Do not assume an appliance is included because it appears in a rendering. The quote should state whether the homeowner supplies it and who confirms its final specifications before fabrication.
Pre-Quote Checklist
- Exact appliance model numbers or a defined shortlist
- Manufacturer installation documents
- Dimensions, door swings, hinge locations, and panel requirements
- Clearances, ventilation, and service access
- Outlet, plumbing, drain, gas, and ventilation locations
- Room measurements, delivery routes, and floor conditions
- Preferred cabinet-box material, door finish, handles, and exposed-end treatments
- Storage priorities, including pantry capacity, pull-outs, and appliance garages
- 2D and 3D drawings showing openings, fillers, panels, utilities, and accessories
- An itemized quote listing inclusions, exclusions, upgrades, payment stages, and change procedures
Questions to Ask Before Approval
- Have the appliance specifications been checked against the final drawings?
- Who verifies site measurements if existing conditions differ?
- How will panels, fillers, hinges, and handles align?
- Where will outlets, plumbing, ventilation, and service access be located?
- Which work is included, and which requires separate trades or approvals?
- How many design revisions are included before fabrication?
- Who coordinates delivery, installation, appliance placement, and adjustments?
- What does the warranty cover for boxes, doors, panels, hardware, and installation?
Frequently Asked Questions
Can a freestanding appliance go inside a built-in cabinet?
Sometimes, but only if the manufacturer permits it and the cabinet provides required ventilation, clearances, access, and utility connections. Do not enclose an appliance based on outside dimensions alone.
Do panel-ready appliances require special cabinet doors?
Yes. They require a compatible custom panel designed to the manufacturer’s specifications, including weight, dimensions, hinge movement, and handle position.
Should appliances be chosen before cabinetry?
Yes. Final cabinet openings, fillers, utilities, ventilation, and storage should be based on exact appliance information whenever possible.
Do condo owners need approval?
It depends on the building and project scope. Check with management or the condo corporation about work hours, elevators, delivery, insurance, plumbing, electrical, ventilation, and alterations.
Conclusion: Choose the Cabinet Plan After the Appliance Plan
Built-in appliance cabinets work best when appliance specifications, workflow, storage, materials, utilities, access, and budget are reviewed together. The seamless appearance is valuable, but precision matters more than appearance alone.
Before fabrication, confirm model-specific requirements, inspect the 2D and 3D design, verify the itemized quote, and document responsibility for each installation stage. For GTA homeowners, Altima Kitchens And Closets provides custom kitchen design, 2D and 3D planning, in-house manufacturing, and professional installation.
Related Posts
Why Choose Kitchen Renovation Company
Nowadays, Kitchen spaces are not only a place for cooking and serving food, but these areas act as a statement, as they speak a lot about a family, the philosophy and personality of individuals, and spaces. If you admire aesthetics and adorn the beauty of your home, you must pay attention to the interior design […]
How a Kitchen Renovation Contractor is Changing the Game
Lifestyle is all about bringing something coherent to the overall experience of living. The kitchen and closets stand as two of the most influential spaces in a home that add to the overall experience of living. A Kitchen Renovation Contractor in Whitby by the name of Altima Kitchen and Closets Inc. is changing the overall […]
How Media unit contractor in Whitby is Changing the Game
Lifestyle is all about bringing something coherent to the overall experience of living. The kitchen and closets stand as two of the most influential spaces in a home that add to the overall experience of living. A Media Unit Company in Whitby by the name of Altima Kitchen and Closets Inc. is changing the overall […]