How Can You Plan Valance Lighting in a Kitchen Without Glare?
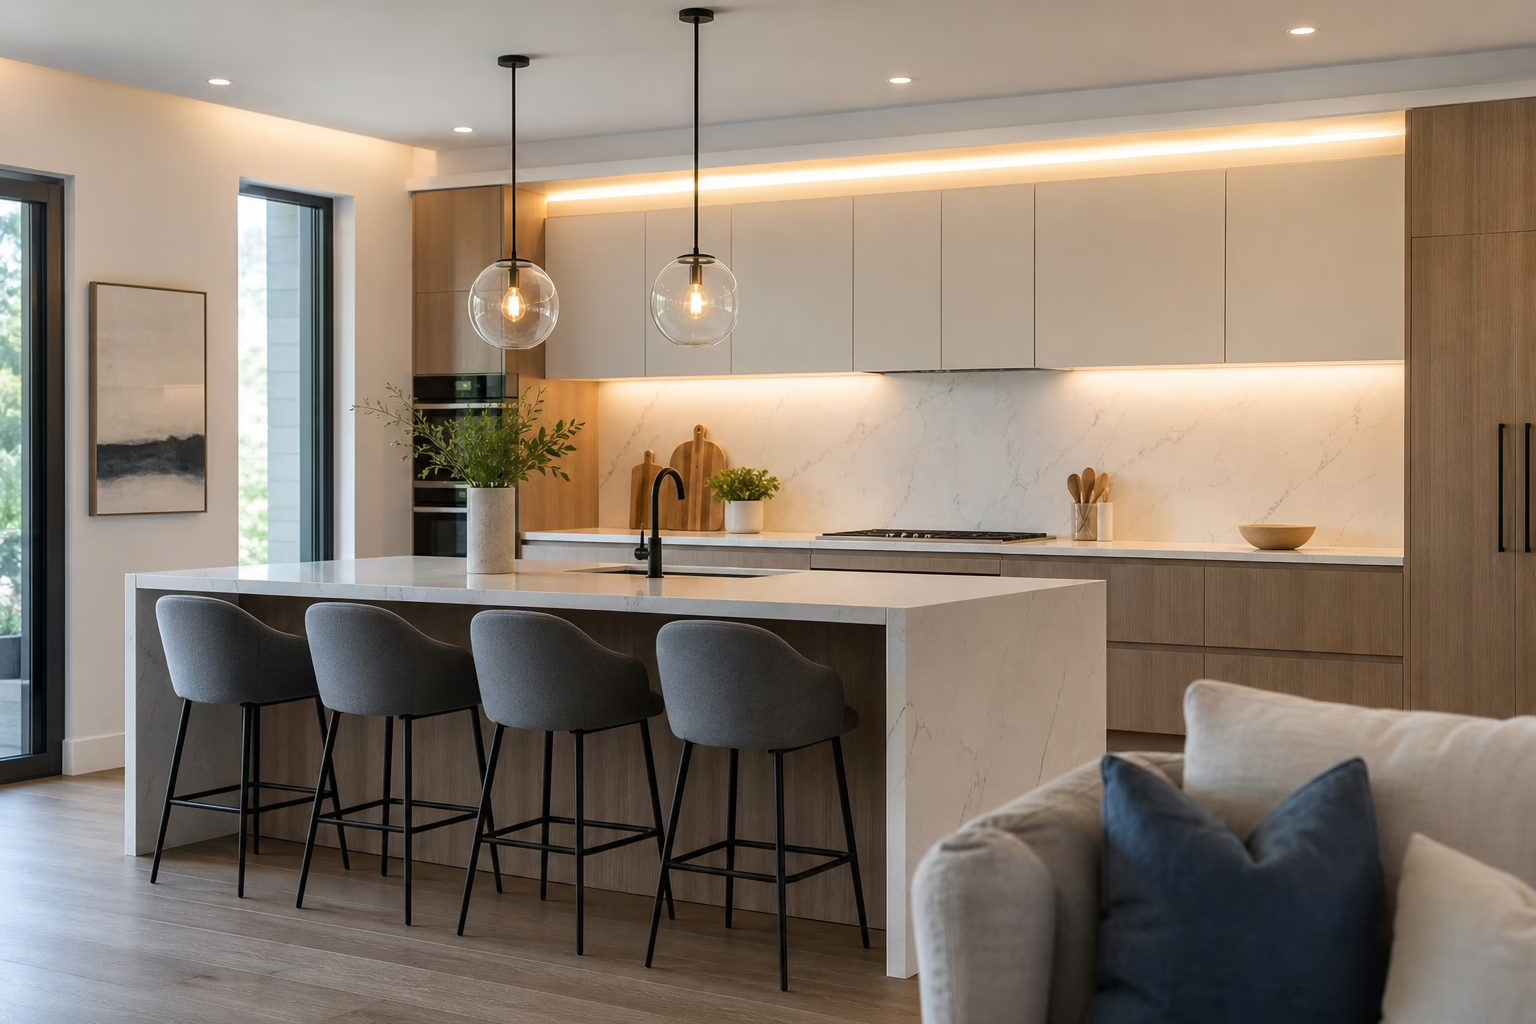
Valance lighting is positioned within or concealed by the lower portion of upper kitchen cabinetry. It can illuminate selected countertop areas and add a finished layer to a kitchen lighting plan, but it should not be treated as an afterthought. Cabinet proportions, sightlines, wiring, controls, backsplash, and countertop details all affect the result.
The safest approach is to plan valance lighting with the cabinetry, rather than choosing fixtures after the cabinets have been designed or installed. The sequence below will help you decide where lighting belongs, identify details that need professional coordination, and put the agreed scope in writing.
Step 1: Decide What the Valance Lighting Should Do
Start with the purpose, not the fixture. Ask what you want to improve:
- Work-area visibility: You may want light along preparation, sink, or cooking surfaces.
- Atmosphere: You may want a softer layer for evenings or entertaining.
- Cabinet emphasis: You may want to highlight the cabinetry or create a finished transition between the upper cabinets and backsplash.
- Coordination: You may want valance lighting to complement ceiling, pendant, pantry, or other kitchen lights.
These goals can overlap, but they are not identical. Lighting that looks attractive may not illuminate every work surface effectively, while lighting intended for task visibility may need careful control to remain comfortable. Treat valance lighting as one layer of the overall kitchen lighting design rather than assuming it will replace every other source.
Stop point: Write down the specific areas you want illuminated and when you expect to use the lighting. If you cannot identify the intended zones, the design is not ready to finalize.
Step 2: Map the Cabinet Zones That Need Light

Review the kitchen elevation and mark each section where light could be useful. Consider preparation areas, the sink, a coffee or serving station, display areas, and sections normally hidden by appliances or other obstructions.
Do not assume every cabinet run should receive the same treatment. A continuous run may be straightforward to coordinate, while a kitchen with open shelving, different cabinet heights, appliance garages, a hood, or gaps between cabinets may require a more selective plan. Lighting an area that does not need it can create unwanted visual emphasis.
Consider where you normally stand and sit. A light source that appears comfortable from across the room may be noticeable when you are seated at an island or working directly beneath the cabinets.
Decision point: If the cabinet run is interrupted or includes unusual sections, ask the designer to show exactly which zones will be lit and which will remain unlit.
Step 3: Decide Whether This Is New Cabinetry, Refacing, or a Retrofit
The available options depend partly on the condition and construction of the existing cabinets.
With new custom cabinetry, lighting space, cabinet proportions, access, and routing can be considered during design. With refacing or a retrofit, existing cabinet depth, underside construction, power access, and finished appearance may limit what can be added without modification.
That does not mean an existing kitchen cannot accommodate valance lighting. It means compatibility should be assessed rather than assumed. A plan that works for new cabinetry may not transfer directly to a refaced or existing cabinet run.
For a broader renovation, review Altima’s kitchen renovation service when deciding whether lighting should be coordinated with a larger cabinet project.
Stop point: Do not approve a retrofit based only on a photograph or a general promise that the lighting will fit. Confirm the proposed location, finish, access, and wiring approach for your actual cabinets.
Step 4: Reserve the Valance Area in the Cabinet Design
The valance should look like part of the cabinetry, not an item added beneath it. Review these details with the designer:
- The proportion and profile of the valance across the cabinet run.
- The relationship between the valance, backsplash, countertop edge, and upper cabinet doors.
- Whether the light source and hardware will be concealed from normal viewpoints.
- Whether the finish will match or intentionally complement the surrounding cabinetry.
- How the lighting can be accessed for adjustment or maintenance later.
- How the design transitions around corners, end panels, open shelves, or changes in cabinet height.
Ask to see the relevant cabinet profiles and material options before fabrication. Altima Kitchens And Closets provides custom cabinetry, showroom selections, and in-house design and manufacturing. Its cabinet catalogs can support a discussion about how the valance treatment should relate to the wider cabinet design.
Decision point: If the valance changes the apparent height or balance of the upper cabinets, resolve that proportion before anything is manufactured.
Step 5: Coordinate Wiring, Switching, and Controls Before Installation
Before installation, confirm how the lighting will be powered and controlled. The written plan should identify the control location, whether the lighting will work independently from other kitchen lights, and how wiring will be coordinated with cabinet installation.
Clarify who is responsible for electrical work, connections, and coordination with other trades. Cabinet installers and electrical professionals may have different responsibilities, so the scope should not rely on assumptions.
Homeowners should not carry out electrical work unless properly qualified and authorized to do so. Ask the appropriate electrical professional about the work that applies to your home. The renovation team should know the control and wiring plan before cabinets are built or installed so access is not blocked.
Stop point: Do not approve the final cabinet layout while the power route, control location, and electrical responsibility remain unclear.
Step 6: Review the Lighting in the 2D and 3D Kitchen Design
A drawing review gives you an opportunity to catch visual problems before fabrication. Altima lists 2D and 3D kitchen designs as part of its design process, helping homeowners review the relationship between cabinetry, lighting, and finishes before construction.
During the review, look for:
- Which countertop sections are intended to receive light.
- Whether the valance appears continuous and intentional from main room viewpoints.
- Whether doors, handles, panels, or shelves could obstruct the intended lighting area.
- Whether backsplash, countertop, and cabinet finishes work with the proposed placement.
- Whether the lighting is likely to be visible from seated and standing positions.
- Whether switches or controls are located where they can be reached comfortably.
A 3D view is useful for proportions and sightlines, but it cannot replace reviewing the finished installation in person. Use it to resolve design decisions early, then plan a practical test before completion.
Step 7: Confirm Every Lighting Detail in the Itemized Quote
Ask for the valance lighting scope to be described clearly in the quote. An itemized quotation is more useful when it distinguishes included work from upgrades, exclusions, and responsibilities.
At minimum, ask whether the quote identifies:
- The cabinet sections that will include valance lighting.
- The valance construction, finish, and integration with the cabinet design.
- The lighting components and controls included in the scope.
- Wiring coordination and which professional is responsible for electrical work.
- Installation, connection, testing, and cleanup responsibilities.
- Access provisions for future adjustment or maintenance.
- Optional upgrades and their separate prices.
- Work that is specifically excluded.
Altima describes its renovation process as including transparent, itemized quotes with upgrade pricing. Regardless of which contractor you choose, convert every important assumption into written scope details.
Stop point: Do not treat “lighting included” as a complete description. Confirm its location, components, installation responsibility, connections, and change pricing.
Step 8: Test the Lighting Before Final Completion
Plan a final review while the installation can still be corrected. Test the lighting from the positions where the kitchen will actually be used, including normal standing and seated viewpoints.
Check:
- Whether the intended countertop and cabinet zones are illuminated.
- Whether the light creates distracting glare from the backsplash, countertop, or cabinet surfaces.
- Whether your body or upper cabinets create unwanted shadows over work areas.
- Whether the light source, wiring, or hardware is visible when it should be concealed.
- Whether the appearance is consistent along the planned cabinet run.
- Whether switches and controls operate as agreed.
- Whether valance lighting works comfortably with other kitchen lights.
Raise problems before final completion rather than assuming they will be less noticeable later. Compare the installed result with the approved cabinet drawings and written scope.
Common Valance Lighting Mistakes to Avoid
- Choosing lighting before planning cabinetry: This can leave too little room for concealment or create an awkward cabinet proportion.
- Lighting every cabinet run automatically: Different zones may have different functional and visual needs.
- Leaving control placement until the end: A poorly located switch can make the system inconvenient.
- Assuming refacing offers the same flexibility as new cabinetry: Existing construction may restrict placement, access, and concealment.
- Leaving electrical responsibility vague: Unclear handoffs can cause delays or gaps in the installation scope.
- Skipping the design review: Proportions, sightlines, and transitions are easier to resolve before fabrication.
- Testing from only one viewpoint: Glare or visible hardware may appear when you sit, stand, or move around the kitchen.
Questions to Ask Before Approving the Kitchen Lighting Plan
- Which countertop and cabinet zones will the valance lighting serve?
- How will the valance integrate with the doors, panels, backsplash, and countertop?
- Will the lighting be concealed from standing and seated viewpoints?
- Where will controls be located, and will the lighting operate independently?
- Who is responsible for electrical coordination, wiring, connections, and testing?
- What will be shown in the 2D and 3D design before fabrication?
- Which components, cabinet work, installation, and controls are included?
- Which options are upgrades, and how will their prices be listed?
- How will access for future adjustment or maintenance be handled?
- When will the lighting be tested, and how will glare or visible hardware be addressed?
A showroom discussion can be useful because you can review cabinet finishes and design options alongside the lighting plan. Altima’s Brampton showroom is located at 11 Edvac Drive, Units 13–19, Brampton, Ontario. Visit the Altima showroom page before planning your consultation.
Frequently Asked Questions
Can valance lighting be added to existing kitchen cabinets?
It may be possible, but compatibility depends on cabinet depth, underside construction, power access, concealment, and the finished appearance. Obtain an on-site assessment before committing to a retrofit.
Should valance lighting be planned before kitchen cabinets are manufactured?
Yes. Planning it before fabrication allows the valance space, proportions, access, wiring coordination, and controls to be considered as part of the cabinet design.
Who should handle the electrical work?
Electrical work should be handled by an appropriately qualified professional. Confirm responsibilities and connections in writing with the renovation team before installation.
What should be included in a valance lighting renovation quote?
The quote should identify the lit cabinet zones, valance construction and finish, lighting components, controls, electrical responsibilities, installation, testing, exclusions, and upgrade pricing.
Conclusion: Plan Valance Lighting With the Cabinets, Not After Them
Good valance lighting begins with a clear purpose and a mapped set of cabinet zones. The cabinet design should reserve the right space, wiring and controls should be assigned before installation, and the complete plan should be reviewed in 2D and 3D before fabrication. An itemized quote and final test help confirm that the installed result matches the intended design.
If you are working with existing cabinets or considering refacing, obtain a site-specific assessment rather than assuming a new-cabinet solution will fit. For a new kitchen renovation, involve design-build and electrical professionals early so lighting, cabinetry, finishes, and installation are coordinated as one plan.
Altima Kitchens And Closets provides custom kitchen design, cabinetry, in-house manufacturing, and installation from its Brampton showroom and factory. To discuss a valance lighting and cabinetry plan, visit Altima Kitchens And Closets.