Functional Kitchen Design: Step-by-Step Plan for 2026
Functional kitchen design is the intentional planning of layout, workflow zones, storage, lighting, ventilation, and ergonomics to make everyday cooking safer and easier. It aligns appliances, work surfaces, and access within natural reach so tasks flow with less walking and fewer bottlenecks. Near 11 Edvac Drive, we validate flow with 2D/3D models before a single cabinet is built.
By Ashok • Altima Kitchens And Closets • Last updated: June 25, 2026
Above-Fold Overview: Your Plan at a Glance
Start with a clear cooking workflow, choose the right layout, and model everything in 2D/3D before ordering cabinets. Define work zones, right-size storage, layer lighting, and specify a quiet, effective range hood. This step-by-step plan prevents rework and helps your new kitchen perform beautifully from day one.
Here’s what you’ll get from this guide and how to use it today.
- What “functional” really means: A kitchen that reduces steps, improves safety, and speeds up daily routines.
- Layouts decoded: One-wall, galley, L-shape, U-shape, island, and peninsula—when each wins.
- Workflow zoning: Prep, cook, clean, store, serve—how we organize tasks to cut wasted motion.
- Lighting and ventilation: Layered light and a right-sized hood for comfort and clean air.
- 2D/3D design: Visualize finishes, clearances, and appliance swings before committing.
- Local insights: Tips relevant to projects around 11 Edvac Drive and nearby landmarks.
What Is Functional Kitchen Design?
Functional kitchen design aligns layout, storage, lighting, and ventilation to support how you actually cook. It prioritizes safe clearances, ergonomic heights, and efficient zones so meals come together with fewer steps and less strain. The outcome is a space that feels intuitive every single day.
In practice, “functional” means your kitchen supports real routines—weekday breakfasts, meal prep, cleanup, and entertaining—without constant backtracking. Cabinetry, counters, and appliances are placed to eliminate friction at every stage of cooking.
- Workflow-led planning: We map what you do first (grab, prep) and last (plate, serve).
- Right-sized storage: Drawers for pots, dividers for baking sheets, and a pull-out pantry near prep.
- Comfort and reach: Counter heights and handle placements that reduce strain and bending.
- Lighting layers: Ceiling ambient, under-cabinet task, and accent lighting to reduce eye fatigue.
- Clean air: A quiet, effective hood that captures steam, smoke, and odors at the source.
We bring this to life with in-house design, factory-direct cabinetry, and 2D/3D drawings, so you preview the flow—and the finished look—before we build. For deeper layout principles, see our kitchen planning guide.
Why Functional Design Matters (Safety, Speed, Comfort)
A functional kitchen reduces walking, improves safety around heat and water, and lowers fatigue. Clear sightlines, safe clearances, good lighting, and proper ventilation make cooking smoother and healthier. Thoughtful storage cuts clutter, while ergonomic heights and smart appliance placement protect your back and wrists.
Safety leads. Cooking is the leading cause of home fires, and effective ventilation reduces smoke and airborne grease that settle on surfaces. Clearances around the range and sink, plus non-slip flooring and strong task lighting, help prevent mishaps.
- Lighting that works: LEDs provide bright task light with minimal heat. According to the U.S. Department of Energy, LED lighting uses at least 75% less energy and lasts longer than incandescent options—bright, cool, and efficient.
- Cleaner indoor air: A well-specified hood limits smoke and moisture. The U.S. EPA emphasizes source control and ventilation to improve indoor air quality for healthier homes.
- Fire awareness: Cooking demands attention. NFPA resources note that unattended cooking is a top factor in kitchen fires—design that supports clear zones and visibility helps you stay in control.
Comfort follows. Ergonomic counter heights, easy-reach storage, and dishwashers positioned with adjacent landing space reduce strain. When a kitchen “just works,” you feel it in faster prep, easier cleanup, and more enjoyable time spent cooking.
For a big-picture look at layout choices and daily flow, explore our kitchen design concepts.
How Functional Kitchen Design Works (Step-by-Step)
We start by mapping your cooking routine, then translate it into zones and clearances. Next, we prototype in 2D/3D, verify appliance swings, specify storage, lighting, and ventilation, and only then fabricate cabinetry. This step-by-step path ensures your final kitchen performs exactly as modeled.
Here’s our structured workflow, used across GTA projects and refined in our Brampton showroom and factory.
- Discovery and measuring: Document walls, windows, utilities, and appliance sizes. Define non-negotiables and wish-list items.
- Workflow mapping: Note how you prep, cook, bake, clean, and serve. Identify pain points (crowded corners, dead zones).
- Layout options in 2D: One-wall, galley, L, U, island, or peninsula—test multiple sketches quickly.
- 3D visualization: Validate clearances, sightlines, and door swings. Adjust cabinet heights and depths.
- Storage detailing: Assign every item a home—pots in deep drawers, spices in a pull-out, trays in vertical slots.
- Lighting and ventilation: Layer ambient and task lighting; select a quiet, effective hood with proper ducting.
- Final specification: Material selections (quartz, backsplash), hardware, finishes, and accessories are locked in.
- Factory production: Italian CNC fabrication and professional spraying deliver precise, durable cabinetry.
- Installation and handover: Our in-house team installs; you receive a walkthrough and care guide.
| Phase | Main Deliverable | What We Validate |
|---|---|---|
| 2D Layouts | Scaled floor plans | Appliance placement, traffic flow, landing zones |
| 3D Models | Renders & walk-throughs | Clearances, sightlines, lighting coverage |
| Spec Pack | Cabinet/finish schedule | Storage assignments, hardware, hood routing |
| Install | On-site fit | Leveling, alignment, door swings, ventilation performance |
Want the full behind-the-scenes blueprint? See our kitchen design process and how we translate drawings into reality with factory-direct control.

Types of Layouts and Approaches (Choose with Confidence)
Pick a layout that fits your room and routine, not trends. In compact rooms, galley and L-shape shine; in open plans, islands or peninsulas add seating and prep space. Use 2D/3D to test traffic, landing zones, and appliance clearance before locking cabinets.
Each layout solves a different problem. Your space, cooking style, and hosting habits determine the best choice.
- One-wall: Streamlined for studios or basements; pair with a mobile island for extra prep.
- Galley: Two facing runs create efficient movement; ideal when width beats depth.
- L-shape: Flexible for small to mid-size rooms; add an island for extra landing space.
- U-shape: Maximum storage and counter; mind corner solutions to avoid dead zones.
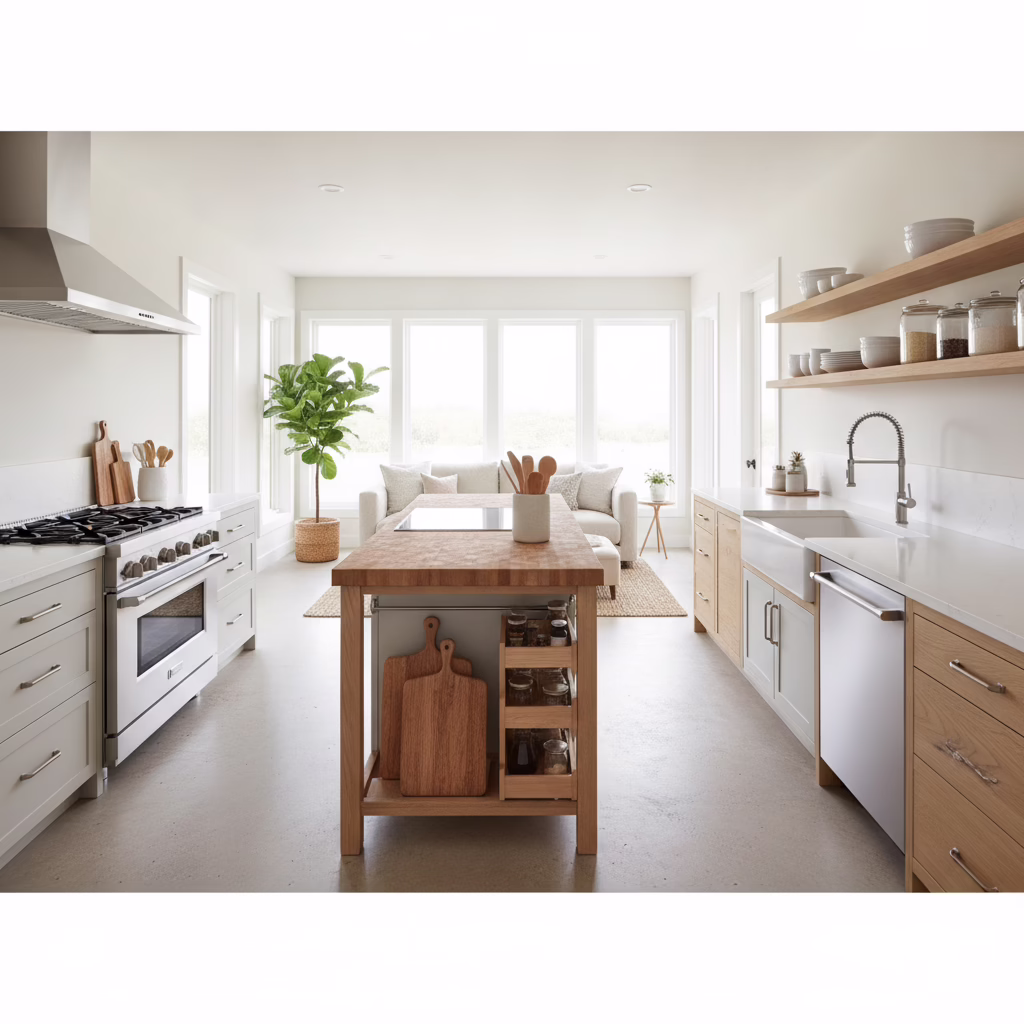
- Island: Great for prep and seating; ensure safe aisles and direct paths to sink/range.
- Peninsula: Island benefits without full circulation; perfect where space is tight.
We also blend work zones into every plan—prep, cooking, cleaning, and storage. That’s where accessories earn their keep: a pull-out pantry by prep, a tray divider near the oven, and a trash/recycling drawer close to the sink. See zoning examples in our kitchen planning article.
Use the mini-matrix below to match layouts to priorities.
| Layout | Best For | Watch Outs |
|---|---|---|
| One-wall | Small footprints, rentals, basement suites | Limited landing space—add a cart or narrow island |
| Galley | Fast cooking, two-user flow | Keep aisles clear; avoid opposing door conflicts |
| L-shape | Open corners, window walls | Use corner solutions (lazy susan, LeMans) |
| U-shape | Max storage, dedicated cook | Avoid crowding; consider a pass-through or seating cutback |
| Island | Entertaining, multi-tasking | Protect aisles; plan outlets and task light |
| Peninsula | Small open plans | Control traffic at the end cap; add under-cabinet lighting |
Best Practices for a Truly Functional Kitchen
Design to your routine: size aisles for your household, keep prep between fridge and sink, and give every item a home. Layer ambient and task lighting, choose easy-clean materials, and specify a quiet range hood that vents outside. Test everything in 3D before fabrication.
Workflow and clearances
- Size aisles for users: Wider aisles improve comfort when multiple people cook or pass through.
- Landing zones: Keep counter space on both sides of cooking and at least one side of the fridge.
- Appliance swings: Verify door and drawer openings in 3D to avoid collisions.
Storage that speeds you up
- Deep drawers for cookware: Faster access than stacked doors and shelves.
- Spice pull-outs and tray dividers: Keep small items visible and organized.
- Trash/recycling near sink: Reduce drips and steps during prep and cleanup.
Lighting and ventilation
- Task lighting under cabinets: Lights up the blade and board—safer prep.
- Ambient + accent layers: Even light reduces shadows and eye strain.
- Efficient LEDs: The U.S. Department of Energy notes LEDs use at least 75% less energy and run cool—perfect for kitchens.
- Source capture: Follow EPA guidance on ventilation and source control; a properly ducted hood improves indoor air quality.
Materials and maintenance
- Quartz counters: Durable, low-maintenance surfaces for busy homes.
- Tile backsplash: Protects walls and eases cleanup behind the range and sink.
- Quality finishes: Professional spray finishing improves durability and consistency.
We specify materials in a single showroom visit, then confirm everything in the spec pack. For inspiration, browse our custom kitchen ideas.
Tools & Resources We Use (So You Can Decide Faster)
We combine showroom consultations, precise site measures, 2D floor plans, 3D renders, and factory-direct samples to speed decisions. You’ll see finishes under real lighting, test hardware feel, and confirm storage details before production—eliminating guesswork and change orders.
Seeing is believing—and deciding faster. Here’s how we help homeowners and condo owners across the GTA move from concept to confident “yes.”
- Showroom consultations: Review door styles, quartz slabs, and hardware in one place.
- 2D/3D design sessions: Live edits to cabinet sizes, clearances, and lighting positions.
- Accessory fit checks: Test pull-out pantry widths, spice racks, and trash insert sizes against your cookware list.
- Installation planning: Early coordination for electrical, plumbing, and hood venting.
- Digital updates: Transparent communication throughout design, production, and install.
Curious how a pro team reduces stress? Walk through our kitchen renovation guide for a bigger picture of timelines and touchpoints.

Thinking about your own layout? Book a friendly design chat. We’ll sketch 2–3 options and show you how storage, lighting, and a quiet hood can transform daily cooking. Start here: our design process.
Case Studies & Examples (GTA Homes Like Yours)
Real homes prove the point: when zones, storage, lighting, and ventilation work together, cooking becomes easier. These GTA examples show smart layout choices—from compact galleys to island-centered plans—that eliminated bottlenecks and added joy back into daily routines.
Compact condo galley (downtown): We replaced upper cabinets over the range with a slim, ducted hood to improve sightlines and air capture, added deep drawers for pots, and placed a narrow pull-out pantry by the prep zone. LEDs under cabinets brightened the full counter depth—prep got faster immediately.
L-shape with island (family home): Prepping between fridge and sink, cooking at the range, and a dishwasher close to dishes storage formed a clean triangle of movement. A trash/recycling pull-out beside the sink and a tray divider near the oven sped up weeknight cookups and weekend baking.
Basement kitchenette (multi-gen living): A one-wall layout with a mobile cart created a flexible second prep surface. We used a compact, quiet hood and wipeable finishes to keep odors down and cleaning simple. See more small-space strategies in our basement kitchen guide.
Local considerations for 11 Edvac Drive
- Plan around peak traffic: If your routine includes school pickups near Williams Pkwy at 2500 Williams Pkwy, favor durable, easy-clean finishes and a mud-room drop zone feeding the kitchen.
- Seasonal airflow: Summer humidity after a walk through Bottomwood Park makes a quiet, effective hood even more valuable—vent outside, not recirculating.
- Showroom timing: Schedule selections earlier in the week to get uninterrupted time with samples and 3D edits—our team can align updates to your workday.
Functional Kitchen Design FAQ
Homeowners ask about clearances, layout choices, and whether to keep the “work triangle.” The best answer is to plan zones around your routine, verify in 3D, and prioritize lighting and a ducted hood. Here are quick answers to the most common questions we hear.
What’s more important: the work triangle or work zones?
Use both ideas wisely. The classic triangle still helps, but modern kitchens benefit from defined zones (prep, cook, clean, store). We map your routine, then test options in 2D/3D to confirm short walks, safe aisles, and smart landing spaces.
How wide should kitchen aisles be?
Aim for comfortable movement and safe appliance use. Wider aisles help when two people cook or when a space doubles as a pass-through. We verify aisle widths, door swings, and landing zones in 3D so you see exactly how the space will feel.
Do I need a ducted range hood for a functional kitchen?
For serious cooking, yes. A ducted hood captures heat, smoke, and moisture and exhausts them outside. That supports clean air and keeps surfaces cleaner. We right-size the hood and route ductwork early in design to avoid surprises later.
What lighting layers should every kitchen have?
Use ambient ceiling fixtures for overall light, under-cabinet task lights for prep, and accent lighting to add depth. LEDs are efficient and cool-running, which makes prep safer and more comfortable during long cooking sessions.
Conclusion: Next Steps to a Kitchen That Works
Design from your routine outward. Validate the layout in 2D/3D, assign every item a home, layer lighting, and specify a ducted hood. Partnering with an in-house design-build team keeps decisions clear and the build on track from first sketch to final cleanup.
When a kitchen fits your habits, everything speeds up—prep, cooking, and cleanup. That’s the heart of functional kitchen design.
Key takeaways
- Pick a layout for your room and routine—then prove it in 2D/3D before production.
- Design by zones and give every item a home with the right accessories.
- Layer ambient and task lighting; choose efficient LEDs for bright, cool work surfaces.
- Specify a quiet, ducted hood and plan its routing early.
- Use a single, accountable team for design, manufacturing, and installation.
Action steps
- List the 20 items you use most—ensure each has a fast-access home.
- Measure your current aisle widths and landing spaces; note any pain points.
- Book a design session to test two layouts in 3D and compare storage plans side-by-side.
Ready to see your own options? Book a discovery session near 11 Edvac Drive and we’ll map your workflow, test layouts, and preview finishes together.
Related Posts

Why Choose Kitchen Renovation Company
Nowadays, Kitchen spaces are not only a place for cooking and serving food, but these areas act as a statement, as they speak a lot about a family, the philosophy and personality of individuals, and spaces. If you admire aesthetics and adorn the beauty of your home, you must pay attention to the interior design […]
How a Kitchen Renovation Contractor is Changing the Game
Lifestyle is all about bringing something coherent to the overall experience of living. The kitchen and closets stand as two of the most influential spaces in a home that add to the overall experience of living. A Kitchen Renovation Contractor in Whitby by the name of Altima Kitchen and Closets Inc. is changing the overall […]
How Media unit contractor in Whitby is Changing the Game
Lifestyle is all about bringing something coherent to the overall experience of living. The kitchen and closets stand as two of the most influential spaces in a home that add to the overall experience of living. A Media Unit Company in Whitby by the name of Altima Kitchen and Closets Inc. is changing the overall […]